
Kittencal’s Buttery Pan Rolls: A Recipe for Pure Comfort
There’s a particular scent that fills my kitchen on a chilly morning, one that speaks of warmth, comfort, and pure, unadulterated joy: the aroma of freshly baked bread. For years, one recipe has consistently delivered this experience with effortless grace – Kittencal’s Buttery Pan Rolls. They’re not just bread; they’re tiny, golden pillows of happiness, perfect for dipping into soup, slathering with butter, or simply enjoying on their own. I remember making a batch for a family gathering years ago, and the way my little niece’s eyes lit up as she bit into a warm, fluffy roll cemented their place as a cherished recipe in my repertoire.
Recipe Overview
- Prep Time: 3 hours 25 minutes (includes rising time)
- Cook Time: 22-25 minutes
- Total Time: Approximately 3 hours 50 minutes
- Servings: 12 rolls
- Yield: 1 recipe
- Dietary Type: Contains Dairy, Eggs, Gluten
Ingredients
For these glorious pan rolls, you’ll need the following:
- 1 tablespoon dry yeast
- 1 teaspoon yeast
- 1/2 cup warm water
- 1 teaspoon sugar (for proofing yeast)
- 1 large egg (bring to room temperature by covering it in warm water for about 15-20 minutes)
- 1 cup milk
- 1/4 cup butter, cut into pieces (no substitutions for this ingredient are recommended for the intended result)
- 1 1/2 – 2 teaspoons salt
- 3 tablespoons white sugar (you can increase this amount if you prefer a sweeter roll)
- 4 cups white flour (more as needed). U.S. residents, reach for bread flour; Canadian residents, all-purpose flour will work beautifully.
Equipment Needed
- A heavy-duty stand mixer fitted with a dough hook
- A small saucepan
- A 13 x 9-inch baking pan (preferably metal)
- A clean tea towel
- Measuring cups and spoons
- A spoon or spatula
- An oiled bowl
Instructions
Let’s transform these simple ingredients into a batch of irresistible pan rolls.
- Begin by generously greasing your 13 x 9-inch baking pan with melted butter. Set this aside.
- In the bowl of your heavy-duty stand mixer, add 4 cups of flour. Keep this ready for the dough.
- In a small saucepan, combine the 1 cup of milk with the 1/4 cup of butter, salt, and 3 tablespoons of white sugar. Heat this mixture over medium heat, stirring with a spoon until the butter begins to melt. It’s important to note that the butter doesn’t need to melt completely at this stage. Remove from heat and let it cool until it is warm but not hot. To expedite the cooling process, you can place the saucepan in the refrigerator for about 20 minutes. The ideal temperature is warm to the touch, similar to a baby’s bath.
- While the milk mixture is cooling, it’s time to proof the yeast. In a small bowl, combine 1 tablespoon and 1 teaspoon of dry yeast with the 1/2 cup of warm water and 1 teaspoon of sugar. Let this mixture sit undisturbed for about 10 minutes, or until it becomes visibly foamy and bubbly. This indicates that the yeast is alive and active.
- Now, add the activated yeast mixture, the warm milk/butter mixture, and the room-temperature egg to the bowl of your stand mixer, which already contains the flour.
- Attach the dough hook to your stand mixer and begin mixing on a low speed. Gradually add more flour, a tablespoon at a time, only as needed. The goal is to create a soft, semi-sticky dough that will eventually cling to the kneader blade. You might need up to 5 cups of flour in total.
- Continue to add flour a tablespoon at a time until the dough starts to pull away from the sides of the bowl. Once the dough has reached this consistency, knead it in the stand mixer for 8-10 minutes until it becomes smooth and elastic.
- Remove the kneaded dough from the mixing bowl. Place it on a lightly floured counter and let it rest, covered with a clean tea towel, for 10 minutes.
- After the 10-minute rest, gently knead the dough for about 15 seconds, shaping it into a smooth ball. The dough should feel pliable and cohesive.
- Lightly oil a bowl. Place the dough ball into the oiled bowl, turning it to coat all sides with oil.
- Cover the bowl with the clean tea towel and let the dough rise for about 1 hour, or until it has doubled in size.
- Once the dough has risen, punch it down to release the accumulated air.
- Divide the dough into 12 equal pieces. Shape each piece into a smooth, round ball.
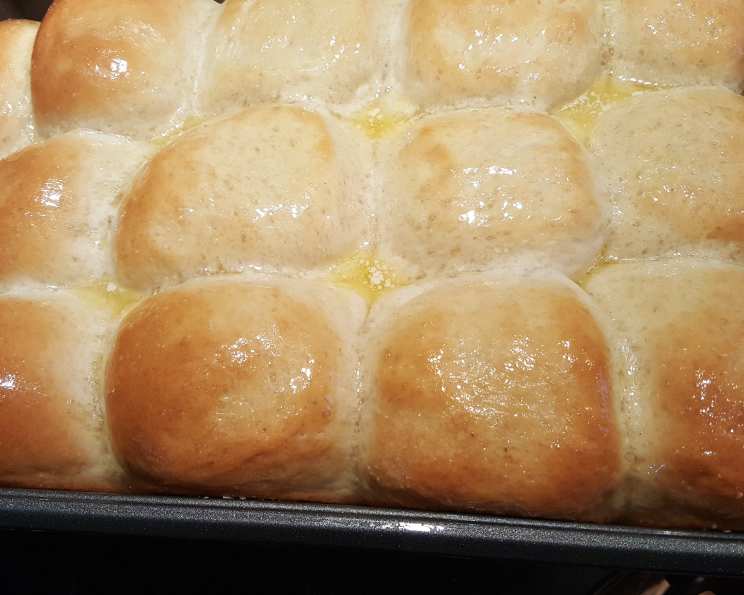
- Arrange the dough balls into your prepared 13 x 9-inch baking pan. They should fit evenly, with 3 balls across and 4 rows down, creating 12 rolls. If you happen to have extra dough balls after making 12, you can place them in the freezer for baking another time.
- If desired, you can brush the tops of the dough balls with melted butter. This step is entirely optional but adds an extra layer of richness.
- Cover the pan with the clean tea towel again. Let the rolls rise for about 30-40 minutes, or until they are almost double in size. They should look puffy and inviting.
- Preheat your oven to 375 degrees Fahrenheit.
- Bake the rolls for 22-25 minutes, or until they are a deep, golden brown on top. They should sound hollow when tapped gently on the bottom.
Expert Tips & Tricks
Achieving perfect pan rolls is within reach with a few insider tips. When proofing your yeast, ensure your water isn’t too hot; it can kill the yeast. Conversely, if it’s too cool, the yeast won’t activate properly. The “warm but not hot” temperature is crucial for the milk mixture as well, as it helps tenderize the dough and contributes to a beautiful crust. Don’t be afraid to adjust the flour amount slightly; humidity and the type of flour can affect its absorption. The dough should be soft and slightly tacky, not stiff. If it feels too wet, add flour a tablespoon at a time. If it seems too dry, a tiny splash of milk can help. For an even more beautiful, glossy finish, consider the egg wash alternative mentioned in the original recipe notes: whisk together 1 egg white with 1 teaspoon of cold water and brush this mixture onto the rolls before baking, then sprinkle with sesame seeds if desired.
Serving & Storage Suggestions
These buttery pan rolls are best enjoyed fresh from the oven, still warm and fragrant. Serve them alongside your favorite hearty soups, stews, or chili. They are also a fantastic accompaniment to salads or as a simple, satisfying snack.
For storing leftovers, allow the rolls to cool completely. They can be kept in an airtight container or a bread bag at room temperature for up to 2-3 days. To reheat, simply wrap them in foil and warm them in a 350°F oven for about 5-10 minutes, or until heated through. They can also be frozen for longer storage. Wrap them tightly in plastic wrap, then place in a freezer-safe bag for up to 2-3 months. Thaw overnight at room temperature or gently reheat from frozen in a 300°F oven for about 15-20 minutes.
Nutritional Information
| Nutrient | Amount per Serving | % Daily Value |
|---|---|---|
| Calories | 222.2 kcal | |
| Calories from Fat | ||
| Total Fat | 5.5 g | 8% |
| Saturated Fat | 3.1 g | 15% |
| Cholesterol | 30.6 mg | 10% |
| Sodium | 335.4 mg | 13% |
| Total Carbohydrate | 36.8 g | 12% |
| Dietary Fiber | 1.4 g | 5% |
| Sugars | 3.6 g | 14% |
| Protein | 6 g | 12% |
Note: Nutritional information is an estimate and can vary based on specific ingredients and portion sizes.
Variations & Substitutions
While this recipe is designed for a classic, buttery roll, there’s always room for a little creativity. If you’re looking for a slightly sweeter profile, you can increase the white sugar in the dough to your preference. For a touch of elegance, consider the egg wash and sesame seed topping mentioned earlier. The original recipe also suggests freezing any extra dough balls, which is a fantastic way to have fresh rolls on hand without making a full batch every time.
FAQs
Q: Why is it important to bring the egg to room temperature?
A: A room-temperature egg incorporates more easily into the dough, leading to a more uniform texture and better emulsification.
Q: My dough seems too sticky. What should I do?
A: Add more flour, one tablespoon at a time, until the dough is no longer excessively sticky and begins to pull away from the sides of the mixer bowl. Be careful not to add too much, as this can result in dry, tough rolls.
Q: How can I tell if my yeast is still good?
A: If your yeast mixture doesn’t become foamy and bubbly after sitting for 10 minutes with warm water and sugar, it’s likely dead and won’t leaven your bread. You’ll need to start with a fresh packet of yeast.
Q: Can I make these rolls ahead of time?
A: Yes, you can prepare the dough and let it rise in the refrigerator overnight after the first rise. In the morning, punch it down, shape it, and let it rise again before baking.
Q: My rolls didn’t get as golden brown as yours. What could be the reason?
A: Oven temperatures can vary. If your oven tends to run cool, you might need to bake them for a few minutes longer. Conversely, if your oven runs hot, keep a close eye on them to prevent over-browning.
Final Thoughts
Kittencal’s Buttery Pan Rolls are more than just a recipe; they are an invitation to slow down, to savor the process of creation, and to share in the simple pleasures of homemade bread. Each golden orb is a testament to the magic that happens when basic ingredients meet a little time and care. I encourage you to try this recipe, to feel the dough come alive under your hands, and to fill your home with the comforting aroma of baking. These rolls are a perfect partner to a cozy meal, and I’m confident they’ll become a beloved staple in your kitchen, just as they have in mine. Happy baking!