
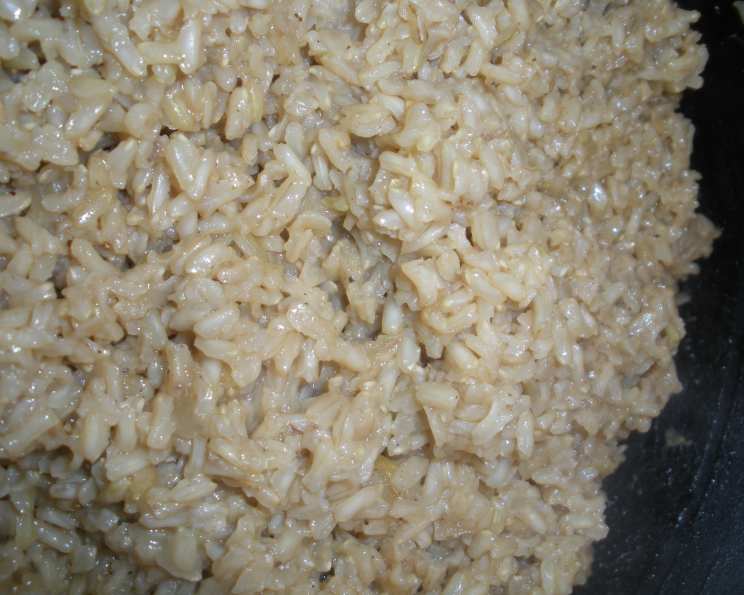
Kittencal’s Oven-Baked Brown Rice: A Culinary Revelation
There are certain dishes that, while seemingly simple, hold a profound place in my culinary heart. Kittencal’s Oven-Baked Brown Rice is one such recipe. I remember the first time I encountered it, not in a restaurant, but in the quiet hum of my own kitchen, a welcome respite after a long day. The aroma that filled the air – a subtle nutty fragrance mingling with savory notes – was incredibly comforting. It wasn’t just rice; it was transformation. The usual fuss of stovetop rice, the anxious watching, the occasional burned bottom – all vanished, replaced by the patient magic of the oven. This recipe is a testament to the power of time and gentle heat, yielding perfectly cooked, fluffy brown rice every single time, a feat that feels almost miraculous when you’re accustomed to the grains’ inherent stubbornness.
Recipe Overview
- Prep Time: 15 minutes
- Cook Time: 1 hour
- Total Time: 1 hour 15 minutes
- Servings: 8-10
- Yield: Approximately 8-10 servings
- Dietary Type: Adaptable (Vegetarian, Vegan options available)
Ingredients
- 3 tablespoons butter or 3 tablespoons olive oil (for a vegetarian or vegan option)
- 3 cups long grain brown rice
- 1 medium onion, chopped
- 2 tablespoons fresh minced garlic (or to taste)
- 1 teaspoon fresh ground black pepper (or to taste)
- 5 cups low sodium chicken broth (heated until very hot) OR 5 cups water (heated until very hot)
- 1 1⁄2 teaspoons seasoning salt (or use white salt, adjusting to taste)
Equipment Needed
- A Dutch oven with a tight-fitting lid (crucial for even cooking)
- A casserole dish (if transferring from the Dutch oven)
- A spoon for stirring
- A fork for fluffing
- An oven
Instructions
-
Begin by preheating your oven to 375 degrees F (190 degrees C). It’s important to ensure your oven is at the correct temperature before you start.
-
Position an oven rack on the second-lowest setting in your oven, or the middle rack if that’s your preference. This ensures consistent heat distribution around the Dutch oven.
-
Take your Dutch oven and grease its interior. A good greasing will prevent the rice from sticking and make for easier serving.
-
Place the Dutch oven over medium heat on your stovetop. Add the 3 tablespoons of butter (or olive oil if using). Once the butter has melted and is shimmering (or the oil is warm), add in the 3 cups of long grain brown rice, the chopped onion, the minced garlic, and the fresh ground black pepper.
-
Stir constantly for approximately 3 minutes. This initial sautéing helps to toast the rice grains slightly, which enhances their nutty flavor and helps them cook more evenly. It also softens the aromatics.
-
Pour in the 5 cups of low sodium chicken broth (or water), ensuring it has been heated until very hot. Then, add the 1 1⁄2 teaspoons of seasoning salt (or white salt).
-
Bring the mixture just to a boil, stirring with a spoon. As soon as it reaches this point, remove the Dutch oven from the heat.
-
At this point, you have two options for baking:
- Option 1 (Baking directly in Dutch oven): If your Dutch oven is suitable for baking and has a tight-fitting lid, you can proceed by covering it with its lid.
- Option 2 (Transferring to casserole dish): If you prefer to use a separate casserole dish, or if your Dutch oven lid isn’t tight-fitting, carefully transfer the hot mixture from the Dutch oven into your prepared casserole dish. Ensure the casserole dish is also covered securely with a lid or aluminum foil.
-
Place the covered Dutch oven or casserole dish onto the prepared oven rack. Bake for approximately 1 hour, or until the rice is tender. The exact time can vary slightly depending on your oven and the specific brand of brown rice, so it’s always a good idea to check for tenderness towards the end of the baking period.
-
Once the rice is tender, remove it from the oven.
-
Fluff the rice gently with a fork to separate the grains and ensure a light, airy texture.
Note: To make this recipe omitting the onion and garlic:
- Preheat your oven to 375 degrees F (190 degrees C) and place an oven rack on the second-lowest or middle setting.
- Place the 3 cups of brown rice directly into a casserole dish. Add the 1 1⁄2 teaspoons of seasoning salt (or white salt).
- On the stovetop, heat the 5 cups of broth or water with the 3 tablespoons of butter or oil until very hot.
- Pour this hot liquid over the rice and salt in the casserole dish.
- Mix with a spoon to ensure the rice is evenly distributed in the liquid.
- Cover with aluminum foil or a lid and bake for about 1 hour, or until the rice reaches your desired texture.
Expert Tips & Tricks
This recipe, in its simplicity, is quite foolproof, but a few nuances can elevate it further.
- Broth Temperature is Key: The instruction to heat the broth or water until “very hot” is crucial. This jump-starts the cooking process for the brown rice, which naturally takes longer to cook than white rice.
- The Lid Matters: A tight-fitting lid on your Dutch oven or a well-sealed foil cover on your casserole dish traps steam, which is essential for cooking the brown rice evenly and preventing it from drying out. If you find your rice is still a bit firm after an hour, a tight cover and an additional 10-15 minutes in the oven often do the trick.
- Rice Rinse (Optional but Recommended): For an even fluffier texture, you can rinse the brown rice under cold water before adding it to the Dutch oven. This removes excess starch, which can sometimes lead to clumping. Be sure to drain it thoroughly.
- Low Sodium Broth Advantage: Using low-sodium broth gives you more control over the final saltiness. Brown rice can absorb a lot of liquid, so starting with less salt allows you to taste and adjust at the end if necessary.
- Butter vs. Olive Oil: While butter adds a lovely richness, olive oil is a fantastic alternative that works beautifully, especially for those following vegetarian or vegan diets. The toasting of the rice and aromatics still brings out fantastic flavor.
Serving & Storage Suggestions
This oven-baked brown rice is incredibly versatile and serves as an excellent base for countless meals.
- Serving: Serve it hot as a wholesome side dish alongside roasted meats, poultry, fish, or hearty vegetarian stews. It’s also a wonderful base for grain bowls, stir-fries, or as a stuffing for vegetables. A gentle fluffing with a fork just before serving will ensure each grain is distinct and tender.
- Storage: Leftovers can be stored in an airtight container in the refrigerator for up to 3-4 days.
- Reheating: To reheat, add a tablespoon or two of water or broth to the rice before gently warming it in a saucepan over low heat or in the microwave. This helps to rehydrate the grains. Avoid overheating, which can lead to mushy rice.
Nutritional Information
| Nutrient | Amount per Serving | % Daily Value |
|---|---|---|
| Calories | 328.2 kcal | |
| Calories from Fat | 7.3 g | 11% |
| Saturated Fat | 3.4 g | 17% |
| Cholesterol | 11.4 mg | 3% |
| Sodium | 88.8 mg | 3% |
| Total Carbohydrate | 57.5 g | 19% |
| Dietary Fiber | 2.8 g | 11% |
| Sugars | 1.4 g | 5% |
| Protein | 8.9 g | 17% |
Note: Nutritional values are approximate and can vary based on specific ingredients used (e.g., type of broth, fat content of butter/oil).
Variations & Substitutions
The beauty of this recipe lies in its adaptability.
- Vegetarian/Vegan: As noted, substituting olive oil for butter and using vegetable broth or water makes this recipe suitable for vegetarians and vegans.
- Flavor Boosters: For an aromatic lift, consider adding a bay leaf or two to the liquid when heating it before pouring it over the rice. These can be removed before serving.
- Spicy Kick: If you enjoy a little heat, a pinch of cayenne pepper or a dash of hot sauce can be stirred into the liquid mixture before baking.
- Herbal Infusion: Fresh or dried herbs like thyme, rosemary, or parsley can be added to the sautéed aromatics for an extra layer of flavor.
FAQs
Q: Why is my brown rice still hard after an hour of baking?
A: Brown rice requires sufficient moisture and time. Ensure your lid is tightly sealed to trap steam. If it’s still firm, return it to the oven, covered, for an additional 10-15 minutes. Using very hot liquid to start also helps.
Q: Can I use a different type of brown rice, like short-grain?
A: While this recipe is designed for long-grain brown rice, you can experiment with other varieties. You may need to adjust the liquid ratio and baking time slightly as different grains have different absorption rates.
Q: What’s the best way to prevent the bottom from sticking or burning?
A: Ensuring the Dutch oven or casserole dish is adequately greased is key. Also, placing the rack on the second-lowest or middle setting helps prevent direct, intense heat from the bottom element.
Q: Can I make this recipe ahead of time?
A: Yes, you can prepare the recipe up to the point of baking, let it cool, and then refrigerate it. Bake as directed, adding a few extra minutes to account for the cold ingredients. It’s best enjoyed fresh, but leftovers reheat well.
Q: Is it okay to use regular salted broth if I don’t have low-sodium?
A: Yes, but you’ll need to adjust the amount of added salt significantly, or even omit it, to avoid over-salting the dish. Taste the broth first before adding any additional seasoning salt.
Final Thoughts
Kittencal’s Oven-Baked Brown Rice is more than just a recipe; it’s an invitation to culinary calm. It’s proof that sometimes, the most profound flavors come from the simplest, most patient methods. It’s the kind of dish that feeds the soul as much as the body, a comforting constant in a busy world. I encourage you to try this straightforward yet remarkably effective technique. Serve it as a foundation for your favorite protein, or let its wholesome goodness shine as a standalone side. I’m eager to hear your experiences and any delightful variations you might discover. Happy cooking!