
A Symphony of Sweetness: The Vibrant Kiwi Strawberry Tart
There are certain desserts that don’t just taste good; they transport you. For me, this Kiwi Strawberry Tart is one of those. I remember my grandmother, a woman whose kitchen always smelled of cinnamon and warm sugar, making a version of this for summer picnics. The vibrant red of the strawberries, kissed by the sun, alongside the jewel-toned green of the kiwis, arranged with such care on a delicate, golden crust, was always the centerpiece. It wasn’t just a dessert; it was a promise of sunshine, laughter, and the simple joy of sharing something beautiful and delicious with loved ones. The combination of tart fruit, a subtly sweet cake layer, and a creamy pudding filling always felt like a culinary hug.
Recipe Overview
- Prep Time: 45 minutes
- Cook Time: 15 minutes
- Total Time: 1 hour
- Servings: 8-10
- Yield: 1 tart
- Dietary Type: Vegetarian
Ingredients
For the Crust
- 1 1/3 cups flour
- 3 tablespoons sugar
- 1/2 teaspoon salt
- 1/4 cup canola oil
- 1/4 cup 2% low-fat milk
For the Cake Layer
- 1 cup flour
- 1/2 teaspoon baking powder
- 1/4 teaspoon baking soda
- 1/4 teaspoon salt
- 1/2 cup sugar
- 1 egg
- 1/2 cup nonfat vanilla yogurt
For the Topping
- 1/2 cup white chocolate instant pudding mix
- 1/2 lb fresh strawberries
- 4 fresh kiwi fruits
- 1 teaspoon confectioners’ sugar (for dusting)
Equipment Needed
- 9-inch tart pan with a removable bottom
- Mixing bowls (various sizes)
- Whisk
- Measuring cups and spoons
- Rolling pin
- Spatula
- Sheet of wax paper
- Baking sheet
- Cooling rack
- Knife
- Cutting board
Instructions
- Preheat your oven to 375 degrees Fahrenheit (190 degrees Celsius). This initial heat is crucial for a perfectly crisped crust.
- Prepare the crust: In a medium mixing bowl, whisk together the flour, sugar, and salt. Gradually drizzle in the canola oil, mixing until the ingredients are just combined. Add the 2% low-fat milk, a little at a time, mixing until you achieve a dough consistency that holds together. You may not need all the milk, so add just enough to reach the desired texture.
- Roll out the crust: Place the dough onto a sheet of wax paper. Use your rolling pin to roll the dough into a large circle, ensuring it’s large enough to fit your 9-inch tart pan. Carefully peel off the top layer of wax paper. Then, using the remaining wax paper to help you, gently flip the dough into the tart pan. Press the dough evenly into the bottom and up the sides of the pan. Prick the bottom of the crust dough lightly with a fork, then sprinkle a small amount of flour onto the bottom. Set aside.
- Prepare the cake batter: In a separate mixing bowl, combine all the cake ingredients. Begin by whisking together the dry ingredients: flour, baking powder, baking soda, and salt. Then, in another small bowl, whisk together the sugar, egg, and nonfat vanilla yogurt until smooth. Add this wet mixture to the dry ingredients and stir until just combined. Be careful not to overmix.
- Assemble and bake the tart: Carefully pour the cake batter over the prepared crust dough in the tart pan, spreading it evenly. Place the tart pan on a baking sheet to catch any potential drips. Bake for approximately 15 minutes, or until the cake layer is set and a toothpick inserted into the center comes out clean.
- Prepare the pudding: While the tart is baking, prepare the white chocolate instant pudding according to the package directions. Once prepared, refrigerate it until needed. This allows it to thicken properly.
- Prepare the fruit: Once the tart has baked, remove it from the oven and let it cool to room temperature on a wire rack. While the tart cools, wash and chop the fresh strawberries. Peel and slice the fresh kiwi fruits.
- Assemble the tart: Once the crust and cake layer have completely cooled, it’s time for the delightful assembly. Use a spatula to smooth the chilled pudding evenly over the cooled cake layer, creating a creamy canvas.
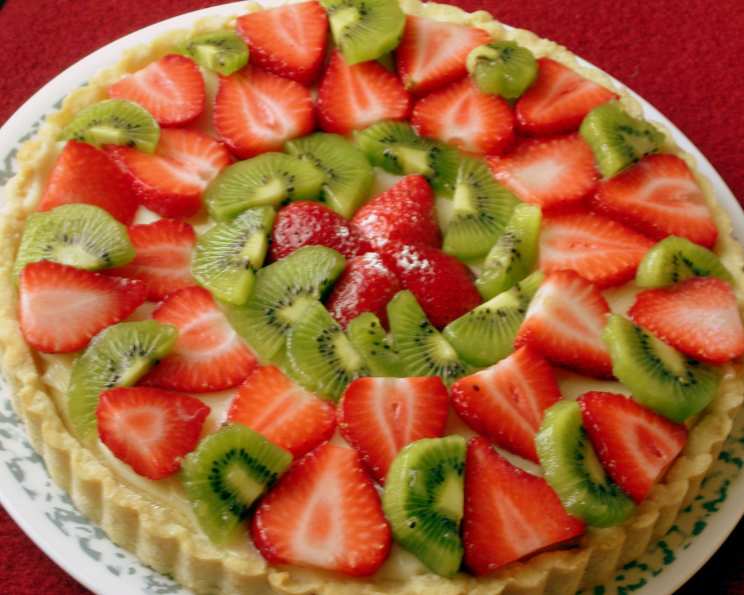
- Decorate with fruit: Artfully arrange the chopped strawberries and sliced kiwis on top of the pudding. You can start in the center and work your way outwards, or create any pattern that appeals to your eye.
- Final touch: Just before serving, lightly sprinkle confectioners’ sugar over the fruit for a touch of elegance and sweetness.
- Serve: This tart is best enjoyed immediately or can be refrigerated.
Expert Tips & Tricks
- Crust Perfection: If your dough is too sticky to roll, chill it for about 15-20 minutes before attempting to roll it out. This will make it much easier to handle.
- Even Baking: Using a baking sheet under the tart pan ensures more even heat distribution and prevents the bottom from getting too dark.
- Fruit Arrangement: For a professional look, try arranging the fruit in concentric circles or alternating rows. You can also use cookie cutters to create fun shapes from the kiwi slices.
- Pudding Consistency: Ensure your pudding is well-chilled and has thickened before spreading. If it’s too thin, it can make the tart soggy.
- Make-Ahead Magic: You can prepare the crust and bake the cake layer a day in advance. Store them separately at room temperature. Prepare the pudding and chop the fruit closer to assembly time for maximum freshness.
Serving & Storage Suggestions
This Kiwi Strawberry Tart is a showstopper on its own, perfect for brunch, a light dessert after a hearty meal, or a sweet treat for any occasion. Serve chilled for the best texture. It pairs wonderfully with a cup of herbal tea or a glass of sparkling rosé. Leftovers can be refrigerated in an airtight container. It should last for a day or two in the refrigerator. Due to the fresh fruit and pudding, it’s not recommended for freezing.
Nutritional Information
| Nutrient | Amount per Serving | % Daily Value |
|---|---|---|
| Calories | 306.2 kcal | – |
| Total Fat | 8.2 g | 12% |
| Saturated Fat | 0.8 g | 4% |
| Cholesterol | 27.1 mg | 9% |
| Sodium | 294.1 mg | 12% |
| Total Carbohydrate | 53.6 g | 17% |
| Dietary Fiber | 2.7 g | 10% |
| Sugars | 22.8 g | 91% |
| Protein | 5.4 g | 10% |
Note: Nutritional values are estimates and can vary based on specific ingredients used.
Variations & Substitutions
- Gluten-Free Crust: For a gluten-free version, you can substitute a gluten-free all-purpose flour blend for the all-purpose flour in the crust. You might need to adjust the liquid slightly as GF blends can absorb moisture differently.
- Dairy-Free Options: To make this tart dairy-free, consider using a plant-based yogurt (like coconut or almond) and a non-dairy milk in the crust. For the pudding, opt for a dairy-free instant pudding mix.
- Berry Bonanza: Feel free to experiment with other berries like raspberries, blueberries, or a mix! The tartness of other berries can offer a lovely contrast.
- Citrus Zest: Adding a touch of lemon or lime zest to the cake batter or the crust can elevate the fruity flavors.
FAQs
Q: Can I make the crust ahead of time?
A: Yes, you can prepare and bake the crust a day in advance. Let it cool completely, then store it at room temperature.
Q: How do I prevent the pudding from becoming watery?
A: Ensure you follow the instant pudding package instructions precisely and refrigerate it until it’s well-chilled and thickened before spreading.
Q: What kind of tart pan should I use?
A: A 9-inch tart pan with a removable bottom is ideal, as it makes it easy to release the tart cleanly for serving.
Q: My cake layer seems a bit dense. What might have gone wrong?
A: Overmixing the cake batter can lead to a dense texture. Mix the wet and dry ingredients until just combined, and avoid overworking the dough.
Q: Can I use frozen fruit instead of fresh?
A: While fresh fruit is recommended for the best texture and flavor, you could potentially use thawed and well-drained frozen fruit. However, it may release more moisture and affect the pudding layer.
A Taste of Sunshine
This Kiwi Strawberry Tart is more than just a recipe; it’s an invitation to celebrate the simple pleasures of fresh fruit and homemade goodness. The vibrant colors and bright flavors are sure to bring a smile to your face and delight your guests. Whether you’re a seasoned baker or just starting, this tart is achievable and incredibly rewarding. Gather your ingredients, enjoy the process, and savor every sweet, fruity bite. I’d love to hear about your creations and any delightful twists you bring to this sunshine-filled dessert!