
Kosher Dill Okra Pickles: A Taste of Summer Preservation
There’s a particular magic that happens when the okra harvest is at its peak. Those tender, vibrant pods, often associated with the steamy, rich gravies of Southern cuisine, hold a secret potential: they transform beautifully into crisp, tangy pickles. I remember a sweltering August afternoon years ago, helping my grandmother in her sun-drenched kitchen. The air was thick with the scent of ripening tomatoes and the earthy aroma of fresh dill. She pulled out a basket overflowing with freshly picked okra, its fuzzy surfaces still warm from the sun. “We’re making pickles, child,” she announced with a twinkle in her eye, and I, a young aspiring cook, was instantly captivated by this unexpected culinary alchemy. That day, she showed me how to coax an entirely different kind of deliciousness from this familiar vegetable, resulting in pickles that were a revelation – a perfect balance of brine, spice, and that delightful, slightly yielding crunch of well-preserved okra.
Recipe Overview
- Prep Time: 15 minutes
- Cook Time: 30 minutes (includes processing time)
- Total Time: 45 minutes (plus cooling time)
- Servings: 6 (referring to the number of jars, not individual pickle servings)
- Yield: 6 pints
- Dietary Type: Vegan, Gluten-Free, Dairy-Free
Ingredients
To capture that authentic Kosher dill flavor, you’ll need a few key components:
- 3 lbs uniform-sized okra
- 6 tablespoons salt
- 3 cups vinegar (a standard white distilled vinegar works beautifully here)
- 3 cups water
- 6 cloves garlic, peeled (one for each jar)
- 3 teaspoons mustard seeds (half a teaspoon for each jar)
- 12 heads fresh dill (or about 1 teaspoon of dill seed per jar, if fresh dill is unavailable)
Equipment Needed
While this recipe is wonderfully straightforward, a few pieces of equipment will make the process smoother:
- Large pot or stockpot for boiling brine and processing jars
- 6 pint-sized canning jars with lids and rings
- Jar lifter (highly recommended for safely handling hot jars)
- Large bowl for washing okra
- Sharp knife or fork for pricking okra
- Small saucepan for heating brine
- Ladle for filling jars
- Canning rack or trivet for inside the stockpot (to keep jars off the bottom)
- Clean kitchen towels
Instructions
The art of pickling lies in careful preparation and a good understanding of the process. Follow these steps precisely to ensure delicious results:
- Prepare the Okra: Begin by thoroughly washing and draining your okra. It’s crucial to ensure the okra is clean and free of any dust or debris.
- Prick the Okra: This is a vital step for allowing the brine to penetrate the pods. You can either prick each okra pod several times with a clean pin or, alternatively, make a small slit with a sharp knife. The goal is to create small openings for the pickling liquid to work its magic.
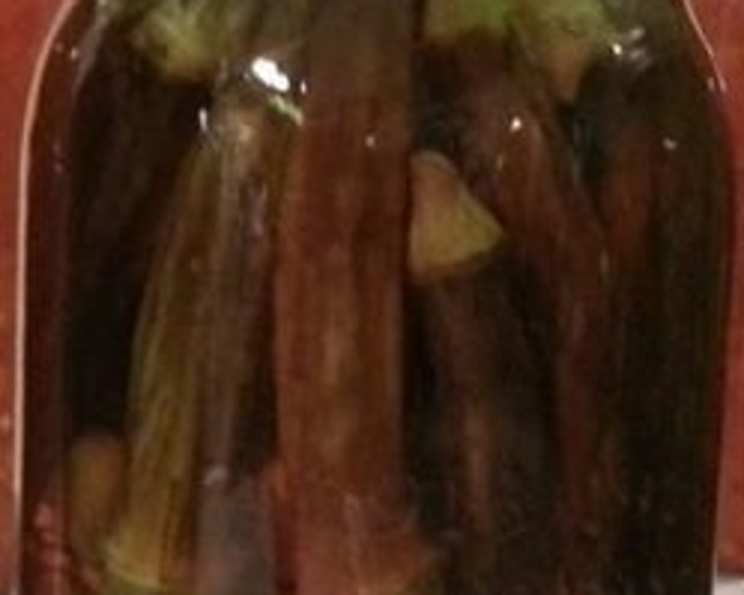
- Jar Preparation: For each of your six pint jars, place one clove of garlic and ½ teaspoon of mustard seeds at the bottom. These aromatics will infuse the pickles with their characteristic flavor.
- Pack the Jars: Carefully pack the prepared okra into the jars, filling them as much as you can without forcing. Aim for a snug fit, which will help prevent the okra from floating too much during processing.
- Add the Dill: Top the okra in each jar with a small bunch of fresh dill. If you are using dill seed, add about 1 teaspoon of dill seed on top of the okra. This fragrant herb is essential for that classic dill pickle taste.
- Boil the Brine: In a large pot, combine the vinegar and salt. Bring the mixture to a boil, stirring occasionally until the salt is completely dissolved. This hot brine is the foundation of your pickles.
- Fill the Jars: Using a ladle, fill each jar with the boiling brine solution. Be sure to leave about ½ inch of headspace at the top of each jar. Headspace is the space between the top of the liquid and the rim of the jar, and it’s crucial for proper sealing.
- Process the Pickles: Carefully place the filled jars onto a canning rack in a large stockpot. Ensure the jars are covered with boiling water by at least 1 inch. Bring the water back to a rolling boil, then process the jars in a boiling water bath for 10 minutes. This processing step is what ensures the pickles are shelf-stable and safely preserved.
- Cooling and Resting: After processing, carefully remove the jars from the boiling water bath using a jar lifter and place them on a cooling rack or a towel-lined counter. Allow the jars to cool completely, which typically takes 12-24 hours. You will likely hear delightful “pinging” sounds as the lids seal.
Expert Tips & Tricks
To elevate your Kosher Dill Okra Pickles from good to exceptional, consider these seasoned chef insights:
- Okra Size Matters: For the best texture and most appealing pickles, select uniform-sized okra. Too large, and they can become tough; too small, and they may become too soft. Aim for pods that are no longer than 2-3 inches.
- The Power of the Prick: Don’t skip or skimp on pricking the okra! The more thoroughly you prick, the better the brine will penetrate, leading to a more evenly pickled and pleasantly textured result. A few strategic pricks are better than one hasty jab.
- Fresh Dill is King: While dill seed offers convenience and a good flavor, the vibrant, fresh aroma of actual dill heads truly shines in these pickles. If using fresh dill, make sure to use the feathery tops and some of the stems for maximum flavor infusion.
- Headspace is Your Friend: That ½ inch of headspace isn’t just a suggestion; it’s critical for a good seal. Too little headspace can cause food to bubble out during processing, preventing a seal. Too much headspace can lead to inadequate processing.
- Patience for the Perfect Pickle: While you can technically taste these pickles after they’ve cooled, they truly develop their best flavor and texture after at least two weeks of resting in the jar. This allows the brine to fully meld with the okra and spices.
Serving & Storage Suggestions
These Kosher Dill Okra Pickles are incredibly versatile. They are a classic accompaniment to sandwiches, burgers, and barbecue, adding a bright, tangy crunch that cuts through richness. They also make a fantastic addition to charcuterie boards or as a palate cleanser.
- Serving: Serve chilled directly from the jar. They are delicious alongside fried chicken, in potato salad, or even chopped and mixed into tartar sauce.
- Storage: Properly processed and sealed jars can be stored in a cool, dark place (like a pantry) for up to 1 year. Once opened, refrigerate the jar and consume within 3-4 weeks for the best quality and flavor. Unopened jars that do not seal properly after processing should be refrigerated immediately and consumed within a similar timeframe.
Nutritional Information
While specific nutritional values can vary based on the exact ingredients and brands used, here is an approximate breakdown per serving (assuming a serving is approximately 1/6th of a pint):
| Nutrient | Amount per Serving | % Daily Value |
|---|---|---|
| Calories | 104.2 | — |
| Calories from Fat | 6g | 6% |
| Total Fat | 0.7g | 1% |
| Saturated Fat | 0.1g | 0% |
| Cholesterol | 0mg | 0% |
| Sodium | 7000.2mg | 291% |
| Total Carbohydrate | 17.6g | 5% |
| Dietary Fiber | 7.6g | 30% |
| Sugars | 2.9g | 11% |
| Protein | 5.2g | 10% |
Note: The high sodium content is typical for preserved foods and is a key component of the pickling process.
Variations & Substitutions
While this recipe is a classic for a reason, feel free to explore these variations:
- Spicy Kick: For those who enjoy a little heat, add a pinch of red pepper flakes or a thin slice of jalapeño to each jar along with the garlic and mustard seeds.
- Other Aromatics: Experiment by adding a few sprigs of fresh coriander or a slice of ginger to the jars for a different flavor profile.
- Vinegar Options: While white distilled vinegar provides a clean tang, you could try using a cider vinegar for a slightly fruitier note.
- Dill Seed Substitution: If fresh dill is truly unavailable, dill seed is a perfectly acceptable substitute. Use approximately 1 teaspoon per jar.
FAQs
Q: Why do I need to prick the okra before pickling?
A: Pricking the okra allows the brine to penetrate the flesh of the pods, ensuring they pickle evenly and develop a tender, crisp texture rather than remaining tough.
Q: How do I know if my jars have sealed properly?
A: After cooling, the center of the lid should be concave (curved downward) and should not flex when pressed. You may also hear a distinct “ping” as the jar seals during the cooling process.
Q: Can I use larger jars for this recipe?
A: This recipe is designed for pint-sized jars. If you choose to use larger jars, you will need to adjust the processing time. It’s best to stick to the recipe’s specified jar size for optimal results.
Q: My pickles taste too salty, what did I do wrong?
A: Ensure you measured your salt accurately. The salt is crucial for both flavor and preservation. If they are too salty, it could be an issue with the measurement or that they need more time to mellow in the brine.
Q: How long do these pickles typically last?
A: Properly sealed and stored, these Kosher Dill Okra Pickles can last up to a year. Once opened, they should be refrigerated and consumed within 3-4 weeks.
Final Thoughts
There’s a deep satisfaction that comes from preserving the bounty of the season, and these Kosher Dill Okra Pickles are a testament to that culinary tradition. They represent a simple yet profound way to capture the essence of summer and enjoy it long after the last pod has been harvested. I encourage you to try this recipe, to experience the delightful transformation of okra into a tangy, briny treat. Share them with friends, serve them with your favorite meals, and savor the taste of homemade goodness. Happy pickling!