
Krumkaker: A Taste of Norwegian Tradition, Crafted for Everyone
There’s something magical about the scent of krumkaker baking, a delicate perfume of sweet vanilla and toasted butter (or in this case, a plant-based wonder) that instantly transports me back to chilly Norwegian Christmases spent with my grandmother. She’d meticulously press the thin batter onto her ancient krumkake iron, the rhythmic hiss and gentle browning a familiar lullaby. The real artistry, though, was in the rolling. As soon as a lacy cookie emerged, still pliable, she’d deftly curl it around a wooden cone, creating those iconic cone shapes that were as beautiful as they were delicious. For years, I assumed this festive treat was out of reach for my vegan lifestyle, but necessity, as they say, is the mother of invention. This recipe is my ode to those cherished memories, a testament to the fact that tradition can evolve, embracing inclusivity without sacrificing an ounce of that authentic, melt-in-your-mouth magic.
Recipe Overview
- Prep Time: 15 minutes
- Cook Time: 30-45 minutes (depending on iron and technique)
- Total Time: 1 hour – 1 hour 15 minutes
- Servings: 36
- Yield: 36 krumkaker
- Dietary Type: Vegan
Ingredients
To create these delicate Norwegian delights, you’ll need a few simple ingredients. The beauty of krumkaker lies in their understated elegance, allowing the quality of each component to shine.
- 3 tablespoons flax seeds
- 1⁄2 cup + 1 tablespoon water
- 1 cup granulated sugar
- 1⁄2 cup Crisco shortening, melted
- 1⁄2 cup soymilk (vanilla-flavored works beautifully here)
- 1 teaspoon vanilla extract
- 2 cups all-purpose flour (plus up to an additional 1⁄2 cup, as needed)
- Canola oil cooking spray (for greasing the iron)
Optional additions for spice lovers:
- 1⁄2 teaspoon cardamom or cinnamon can be added with the flour for a warm, aromatic twist.
Equipment Needed
While the ingredients are straightforward, a few key pieces of equipment are essential for success:
- Blender or coffee grinder (for grinding flax seeds)
- Mixing bowls (one medium, one larger)
- Wooden spoon or whisk
- Krumkake iron (electric or stovetop) or a pizzelle iron
- Non-metal spatula or thin knife (for removing cookies from the iron)
- Wooden krumkake pin, wooden spoon handle, or a cylindrical object for shaping
- Wire cooling racks
- Tins or airtight containers for storage
Instructions
Crafting krumkaker is a dance between precise measurements and a gentle touch, a process that becomes more intuitive with each cookie. Don’t be discouraged if your first few aren’t perfect; they will still taste wonderful!
- Begin by preparing your flax egg. In a blender or coffee grinder, grind the flax seeds into a fine meal.
- Add the 1⁄2 cup plus 1 tablespoon of water to the ground flax seeds and blend until well incorporated. This mixture will thicken slightly. Pour this into a mixing bowl and set aside.
- In a separate, larger mixing bowl, combine the granulated sugar, melted Crisco shortening, soymilk, and vanilla extract. Mix well with a wooden spoon or whisk until everything is smoothly incorporated.
- Gradually add 1 1⁄2 cups of the flour to the wet ingredients. Stir until just incorporated.
- Now, it’s time to achieve the right consistency for your dough. Add additional flour (up to the remaining 1⁄2 cup) only as needed to create a very soft dough. The mixture should be thicker than a typical cake batter, but it should not be stiff. The key here is that less flour results in a lighter, crisper cookie, while more flour will yield a thicker cookie. Aim for a consistency that is easily spooned but holds its shape somewhat. If you are adding spices like cardamom or cinnamon, now is the time to mix them into the dough before the flour.
- Allow the dough to rest at room temperature for about 10-15 minutes while you heat your krumkake iron. This resting period helps the flour hydrate and makes the dough more pliable.
- Preheat your krumkake iron according to the manufacturer’s instructions. Once the iron is hot, spray it lightly with canola oil cooking spray before adding the batter for each cookie. This is crucial to prevent sticking. You may need to re-spray as you continue making cookies.
- When the cookie iron is ready, spoon approximately one tablespoon of batter onto the center of the heated iron. Aim to create cookies that are about five inches in diameter once baked.
- Close the iron and bake. The krumkaker are done when steam stops escaping from the sides of the cookie iron and the cookies are very lightly browned. The exact baking time will vary depending on your iron, but it typically ranges from 1 to 2 minutes per side.
- Carefully remove the cookies from the iron. This is where speed and dexterity are key. If you’re making cone shapes, immediately roll the hot cookie over a wooden krumkake pin, the handle of a wooden spoon, or a similar cylindrical object. Work quickly, as the cookies will harden as they cool. If you prefer flat cookies, you can use a non-metal spatula to gently lift and flatten them on the baking surface.
- Once shaped (or flattened), place the cookies on wire cooling racks to cool completely. This is important for them to retain their crispness.
- Repeat the process with the remaining dough, remembering to spray the iron with cooking spray before each addition of batter and to shape the cookies as soon as they come off the iron. The cooking time is approximate and depends heavily on how quickly you can work and how quickly your iron heats and cooks.
- Once cooled, store the krumkaker in tins or airtight containers to retain their crispness. They are best enjoyed within a week or two when stored properly.
Expert Tips & Tricks
- The Dough Consistency is Key: Pay close attention to the dough’s texture. It should be soft enough to spread but not so loose that it oozes uncontrollably. If it seems too sticky, add flour a tablespoon at a time. If it seems too stiff, a tiny splash of soymilk can help.
- Embrace the Imperfect: Krumkaker are rustic cookies. A slightly uneven edge or a little crack here and there only adds to their charm. Don’t strive for absolute perfection; focus on flavor and the joy of making them.
- Work Methodically: Have your shaping tool ready before you open the iron. The cookies cool and harden very rapidly.
- Adjusting for Your Iron: Every krumkake or pizzelle iron is different. It’s a good idea to make a test cookie or two to gauge the perfect baking time and the ideal amount of batter for your specific iron.
- The Importance of Cooling: Resist the urge to stack warm krumkaker. They need to cool completely on a wire rack to prevent steaming and becoming soft.
Serving & Storage Suggestions
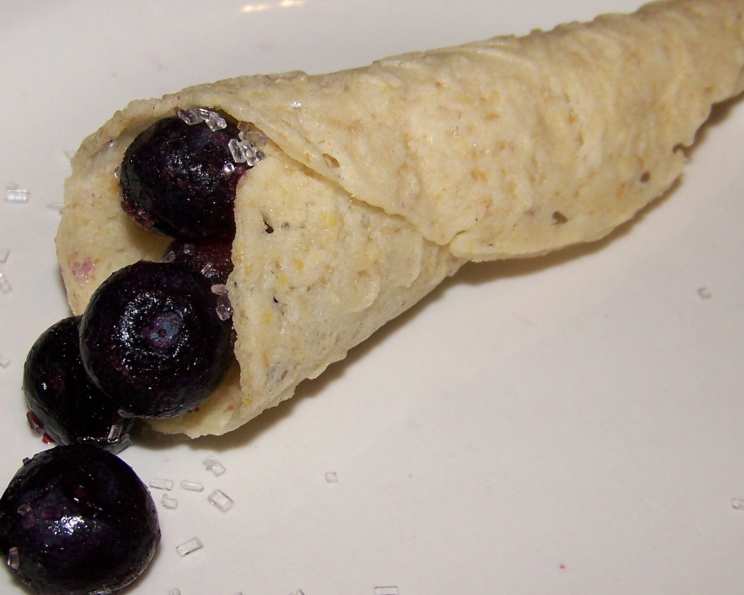
Krumkaker are wonderfully versatile. They are delightful on their own, their delicate crispness and subtle sweetness a perfect accompaniment to coffee or tea. For a more festive presentation, they can be filled.
- Filling Ideas: Fill the cones with vegan whipped cream, fresh berries, or a light fruit compote. They also make a fantastic base for small desserts, layered with vegan custard or mousse.
- Garnishes: A dusting of powdered sugar is a classic and elegant finishing touch.
- Storage: Store cooled krumkaker in airtight tins or containers at room temperature. They will remain crisp for up to two weeks. Avoid storing them with humid ingredients, as this will cause them to soften. If they do soften slightly, you can briefly warm them in a low oven (around 200°F / 95°C) for a few minutes to restore crispness, then cool completely before re-storing.
Nutritional Information
Here’s an estimated breakdown of the nutritional content for one krumkaker. Please note that these are approximate values and can vary based on specific ingredient brands and precise measurements.
| Nutrient | Amount per Serving | % Daily Value |
|---|---|---|
| Calories | 78.6 kcal | |
| Total Fat | 3.3 g | 5% |
| Saturated Fat | 0.8 g | 3% |
| Cholesterol | 0 mg | 0% |
| Sodium | 2.4 mg | 0% |
| Total Carbohydrate | 11.3 g | 3% |
| Dietary Fiber | 0.5 g | 1% |
| Sugars | 5.6 g | 22% |
| Protein | 1 g | 2% |
(Note: Calories from Fat is not explicitly provided in the original data but can be estimated based on Total Fat content.)
Variations & Substitutions
While this recipe is designed to be authentically delicious as is, there’s always room for personal touches:
- Flour Power: For a slightly different texture, you could experiment with a blend of all-purpose flour and a small amount of almond flour. Ensure the dough remains soft.
- Milk Options: While soymilk is specified, unsweetened oat milk or almond milk can also work well, though they might slightly alter the flavor profile.
- Sweetener Swap: While sugar is traditional, you could try a fine-grained coconut sugar for a deeper, caramel-like note, though it may slightly change the color.
- Citrus Zest: A teaspoon of finely grated lemon or orange zest added with the wet ingredients can offer a bright, refreshing counterpoint to the sweetness.
FAQs
Q: Can I use a regular waffle iron to make krumkaker?
A: While a pizzelle iron is the closest common alternative, a standard waffle iron is generally too deep and will produce a cookie that is too thick for the traditional krumkaker texture.
Q: My krumkaker are sticking to the iron. What am I doing wrong?
A: Ensure your iron is adequately preheated and consistently greased with cooking spray before adding each spoonful of batter. The flax egg also helps to bind, so ensure it’s well incorporated.
Q: How do I get perfect cone shapes?
A: Work quickly! Roll the cookie immediately after removing it from the iron while it’s still warm and pliable. Use a smooth, cylindrical object like a wooden krumkake pin or even a sturdy paper towel tube covered in foil.
Q: Can I make the dough ahead of time?
A: The dough is best used fresh, but you can refrigerate it for a few hours. It may stiffen, so you might need to let it sit at room temperature for a bit and add a tiny splash of soymilk if it becomes too firm to work with.
Q: My cookies are coming out too soft. How can I make them crispier?
A: This is often due to using too much flour or not baking them long enough. Try using slightly less flour to achieve a softer dough, and ensure they are baked until lightly browned and the steam has significantly subsided.
Final Thoughts
There’s a deep satisfaction in recreating a piece of culinary heritage, especially when it can be shared with everyone. This vegan krumkaker recipe is more than just a collection of ingredients and steps; it’s an invitation to partake in a tradition, to experience the delicate crunch and subtle sweetness that has graced tables for generations. I encourage you to try this recipe, to share these beautiful cookies with your loved ones, and to savor the moments of connection they help to create. Perhaps serve them alongside a warm cup of spiced apple cider or a velvety vegan hot chocolate for the ultimate cozy indulgence. Happy baking!