
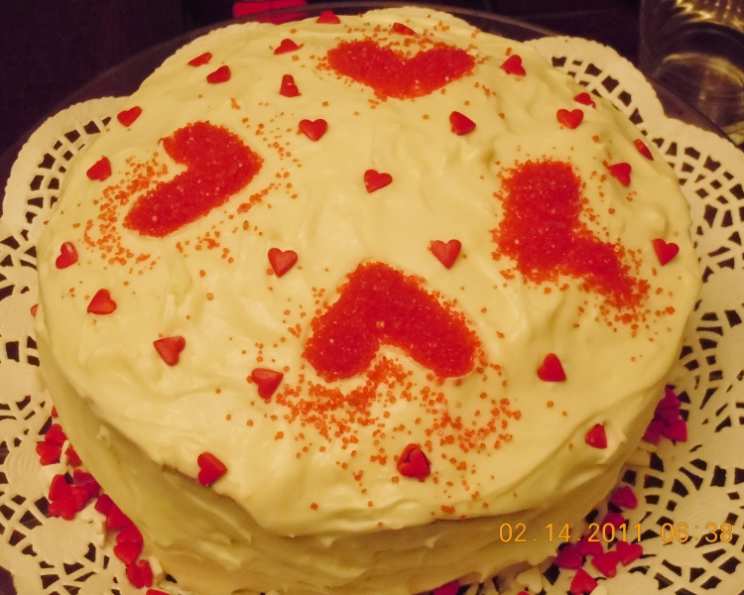
The Enduring Charm of Old-Fashioned Red Velvet Cake
There’s something undeniably magical about a classic Red Velvet cake. For me, it’s a taste of childhood nostalgia, a memory conjured by that signature crimson hue and the velvety smooth frosting. I remember my grandmother, her hands dusted with flour, carefully measuring ingredients for this very cake. The aroma that filled her kitchen – a subtle hint of cocoa, vanilla, and something uniquely sweet – was always a prelude to pure delight. That first bite, a perfect balance of moist cake and tangy cream cheese frosting, was a revelation. It’s a cake that doesn’t just satisfy a sweet tooth; it evokes warmth, comfort, and a sense of occasion, no matter when it’s baked.
Recipe Overview
- Prep Time: 20 minutes
- Cook Time: 25-30 minutes
- Total Time: 45-50 minutes
- Servings: 8
- Yield: 2 (9-inch) cake layers
- Dietary Type: Classic (may be adapted)
Ingredients
This recipe calls for a few key components that contribute to Red Velvet’s unique character. The secret to its tender crumb lies in the careful balance of ingredients and the specific leavening agents.
For the Cake:
- 2 1/2 cups sifted cake flour
- 2 tablespoons good quality cocoa powder
- 1 teaspoon baking soda
- 1 teaspoon baking powder
- 1 teaspoon salt
- 1 1/2 cups sugar
- 1/2 cup unsalted butter, softened
- 2 large eggs
- 1 cup buttermilk
- 2 ounces red food coloring (liquid or gel)
- 1 teaspoon distilled white vinegar
- 1 teaspoon vanilla extract
For the Frosting:
- 1 (8 ounce) package cream cheese, softened
- 1/2 cup butter, softened
- 1 cup melted marshmallows (you may use Fluff marshmallow creme to make it easier)
- 1 (1 lb) box confectioners’ sugar
- 1/4 cup chopped pecans (optional, for garnish or to fold in)
Equipment Needed
To bring this classic cake to life, you’ll want to have these tools ready:
- Two 9-inch round cake pans
- Parchment paper (optional, for lining pans)
- Mixing bowls (medium and large)
- Electric mixer (stand or handheld)
- Sifter
- Measuring cups and spoons
- Rubber spatula
- Wire cooling rack
- Wooden toothpick or cake tester
Instructions
Crafting an Old-Fashioned Red Velvet cake is a rewarding process, each step building upon the last to create that iconic flavor and texture.
Preparing the Cake Batter:
- Preheat your oven to 350 degrees F (175 degrees C). This consistent temperature is crucial for even baking.
- Prepare your cake pans: Grease and flour two 9-inch cake pans. For extra insurance against sticking, you can also line the bottoms with parchment paper cut to fit.
- In a medium bowl, or on a piece of waxed paper, sift together the sifted cake flour, cocoa powder, baking soda, baking powder, and salt. Sifting these dry ingredients ensures they are well combined and free of lumps, which contributes to a lighter cake texture. Set this mixture aside.
- In a large bowl, cream together the sugar and softened unsalted butter using your electric mixer. Beat them until the mixture is light and fluffy; this incorporates air, which is vital for a tender cake.
- Beat in the eggs one at a time, ensuring each egg is fully incorporated before adding the next. Scrape down the sides of the bowl as needed.
- Now, it’s time to alternately add the flour mixture and the buttermilk. Begin and end with the flour mixture. For example, add about one-third of the flour mixture, mix until just combined, then add half of the buttermilk, mix, add another third of the flour mixture, mix, the remaining buttermilk, mix, and finally, the last of the flour mixture, mixing until just incorporated. Be careful not to overmix at this stage; overmixing can develop the gluten too much, resulting in a tough cake.
- In a small bowl, beat in the red food coloring and the distilled white vinegar into the batter until it’s a uniform vibrant red. The vinegar reacts with the baking soda, helping with the leavening and also contributing to the cake’s tender crumb. Finally, stir in the vanilla extract.
- Spread the batter evenly between the two prepared cake pans. Use your spatula to level the tops.
- Bake for 20 to 30 minutes, or until a wooden toothpick inserted into the center of the cakes comes out clean. The exact baking time will vary depending on your oven, so start checking at the lower end of the range.
- Once baked, turn the cakes out onto a wire rack to cool completely. Allowing them to cool fully before frosting is essential; a warm cake will cause the frosting to melt and slide off.
Preparing the Frosting:
- In a mixing bowl, blend together the softened cream cheese and softened butter until smooth and creamy. This forms the rich base of our frosting.
- Add the melted marshmallows (or marshmallow creme) and the confectioners’ sugar. Blend until the frosting is smooth and well combined. If it seems too thick, you can add a tablespoon of milk or buttermilk at a time until it reaches your desired consistency. If it seems too thin, add more confectioners’ sugar.
- Fold in the chopped pecans, if you are using them to be incorporated into the frosting.
Assembling the Cake:
- Once the cake layers are completely cool, place one layer on your serving plate.
- Spread a generous amount of frosting over the top of the first layer.
- Carefully place the second cake layer on top.
- Frost the top and sides of the entire cake with the remaining frosting.
- If desired, sprinkle the chopped pecans around the top edge or over the entire cake for a decorative finish.
Expert Tips & Tricks
- Room Temperature Ingredients: For both the cake and the frosting, ensuring your butter, eggs, and buttermilk are at room temperature is paramount. This allows them to emulsify properly, leading to a smoother batter and a more stable, evenly mixed frosting.
- Sifting is Key: Don’t skip the sifting of your dry ingredients. It aerates them and removes any clumps, ensuring a lighter, more uniform cake crumb.
- Don’t Overmix: Once you start adding the dry ingredients to the wet, mix only until just combined. Overmixing develops gluten, which can make your cake tough.
- The Vinegar Magic: The distilled white vinegar might seem unusual, but it’s a classic Red Velvet ingredient. It reacts with the baking soda to provide lift and contributes to the cake’s signature tender texture without adding a vinegary taste.
- Food Coloring Choice: While liquid food coloring is readily available, gel food coloring can offer a more intense color with less liquid, potentially impacting the batter’s consistency less. Use the amount that achieves your desired vibrant red.
- Marshmallow Creme Shortcut: Using marshmallow creme (like Fluff) is a wonderful time-saver for the frosting. If you choose to melt marshmallows, ensure they are fully melted and slightly cooled before incorporating them into the frosting to avoid a gummy texture.
- Cooling is Crucial: Resist the urge to frost a warm cake. It’s the most common mistake that leads to a messy, sliding frosting. Patience here pays off handsomely.
Serving & Storage Suggestions
This Old-Fashioned Red Velvet cake is a showstopper on its own, but it pairs beautifully with a glass of cold milk or a cup of coffee. For a more decadent experience, consider serving it with a dollop of extra whipped cream or a fresh berry coulis.
Storage:
- Room Temperature: If left unfrosted or frosted with a stable buttercream, the cake can be stored at room temperature, loosely covered, for up to 2-3 days. However, with cream cheese frosting, it’s best to refrigerate.
- Refrigeration: Store frosted cake in an airtight container in the refrigerator for up to 4-5 days. Let it sit at room temperature for about 30 minutes before serving to soften the frosting and allow the cake’s flavors to meld.
- Freezing: Unfrosted cake layers can be wrapped tightly in plastic wrap and then in foil and frozen for up to 2-3 months. Thaw overnight in the refrigerator before frosting. Frosted cake can be a bit trickier to freeze without compromising the frosting’s appearance.
Nutritional Information
(Please note: This is an estimation and can vary based on specific ingredients and portion sizes.)
| Nutrient | Amount per Serving | % Daily Value |
|---|---|---|
| Calories | 970.4 kcal | – |
| Calories from Fat | 401 kcal | – |
| Total Fat | 44.6 g | 68% |
| Saturated Fat | 21.6 g | 108% |
| Cholesterol | 140 mg | 46% |
| Sodium | 745 mg | 31% |
| Total Carbohydrate | 138.2 g | 46% |
| Dietary Fiber | 2.5 g | 9% |
| Sugars | 99.7 g | 398% |
| Protein | 9.7 g | 19% |
Variations & Substitutions
- Gluten-Free: For a gluten-free version, you can substitute a high-quality gluten-free all-purpose flour blend for the cake flour. Ensure the blend contains xanthan gum.
- Dairy-Free: To make this dairy-free, use a dairy-free butter alternative for both the cake and frosting. For the buttermilk, you can create a dairy-free version by mixing 1 cup of non-dairy milk (like almond or soy) with 1 tablespoon of lemon juice or white vinegar and letting it sit for 5-10 minutes.
- Chocolate Intensity: If you desire a more pronounced chocolate flavor, you can slightly increase the amount of cocoa powder, but be mindful not to exceed 3 tablespoons as it can affect the cake’s moisture.
- Frosting Variations: While the classic cream cheese frosting is hard to beat, you could experiment with a traditional American buttercream or even a chocolate ganache for a different flavor profile.
FAQs
Q: Why is my red velvet cake not red enough?
A: The intensity of the red color can vary greatly depending on the brand and type of food coloring used. Gel food coloring typically provides a more vibrant and concentrated color than liquid. You may need to adjust the amount to achieve your desired hue.
Q: What is the role of vinegar in red velvet cake?
A: The vinegar, when combined with baking soda, creates a chemical reaction that helps the cake to rise and become tender. It also helps to enhance the red color by reacting with the natural pigments in the cocoa powder.
Q: Can I make red velvet cupcakes instead of a cake?
A: Absolutely! This batter is perfect for cupcakes. Fill your cupcake liners about two-thirds full and bake for approximately 18-22 minutes, or until a toothpick comes out clean.
Q: My cream cheese frosting is too runny. What did I do wrong?
A: This can happen if the cream cheese or butter were too soft, or if too much liquid was added. Try adding more confectioners’ sugar, a tablespoon at a time, until it thickens. You can also chill the frosting for about 15-20 minutes to help it firm up.
Q: Does the type of cocoa powder matter for red velvet cake?
A: While any good quality unsweetened cocoa powder will work, natural, unsweetened cocoa powder (not Dutch-processed) is traditionally preferred. It reacts better with the baking soda for leavening and contributes to the cake’s distinctive color and flavor profile.
A Slice of Celebration
There’s a reason the Old-Fashioned Red Velvet cake has stood the test of time. It’s more than just a dessert; it’s an experience. The visual appeal is undeniable, but it’s the symphony of subtle cocoa, a hint of tang, and that luscious frosting that truly captures the heart. This recipe is a journey back to classic baking, a chance to recreate a beloved treat that brings smiles and creates cherished memories. Gather your ingredients, embrace the process, and prepare to indulge in a truly unforgettable cake. Happy baking!