
Quesadillas: A Pampered Chef Classic Reimagined
My days spent working in the Pampered Chef test kitchens were a delightful blur of developing, testing, and savoring recipes. Among the countless dishes that graced our tables, the quesadillas from The Pampered Chef Classics held a special place in my heart. They weren’t just a quick snack; they were a canvas for flavor, a testament to how simple ingredients, prepared with a little care, could yield something truly satisfying. I recall evenings at home, the aroma of baking tortillas filling the air, as my family gathered around, eager to dip into these cheesy delights.
Recipe Overview
- Prep Time: 10 minutes
- Cook Time: 8-10 minutes
- Total Time: 18-20 minutes
- Servings: 2-4
- Yield: 4 quesadillas
- Dietary Type: Vegetarian (adaptable)
Ingredients
This recipe is beautifully straightforward, relying on fresh ingredients to shine.
- 8 (7-inch) flour tortillas: The foundation of our quesadilla, providing that delightful chew.
- 1 cup shredded Monterey Jack cheese: Its mild, creamy melt is essential.
- 1/3 cup chopped olives: Pitted black olives are traditional and add a briny counterpoint.
- 1/4 cup chopped fresh cilantro: For that burst of herbaceous freshness.
- 3 tablespoons sliced green onions: The mild oniony bite is perfect.
- 1/3 cup salsa or picante sauce: This brings moisture and a touch of spice to the filling.
Optional Additions:
- 1 cup cooked chicken: Shredded or diced, this transforms the quesadilla into a hearty meal.
- Sour cream: For serving, adding a cool, tangy element.
- Additional salsa or picante sauce: For dipping and an extra flavor boost.
Equipment Needed
The beauty of this recipe lies in its simplicity, requiring only basic kitchen tools.
- Baking sheet or large round stone
- Small bowl
- Spatula or spoon
- Knife and cutting board (for chopping)
- Cooking spray
Instructions
The magic happens quickly with these quesadillas, making them perfect for a weeknight meal or an impromptu appetizer.
- Preheat the oven: Begin by preheating your oven to 425°F (220°C). This high heat is crucial for achieving that perfectly golden, slightly crisp tortilla.
- Prepare the filling: In a small bowl, combine the shredded Monterey Jack cheese, chopped olives, chopped cilantro, sliced green onions, and salsa (or picante sauce). If you’re opting for the optional cooked chicken, add it to the mixture now. Mix everything together thoroughly until well combined. The salsa will slightly moisten the cheese and herbs, creating a cohesive, flavorful filling.
- Assemble the quesadillas: Lay 4 flour tortillas flat on your prepared baking sheet or large round stone. These will be the bases of your quesadillas.
- Distribute the filling: Divide the cheese and olive mixture evenly among the 4 tortillas, spreading it out almost to the edges. Don’t overload them, as this can make them difficult to fold and can cause the filling to ooze out excessively during baking.
- Top and spray: Carefully place a second tortilla on top of the filling on each of the base tortillas, creating a sandwich. Press down firmly on the top tortilla to help the quesadilla hold its shape. Lightly spray the tops of each quesadilla with cooking spray. This step helps the tortillas brown beautifully and achieve a slight crispness.
- Bake to perfection: Bake in the preheated oven for 8 to 10 minutes, or until the tops are lightly browned and the cheese is bubbly and melted. Keep a close eye on them, as oven temperatures can vary, and you want a lovely golden hue, not burnt edges.
- Cool and cut: Remove the quesadillas from the oven and let them cool on the baking sheet for about 5 minutes. This resting period is important; it allows the cheese to set slightly, making them easier to cut without all the filling escaping. Once cooled slightly, cut each quesadilla into 6 wedges.
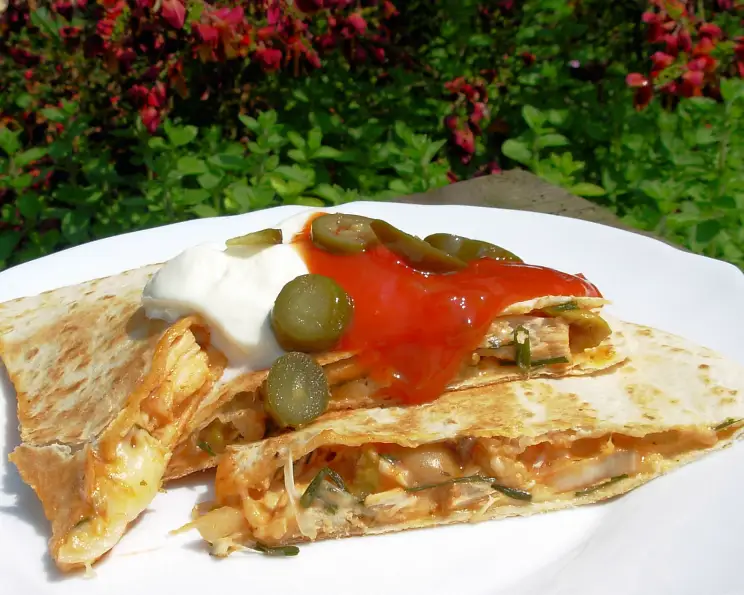
- Serve: Serve immediately with additional salsa (or picante sauce) and a dollop of sour cream, if desired. The contrast of the warm, cheesy quesadilla with the cool toppings is simply delightful.
Expert Tips & Tricks
As a chef, I’ve learned that even the simplest recipes can be elevated with a few insider techniques.
- Cheese blend: While Monterey Jack is traditional and melts beautifully, don’t be afraid to experiment with other good melting cheeses. A blend of Monterey Jack and cheddar, or even some pepper jack for a little heat, works wonderfully. Just ensure you have about a cup of shredded cheese per two quesadillas.
- Salsa consistency: If your salsa is very wet, you might want to drain off some of the excess liquid before adding it to the filling. Too much moisture can make the tortillas soggy.
- Even spreading: For the most professional-looking quesadillas, try to spread the filling as evenly as possible. This ensures that each bite has a balanced distribution of cheese, olives, and herbs.
- Baking sheet liner: For easier cleanup, consider lining your baking sheet with parchment paper or a silicone baking mat before placing the tortillas on it.
- Crispier crust: If you prefer a crispier exterior, you can brush the tops of the tortillas lightly with olive oil instead of using cooking spray.
Serving & Storage Suggestions
These quesadillas are best enjoyed fresh from the oven when the cheese is wonderfully gooey and the tortillas are warm. They make a fantastic appetizer for a party, a light lunch, or a satisfying snack.
For serving, arrange the wedges artfully on a platter. A bowl of extra salsa for dipping and a dollop of sour cream or even some guacamole on the side completes the presentation.
Leftovers can be stored in an airtight container in the refrigerator for up to 2 days. To reheat, place the quesadilla wedges on a baking sheet and warm them in a 350°F (175°C) oven for about 5-7 minutes, or until heated through and slightly crisped. You can also gently reheat them in a non-stick skillet over medium-low heat, covered, until warm.
Nutritional Information
Here’s an estimated nutritional breakdown for one serving (assuming 2 servings per recipe, without optional additions):
| Nutrient | Amount per Serving | % Daily Value |
|---|---|---|
| Calories | 480 kcal | 24% |
| Total Fat | 25 g | 32% |
| Saturated Fat | 10 g | 50% |
| Cholesterol | 30 mg | 10% |
| Sodium | 1200 mg | 52% |
| Total Carbohydrate | 45 g | 16% |
| Dietary Fiber | 3 g | 11% |
| Sugars | 3 g | 6% |
| Protein | 18 g | 36% |
Note: Nutritional values are estimates and can vary based on specific ingredients used.
Variations & Substitutions
The versatility of this quesadilla recipe is one of its greatest strengths.
- Spicy Kick: For those who love a bit more heat, incorporate a finely diced jalapeño into the filling or use a spicier picante sauce. A pinch of cayenne pepper in the cheese mixture can also add a subtle warmth.
- Vegetable Delight: Add finely chopped bell peppers (any color), mushrooms, or corn kernels to the filling for extra texture and nutrients. Sautéing them briefly before adding to the cheese mixture can enhance their flavor.
- Bean Power: For a vegetarian protein boost, stir in a 1/2 cup of rinsed and drained black beans or pinto beans to the filling mixture.
- Herb Swap: If cilantro isn’t your favorite, fresh parsley or even a little dried oregano can offer a different, but still delicious, herbaceous note.
- Gluten-Free Option: Substitute the flour tortillas with your favorite gluten-free tortillas. Ensure they are pliable enough to fold without cracking.
FAQs (Frequently Asked Questions)
Q: Can I make the quesadilla filling ahead of time?
A: Yes, you can prepare the cheese and filling mixture up to a day in advance and store it covered in the refrigerator. However, it’s best to assemble and bake the quesadillas just before serving for optimal texture.
Q: What kind of cheese is best for quesadillas?
A: Any good melting cheese works well! Monterey Jack, Cheddar, Colby Jack, Oaxaca cheese, or a Mexican blend are all excellent choices. The key is a cheese that becomes smooth and creamy when heated.
Q: How can I prevent my quesadillas from burning?
A: Keep a close eye on them during the last few minutes of baking. Oven temperatures can vary, and it’s easy for the tortillas to go from golden brown to burnt quickly. If you notice one quesadilla browning faster than the others, you can carefully remove it from the baking sheet while the others finish.
Q: Can I use corn tortillas instead of flour?
A: While flour tortillas are traditional for this recipe due to their flexibility, you can try using corn tortillas. You may need to warm them slightly before filling and folding to make them more pliable, and they might achieve a crispier texture than flour tortillas.
Q: How do I make sure the filling stays inside the quesadilla?
A: Don’t overfill the tortillas, and press down firmly on the top tortilla after adding the filling. Baking on a baking sheet rather than directly on the oven rack also helps contain any minor leaks.
Final Thoughts
This Pampered Chef quesadilla recipe is a testament to the fact that culinary excellence doesn’t always require complex techniques or exotic ingredients. It’s about understanding how simple components come together to create something comforting and delicious. Whether you’re looking for a quick and easy weeknight meal, a crowd-pleasing appetizer, or simply a satisfying snack, these quesadillas are sure to hit the spot. I encourage you to try them, perhaps with your own favorite additions, and share them with loved ones. Serve them alongside a crisp green salad or a bowl of hearty chili for a truly complete meal. Happy cooking!