
Queso Blanco: A Chef’s Guide to Making Your Own Fresh, Versatile Cheese
There’s a particular joy I find in the simplicity of making cheese at home. It reminds me of a trip to Mexico years ago, where I stumbled upon a street vendor selling freshly fried empanadas. The filling, a wonderfully mild and slightly chewy white cheese, held its shape beautifully, offering a delightful contrast to the crispy exterior. It was then that my fascination with Queso Blanco truly began. This isn’t just any cheese; it’s a blank canvas, a foundation for countless culinary adventures, and surprisingly accessible to even the most novice home cook. The satisfaction of transforming humble milk into this remarkable cheese is, quite frankly, addictive.
Recipe Overview
- Prep Time: Minimal, focused on heating milk
- Cook Time: Approximately 10-15 minutes active heating, plus several hours draining
- Total Time: 4-6 hours (primarily draining time)
- Servings: N/A (yields cheese)
- Yield: 1 to 2 pounds
- Dietary Type: Dairy
Ingredients
For crafting approximately 1.5 to 2 pounds of your own exquisite Queso Blanco, you will need:
- 1 gallon whole milk
- 1/4 cup white vinegar
Equipment Needed
- A large, heavy-bottomed pot (at least 6-quart capacity)
- A sturdy spoon or whisk for stirring
- A fine-mesh sieve or colander
- Several layers of cheesecloth
- A bowl or container to catch the whey
- Twine or string for hanging the cheesecloth
- Plastic wrap for storage
Instructions
Creating your own Queso Blanco is a rewarding process that begins with the careful heating of milk.
- Begin by placing your gallon of whole milk into a large, heavy-bottomed pot. It’s crucial to use a pot that’s substantial enough to prevent scorching and to allow for easy stirring.
- Place the pot over a direct heat source. It is imperative to warm the milk to precisely 180 degrees Fahrenheit. This temperature is critical for the curdling process.
- Throughout the heating process, stir frequently using a spoon or whisk. This constant motion is essential to prevent the milk from scorching on the bottom of the pot.
- Once the milk reaches 180 degrees Fahrenheit, maintain this temperature for several minutes. Holding the temperature steady ensures the milk is sufficiently prepared for the next step.
- Now, slowly add the 1/4 cup of vinegar. Pour it in gradually, while continuing to stir gently. You will observe the curds beginning to separate from the whey. This visual cue indicates the milk is transforming into cheese.
- Typically, the 1/4 cup of vinegar will be sufficient to precipitate the curds from a gallon of milk. You should see distinct white curds forming within a yellowish liquid (the whey).
- Prepare your colander by lining it with cheesecloth. Ensure the cheesecloth is generous enough to create a bag for the curds. Place the lined colander over a large bowl or sink to catch the draining whey.
- Carefully pour the curds and whey into the cheesecloth-lined colander.
- Gather the corners of the cheesecloth together, forming a tight knot. Tie the four corners securely with twine or string.
- Hang the bag of curds to drain. This can be done over a sink, from a cabinet handle, or any other suitable sturdy fixture. Allow it to drain for several hours, or until the bag of curds has stopped dripping significantly. The longer it drains, the firmer your cheese will be.
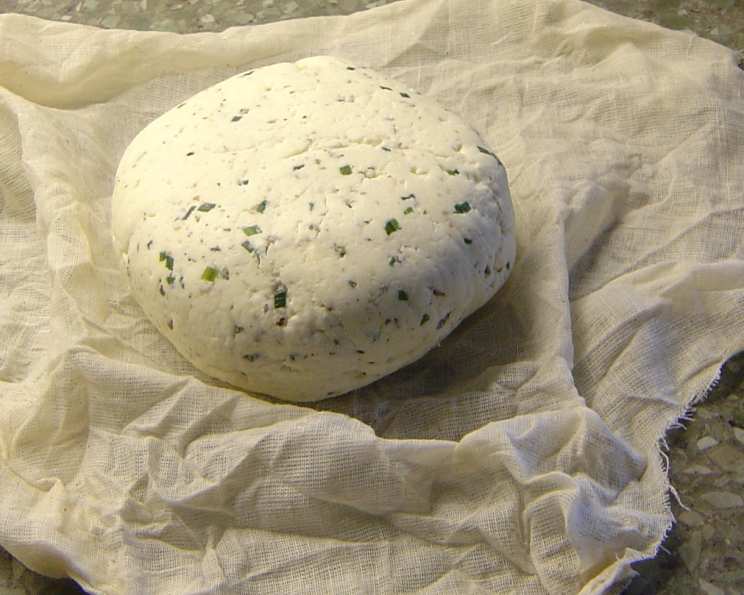
- Once drained, take the mass of curds out of the cheesecloth. It should now be a cohesive, solid bag of curd.
- Your Queso Blanco is now ready for storage or immediate use. If storing, wrap the curd tightly in plastic wrap and refrigerate. It will keep well in the refrigerator for up to 1 week.
Expert Tips & Tricks
When working with milk, especially for cheesemaking, quality matters. Using whole milk is paramount for achieving the best texture and flavor. While skim or reduced-fat milk can be used, the resulting cheese will be less rich and may not firm up as well. Don’t be tempted to rush the draining process; patience here will be rewarded with a superior cheese. The whey, a byproduct of cheesemaking, is surprisingly versatile. It can be used in place of water in bread recipes, to cook grains like oatmeal or rice, or even added to smoothies for an extra protein boost.
Serving & Storage Suggestions
Queso Blanco is celebrated for its incredible versatility. It doesn’t melt like many other cheeses, making it an ideal candidate for frying. Dice it into half-inch cubes and stir-fry it with vegetables for a hearty and delicious side dish or main component. It can be added to soups or sauces, such as a rich marinara for spaghetti, where it will hold its shape and add a subtle, creamy texture. In Asian cuisine, it serves as an excellent substitute for bean curd. It browns beautifully when fried, absorbing the flavors of any spices or ingredients it’s cooked with. Store your homemade Queso Blanco, tightly wrapped in plastic wrap, in the refrigerator for up to one week.
Nutritional Information
Please note that nutritional information can vary based on the specific ingredients and fat content of the milk used. This is an estimated breakdown per approximate pound of cheese.
| Nutrient | Amount per Serving (approx.) | % Daily Value (approx.) |
|---|---|---|
| Calories | 2353.1 | – |
| Calories from Fat | 1141 | – |
| Total Fat | 126.9 g | 195% |
| Saturated Fat | 72.8 g | 364% |
| Cholesterol | 390.4 mg | 130% |
| Sodium | 1562.8 mg | 65% |
| Total Carbohydrate | 176.5 g | 58% |
| Dietary Fiber | 0 g | 0% |
| Sugars | 205.4 g | 821% |
| Protein | 125.7 g | 251% |
Variations & Substitutions
While this recipe yields a classic, unadorned Queso Blanco, the possibilities for variation are vast. For a hint of zest, consider adding a pinch of salt to the curds before pressing them into their final form. Some regions incorporate finely chopped herbs like cilantro or parsley into the cheese mass before draining. If you are seeking a dairy-free alternative, it’s important to note that traditional Queso Blanco relies on dairy proteins for its structure. However, many vegan “queso” recipes exist using nuts or plant-based milks, though they will have a different texture and flavor profile.
FAQs
Q: Why does my Queso Blanco not seem to be separating into curds?
A: Ensure your milk reached the correct temperature of 180 degrees Fahrenheit and was held there for a few minutes. Also, make sure the vinegar is fresh, as older vinegar may lose some of its acidity.
Q: Can I use a different type of vinegar?
A: White vinegar is recommended for its neutral flavor and acidity. Apple cider vinegar or other colored vinegars might impart a slight hue or taste to your cheese.
Q: How can I make my Queso Blanco firmer?
A: The firmness is largely determined by how long you drain the curds. The longer you hang the cheesecloth, the more whey will be expelled, resulting in a firmer cheese.
Q: Is it normal for some tiny curds to go through the cheesecloth?
A: Yes, it’s very common to lose a small amount of very fine curd through the cheesecloth. This is perfectly normal and doesn’t significantly impact the final yield or quality.
Q: Can I add spices directly to the milk?
A: It’s best to add spices after the cheese has been formed and drained, or during the cooking process where you plan to use it. Adding them to the milk might affect the curdling process or lead to uneven distribution.
Final Thoughts
The beauty of homemade Queso Blanco lies in its unpretentious nature and remarkable adaptability. It’s a testament to how simple, quality ingredients can yield extraordinary results. Whether you’re an experienced cook looking to expand your repertoire or a beginner eager to try your hand at cheesemaking, this recipe offers a delightful entry point. I encourage you to make a batch, experience the satisfaction of creation, and then get inspired by its potential. Try cubing it and pan-frying it with your favorite vegetables, or simply serve it as a fresh, mild accompaniment to a spicy salsa. Share your creations, and let this humble white cheese become a star in your kitchen.