
The Magic of No-Bake Chocolate Cookies: Instant Gratification for the Sweet Tooth
There are certain flavors that instantly transport you back in time, and for me, the rich, slightly gritty sweetness of no-bake chocolate cookies is one of them. I remember vividly, on scorching summer afternoons when the thought of turning on the oven was an absolute non-starter, my grandmother would whip up a batch of these. The entire process, from gathering ingredients to the final, satisfying plop onto the wax paper, felt like a secret culinary ritual. The air would fill with the comforting aroma of cocoa and simmering sugar, a promise of instant joy. It wasn’t just about the cookies themselves, but the shared moments, the anticipation of that first cool, chewy bite, and the sheer simplicity that made them so utterly magical.
Recipe Overview
- Prep Time: 11 minutes
- Cook Time: 1 minute (boiling time)
- Total Time: 11 minutes
- Servings: 24
- Yields: 24 cookies
- Dietary Type: Vegetarian
Ingredients
To conjure these delightful treats, you’ll need just a handful of pantry staples:
- 2 2⁄3 cups sugar
- 2⁄3 cup milk
- 1⁄3 cup unsweetened cocoa powder
- 1⁄3 lb (which is approximately 1.5 sticks or 3/4 cup) margarine
- 3⁄4 cup creamy peanut butter
- 1⁄2 teaspoon vanilla extract
- 3 1⁄2 cups quick-cooking oats
A Note on Ingredients: For the margarine, any standard baking margarine will work beautifully. The cocoa powder should be unsweetened for the best chocolate flavor balance. Quick-cooking oats are essential here; they absorb the liquid more readily, giving the cookies their signature chewy texture. If you only have old-fashioned rolled oats, you might find the cookies a bit chewier, which isn’t necessarily a bad thing! For the peanut butter, a creamy, smooth variety ensures it blends seamlessly into the chocolate mixture without adding unwelcome texture.
Equipment Needed
This recipe is wonderfully straightforward and doesn’t demand a brigade of specialized tools. You’ll likely have everything you need in your kitchen already:
- A medium saucepan for cooking the base mixture.
- A measuring cup set and measuring spoons.
- A whisk or wooden spoon for stirring.
- A silicone spatula for scraping the saucepan clean.
- A sheet of waxed paper or parchment paper laid out on a flat surface (like a baking sheet or countertop) for dropping the cookies onto.
Instructions
This is where the magic truly happens – a swift journey from pantry to delectable dessert.
- Begin by combining the sugar, milk, cocoa powder, and margarine in your medium saucepan.
- Place the saucepan over medium heat and stir the ingredients together until the margarine has melted and everything is well combined.
- Bring the mixture to a rolling boil. Once it reaches this point, let it boil for exactly 1 minute. It’s crucial to time this precisely; boiling for too short a time may result in softer cookies that don’t set properly, while boiling for too long can make them too hard.
- Carefully remove the saucepan from the heat.
- Immediately stir in the vanilla extract and the creamy peanut butter.
- Continue to stir until the peanut butter is completely melted and the mixture is smooth and uniformly blended. This step should be quick as the residual heat will help melt the peanut butter.
- Now, it’s time to incorporate the quick oats. Add the 3 1⁄2 cups of quick oats to the chocolate and peanut butter mixture.
- Stir vigorously until all the oats are thoroughly coated and incorporated into the rich chocolate base. The mixture will begin to thicken as the oats absorb the liquid.
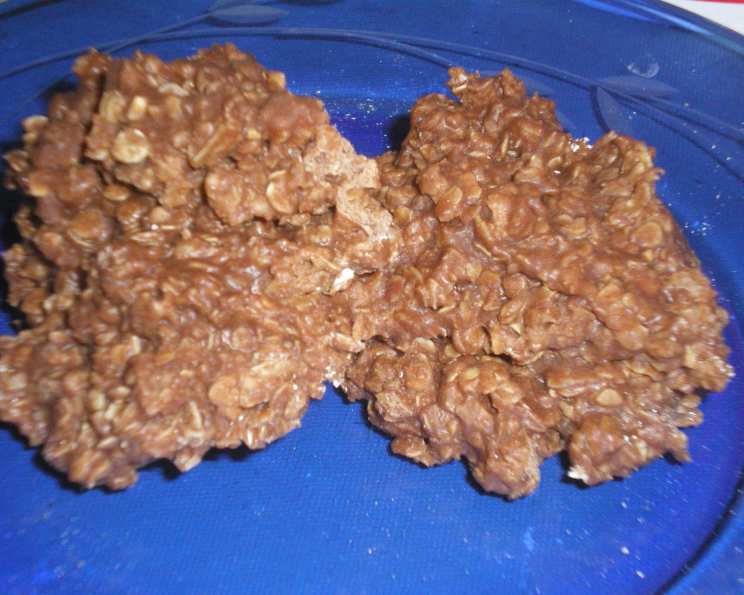
- Working quickly while the mixture is still warm and pliable, use a tablespoon to drop spoonfuls of the cookie dough onto your prepared waxed paper. Aim for roughly tablespoon-sized mounds, leaving a little space between them as they won’t spread significantly.
- Allow the cookies to sit undisturbed on the waxed paper until they are set and firm to the touch. This typically takes about 20 to 30 minutes at room temperature.
Expert Tips & Tricks
As a chef, I’ve learned that even the simplest recipes can benefit from a few insider tips to elevate them from good to truly exceptional.
- The Boil is Key: That 1-minute boil is non-negotiable. It’s what activates the sugar crystals and creates the chewy, fudgy texture without the need for baking. If you’re unsure about your stovetop’s heat consistency, use a candy thermometer if you have one; you’re looking for the mixture to reach approximately 230°F (110°C), the soft-ball stage.
- Speed is of the Essence: Once you remove the mixture from the heat, work efficiently. The oats need to be incorporated while the mixture is still fluid enough to coat them evenly. If it starts to firm up too much, a gentle rewarming over very low heat for just a few seconds might help, but be careful not to overheat.
- Uniformity for Even Setting: Try to drop your cookies into relatively uniform sizes. This ensures they all set up at roughly the same rate, making for a more consistent batch.
- The Perfect Plop: Don’t overthink the shaping. A rustic, spoonful-dropped cookie has its own charm. Avoid packing the dough too tightly on the spoon; a gentle scoop and release will give you the best texture.
- Peanut Butter Nuances: If your peanut butter is very stiff, it might take a little extra stirring to fully incorporate. Conversely, if it’s very oily, you might want to give it a good stir before measuring to ensure the oil is blended in.
Serving & Storage Suggestions
These no-bake wonders are incredibly versatile when it comes to serving. They are perfect on their own, a delightful after-school treat, or even as a quick dessert when unexpected guests arrive.
- Serving: Present them on a simple platter. They’re best served slightly chilled, which gives them a satisfying chew. They also pair wonderfully with a tall glass of cold milk – a classic for a reason!
- Storage: Because these cookies are not baked, their shelf life is a bit different from their oven-baked counterparts. They are best stored in an airtight container in the refrigerator. In the fridge, they will keep well for up to 1 week. For longer storage, you can absolutely freeze them! Place them in a single layer on a baking sheet until firm, then transfer them to a freezer-safe bag or container. They will stay delicious in the freezer for up to 2-3 months. To serve from frozen, simply let them thaw at room temperature for about 15-20 minutes, or enjoy them directly from the freezer for an extra-firm, icy treat.
Nutritional Information
Here’s an approximate nutritional breakdown per cookie:
| Nutrient | Amount per Serving | % Daily Value |
|---|---|---|
| Calories | 232.5 kcal | |
| Calories from Fat | 92 g | |
| Total Fat | 10.3 g | 15 % |
| Saturated Fat | 2.2 g | 10 % |
| Cholesterol | 0.9 mg | 0 % |
| Sodium | 100.7 mg | 4 % |
| Total Carbohydrate | 32.8 g | 10 % |
| Dietary Fiber | 1.9 g | 7 % |
| Sugars | 23.1 g | 92 % |
| Protein | 4.1 g | 8 % |
Note: Nutritional values are estimates and can vary based on specific ingredients used.
Variations & Substitutions
While this recipe is wonderfully satisfying as is, there’s always room for a touch of personalization!
- Nut Butter Swap: If you’re not a fan of peanut butter or have allergies, almond butter or sunflower seed butter can be excellent substitutes. The flavor profile will change slightly, but the textural outcome should remain similar.
- Chocolate Chip Boost: For an extra chocolatey punch, stir in about 1/2 cup of chocolate chips (milk, semi-sweet, or dark) along with the oats.
- Sprinkle Fun: Once the cookies are dropped onto the waxed paper, you can immediately press a few sprinkles into the tops for a festive touch, especially for parties or holidays.
- Spice it Up: A pinch of cinnamon or a dash of espresso powder added with the cocoa can deepen the chocolate flavor and add a sophisticated warmth.
FAQs
Q: Why are my no-bake cookies soft and not setting?
A: This is usually because the mixture wasn’t boiled for the full minute, or it was boiled for too short a time, preventing the sugar from reaching the right stage to set.
Q: Can I use old-fashioned rolled oats instead of quick oats?
A: You can, but the cookies will have a chewier, more textured consistency. Quick oats are recommended for the classic no-bake cookie texture.
Q: My chocolate mixture is too thick to stir the oats in. What should I do?
A: Remove the pan from the heat and gently stir in a tablespoon of milk at a time until it reaches a more manageable consistency for incorporating the oats.
Q: Can I make these cookies vegan?
A: You can make a vegan version by substituting the milk with a plant-based milk (like almond, soy, or oat milk) and ensuring your margarine is dairy-free.
Q: How long do these cookies typically take to set?
A: They usually take about 20 to 30 minutes to set at room temperature, becoming firm enough to handle.
Final Thoughts
There’s a unique joy in creating something delicious with such minimal effort and time. These Quick and Easy No-Bake Chocolate Cookies are a testament to that. They’re the perfect answer to a sudden sweet craving, a simple activity to share with little ones in the kitchen, or a reliable treat to have on hand. So, the next time you find yourself yearning for something chocolatey and don’t want to heat up the oven, remember this recipe. Whip up a batch, share them with loved ones, and savor the simple, sweet perfection they bring. They are truly a little piece of kitchen magic.