
The Speedy Hearth: My Go-To Vegetarian Chili
There are certain dishes that, for me, evoke the comforting embrace of home, regardless of where I might be. For years, during a period of conscious exploration into plant-based eating, this vegetarian chili became my weeknight warrior. It was the kind of recipe that you could whip up with pantry staples, the aroma wafting through the kitchen, promising a hearty and satisfying meal. Even now, as my culinary compass has broadened, this chili remains a cherished staple, a testament to the fact that deeply flavorful and soul-warming food doesn’t need meat. It’s a bright, fresh, and surprisingly quick bowl of goodness that I find myself returning to time and time again.
Recipe Snapshot
- Prep Time: 15 minutes
- Cook Time: 30 minutes
- Total Time: 45 minutes
- Servings: 4-6
- Yield: Approximately 6-8 cups
- Dietary Type: Vegetarian (can be made Vegan and Gluten-Free)
The Humble Assembly: Ingredients
This chili is built on a foundation of accessible ingredients, proving that deliciousness can be both simple and speedy. The beauty lies in its flexibility, but here are the core components that bring this dish to life:
- 1 tablespoon vegetable oil
- 1 large onion, diced
- 2-3 garlic cloves, minced
- 1-2 green bell pepper, diced
- 1 (28-ounce) can diced tomatoes, undrained
- 1 (6-ounce) can spicy vegetable juice
- 1 (14-ounce) can red beans, drained and rinsed
- 1 (14-ounce) can black beans, drained and rinsed
- 1 (14-ounce) can whole kernel corn, drained (optional, but recommended for texture)
- Chili powder, to taste (I use a generous amount!)
- Cumin, to taste (equally important for that classic chili flavor)
- Fresh cilantro, for garnish (optional, but highly recommended)
Tools of the Trade: Equipment Needed
For this swift and satisfying chili, you won’t need a brigade of specialized gadgets. The essentials will serve you perfectly:
- A large soup pot or Dutch oven
- A sharp knife and cutting board for your aromatics and vegetables
- A can opener
- Measuring spoons
- A wooden spoon or heat-resistant spatula for stirring
The Art of Simplicity: Instructions
The magic of this chili lies in its straightforward approach. There’s no long simmering or complex techniques, just a harmonious blend of flavors that come together beautifully.
- Prepare Your Foundations: Begin by draining and rinsing both the red beans and black beans to remove excess sodium and any starchy liquid. If you’re using canned corn, drain that as well.
- Awaken the Aromatics: Place your large soup pot or Dutch oven over medium heat. Add the vegetable oil and let it warm up for a moment. Once shimmering, introduce the diced onion, minced garlic cloves, and diced green bell pepper. Sauté these ingredients, stirring occasionally, until the onions become translucent and the bell peppers turn a vibrant, bright green. This usually takes about 5-7 minutes, and you want to achieve tenderness without browning.
- Introduce the Core Flavors: To the softened aromatics, add the undrained diced tomatoes, the spicy vegetable juice, the prepared red beans, black beans, and whole kernel corn (if using).
- Season Generously: Now comes the heart of the chili’s flavor profile. Add chili powder and cumin. This is where you can really tailor the heat and depth to your preference. I personally love a robust amount, so don’t be shy! Stir everything together to ensure the spices are well distributed.
- Simmer to Perfection: Bring the mixture to a boil, then reduce the heat to low. Cover the pot and let the chili simmer gently for about 30 minutes. This simmering time allows the flavors to meld and deepen, creating a cohesive and satisfying dish.
- Adjust Consistency: During the simmering process, keep an eye on the chili’s thickness. If it becomes too thick for your liking, you can add more spicy vegetable juice until you reach your desired consistency.
Chef’s Secrets: Expert Tips & Tricks
As a chef, I’m always looking for ways to elevate even the simplest of dishes. Here are a few insights to make your speedy vegetarian chili even more spectacular:
- Spice Level Control: The “spicy” in spicy vegetable juice can vary by brand. If you prefer a milder chili, opt for a regular vegetable juice and then add your heat with a pinch of cayenne pepper or a diced jalapeño along with the bell pepper. Conversely, if you like it fiery, consider adding a dash of hot sauce or a pinch more chili powder.
- The Power of Dried Beans: While canned beans are fantastic for speed, if you have the time, cooking dried beans from scratch will yield an even more tender and flavorful chili. Just remember to soak and cook them according to package directions before adding them to the pot.
- Aromatics are Key: Don’t rush the sautéing of the onions, garlic, and bell pepper. This initial step builds a crucial layer of flavor that forms the aromatic backbone of the chili. You’re looking for sweetness and tenderness, not char.
- Chili Powder and Cumin Ratio: The “lot” of chili powder and cumin I mentioned is subjective, but a good starting point is 1-2 tablespoons of chili powder and 1-2 teaspoons of cumin for this quantity. Taste and adjust as it simmers. Different chili powders have different heat levels and flavor profiles, so experiment with your favorites.
- A Touch of Sweetness (Optional): If your diced tomatoes are particularly acidic, a tiny pinch of sugar or a drizzle of maple syrup can help balance the flavors. Add it during the simmering stage and taste.
The Grand Finale: Serving & Storage Suggestions
This chili is a chameleon, adapting beautifully to a variety of accompaniments. Serve it piping hot, as is, or embrace the classic chili experience.
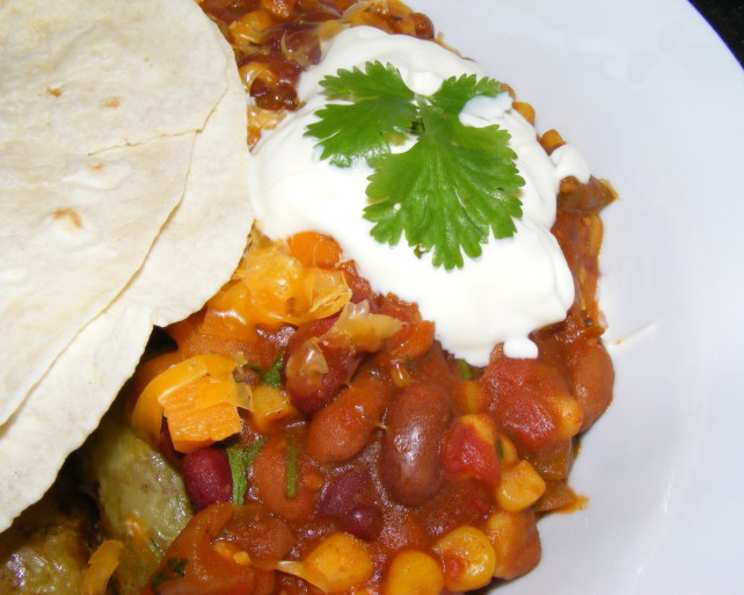
- Toppings Galore: A dollop of sour cream (or a vegan alternative), shredded cheddar cheese (or nutritional yeast for a dairy-free option), a sprinkle of fresh cilantro, a spoonful of salsa, or even some crunchy tortilla chips all make wonderful additions. A side of warm, crusty cornbread is, in my opinion, the ultimate pairing.
- Leftover Love: This chili is even better the next day as the flavors have more time to meld. Store any leftovers in an airtight container in the refrigerator for up to 3-4 days.
- Freezer Friendly: For longer storage, allow the chili to cool completely, then transfer it to freezer-safe containers or bags. It will keep well in the freezer for up to 3 months. Thaw overnight in the refrigerator and reheat gently on the stovetop or in the microwave.
Nourishing Insights: Nutritional Information
While this chili is packed with flavor and fiber, here’s an approximate breakdown of its nutritional content. Please note that actual values can vary based on specific ingredients and portion sizes.
| Nutrient | Amount per Serving (approx.) | % Daily Value (approx.) |
|---|---|---|
| Calories | 401.4 | – |
| Calories from Fat | 77.4 | – |
| Total Fat | 8.6 g | 11% |
| Saturated Fat | 1.1 g | 6% |
| Cholesterol | 0 mg | 0% |
| Sodium | 432.2 mg | 18% |
| Total Carbohydrate | 73.9 g | 24% |
| Dietary Fiber | 18.6 g | 74% |
| Sugars | 11.7 g | 23% |
| Protein | 20.4 g | 41% |
Note: Nutritional values are estimates and can vary based on the specific brands of ingredients used, especially for canned goods and spicy vegetable juice.
Culinary Canvas: Variations & Substitutions
The beauty of this vegetarian chili is its inherent adaptability. Feel free to play with the ingredients to suit your pantry and preferences.
- Bean Bonanza: Don’t have red and black beans? Swap them out for kidney beans, pinto beans, or even cannellini beans. A mix of three or four different beans adds wonderful texture and visual appeal.
- The Heat Factor: For a spicier kick, consider adding a diced jalapeño or serrano pepper along with the bell pepper, or a pinch of cayenne pepper or red pepper flakes during the simmering stage.
- Corn’s Cousins: If corn isn’t your favorite, try adding diced zucchini, carrots, or even some sweet potatoes for a different vegetable profile.
- A Touch of Umami: For an added depth of savory flavor, a tablespoon of soy sauce or tamari (for gluten-free) can be stirred in during the simmering process.
- Meat Lover’s Adaptation: If you’re transitioning or just want a heartier, meat-infused version, brown 1 pound of ground meat (beef, turkey, or chicken) before adding the onions, garlic, and bell pepper. Drain off any excess fat before proceeding with the rest of the recipe.
Common Queries Answered: FAQs
Q: Can I make this vegetarian chili vegan?
A: Absolutely! The recipe is naturally vegetarian, and to make it vegan, simply ensure you use vegan cheese or omit cheese altogether when serving, and use vegetable oil as listed.
Q: How can I make this gluten-free?
A: This recipe is already gluten-free as written, provided you use a gluten-free spicy vegetable juice. Always check your labels for hidden gluten.
Q: My chili seems too thin. What can I do?
A: If your chili is too watery after simmering, you can simmer it uncovered for an additional 10-15 minutes to allow some of the liquid to evaporate. Alternatively, you can create a slurry by mixing 1 tablespoon of cornstarch with 2 tablespoons of cold water and stirring it into the chili during the last 5 minutes of simmering.
Q: Can I use fresh tomatoes instead of canned?
A: Yes, you can! You would need about 4-5 large, ripe tomatoes, peeled, seeded, and diced. Fresh tomatoes will offer a brighter, fresher flavor but may require a bit more simmering time to break down.
Q: How much chili powder and cumin should I use?
A: This is highly personal! Start with 1 tablespoon of chili powder and 1 teaspoon of cumin and taste during the last 15 minutes of simmering. Add more gradually until you achieve your desired flavor intensity.
A Bowl of Comfort, Fast
There’s a profound satisfaction in creating a nourishing and flavorful meal with such efficiency. This Quick and Easy Vegetarian Chili is more than just a recipe; it’s a testament to the power of simple ingredients coming together to create something truly special. It’s the perfect answer to a busy weeknight, a comforting companion on a chilly evening, and a dish that I hope brings as much warmth and joy to your table as it does to mine. Serve it with your favorite toppings, perhaps alongside that aforementioned cornbread, and savor every hearty, wholesome spoonful.