
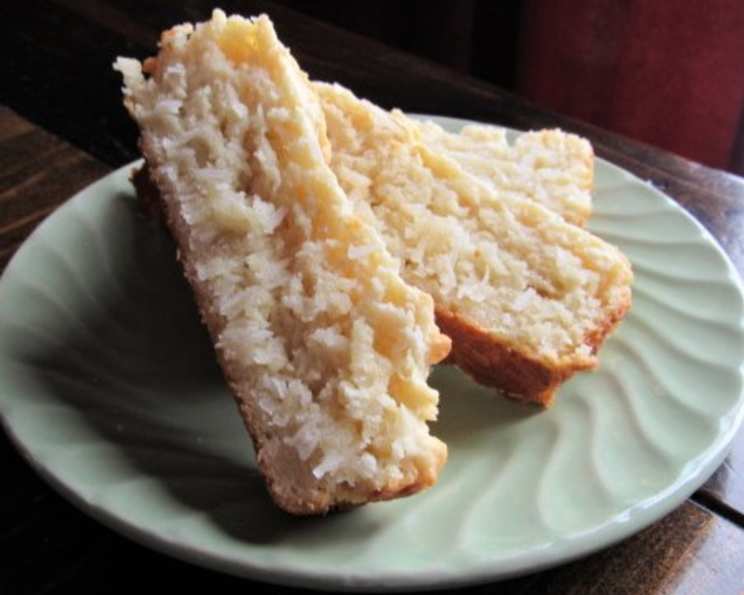
Quick Coconut Bread: A Hug in a Loaf
There are some recipes that, with the first whiff of them baking, transport you back in time. For me, this Quick Coconut Bread is precisely one of those. It’s the scent of pure, unadulterated comfort, reminiscent of sun-drenched afternoons at my grandmother’s house, her kitchen always filled with the sweet, tropical aroma of freshly baked goods. She’d often make a batch of this on a Sunday, and as the golden loaves emerged from the oven, she’d slice off a warm, slightly crisp piece, slather it with butter, and hand it to me, her eyes twinkling. It was, and still is, like putting a straw directly into a coconut – an immediate, delightful indulgence that always felt like a special treat.
Recipe Overview
- Prep Time: 15 minutes
- Cook Time: 40 to 45 minutes
- Total Time: Approximately 1 hour
- Servings: 8-10
- Yields: 2 loaves
- Dietary Type: Can be made dairy-free
Ingredients
Here’s what you’ll need to create this delightful loaf:
- 4 cups all-purpose flour
- 1/3 cup granulated sugar
- 2 teaspoons baking powder
- 1/4 teaspoon salt
- 1 large egg, lightly beaten
- 1 cup coconut milk
- 1/2 cup unsalted butter or margarine, melted
- 1 teaspoon vanilla extract
- 2 cups grated unsweetened coconut
- 1 cup currants (optional) or 1 cup raisins (optional)
A Note on Coconut Milk: For the most authentic and vibrant coconut flavor, using freshly made coconut milk is truly divine. However, if time is of the essence, good quality canned unsweetened coconut milk will work beautifully. Remember, we’re aiming for the rich, creamy liquid, not the watery stuff you might pour directly from a fresh coconut.
Equipment Needed
- Two medium loaf pans (buttered)
- Large mixing bowl
- Whisk
- Sifter or fine-mesh sieve
- Measuring cups and spoons
- Wooden spoon or spatula
- Toothpick or skewer for testing doneness
- Cooling rack
Instructions
Let’s get baking! This recipe is designed for speed and simplicity, ensuring you can have a warm, fragrant loaf ready in no time.
- Preheat Your Oven: Begin by preheating your oven to 350°F (175°C). This ensures a consistent and even bake from the moment the loaves enter the oven.
- Prepare the Dry Ingredients: In a large mixing bowl, sift the flour, sugar, baking powder, and salt. Sifting is a crucial step that helps to aerate the dry ingredients, leading to a lighter, more tender crumb in your bread. Whisk them together gently to ensure they are well combined.
- Combine Wet Ingredients: In a separate, smaller bowl or jug, whisk together the beaten egg, coconut milk, melted butter (or margarine), and vanilla extract. Whisk until everything is smoothly incorporated.
- Incorporate Wet into Dry: Pour the wet ingredients into the bowl with the sifted dry ingredients. Using a wooden spoon or spatula, mix until just combined. Be careful not to overmix at this stage; a few streaks of flour remaining are perfectly fine.
- Add the Coconut and Fruits: Gently fold in the grated unsweetened coconut and the currants or raisins, if you are using them. Mix until they are evenly distributed throughout the batter.
- Shape the Loaves: Lightly flour a clean work surface. Turn out the batter onto the floured board. Knead it very briefly – just a few turns to bring it together into a cohesive dough. Then, shape the dough into two equal loaves.
- Pan It Up: Pat each loaf into your two prepared, buttered medium loaf pans. Ensure they fit snugly but aren’t packed too tightly.
- Bake to Perfection: Place the loaf pans in the preheated oven. Bake for 40 to 45 minutes. The loaves are ready when they are beautifully golden brown on top and a toothpick or skewer inserted into the center comes out clean. If the tops begin to brown too quickly, you can loosely tent them with aluminum foil during the last 10-15 minutes of baking.
- Cool Down: Once baked, remove the loaves from the oven and let them cool in the pans for about 10 minutes before carefully inverting them onto a wire cooling rack to cool completely. This prevents the bottoms from becoming soggy.
Expert Tips & Tricks
- Don’t Overwork the Dough: When mixing the wet and dry ingredients, remember that overmixing can develop the gluten too much, leading to a tough bread. Stop as soon as you no longer see large dry pockets of flour.
- Freshness is Key: While canned coconut milk works well, if you have the time and inclination, making your own coconut milk from fresh coconut meat will elevate the flavor to an extraordinary level.
- Test Your Oven: Ovens can vary in temperature. If you find your bread consistently bakes too quickly or too slowly, consider using an oven thermometer to ensure accuracy.
- The “Toothpick Test”: This is your best friend for determining doneness. It’s simple, effective, and prevents the heartbreak of an undercooked center.
Serving & Storage Suggestions
This Quick Coconut Bread is a delight served warm, slathered with a generous amount of butter. It’s also wonderful on its own, allowing the subtle sweetness of the coconut to shine.
- Serving: Allow the bread to cool slightly before slicing. It’s fantastic for breakfast, as a mid-afternoon snack, or even as a light dessert. For an extra touch of tropical flair, consider a simple lime glaze (a mix of powdered sugar and lime juice) drizzled over the top once completely cool.
- Storage: Store cooled bread in an airtight container or wrap it tightly in plastic wrap at room temperature for up to 3 days. For longer storage, it freezes beautifully. Wrap individual loaves or slices tightly in plastic wrap, then in aluminum foil, and freeze for up to 3 months. Thaw at room temperature or gently reheat in a low oven.
Nutritional Information
(Note: Nutritional values are estimates and can vary based on specific ingredients used.)
| Nutrient | Amount per Serving | % Daily Value |
|---|---|---|
| Calories | 818 kcal | |
| Calories from Fat | 61% | |
| Total Fat | 55.9 g | 85% |
| Saturated Fat | 45.8 g | 229% |
| Cholesterol | 56.9 mg | 18% |
| Sodium | 294.7 mg | 12% |
| Total Carbohydrate | 72.9 g | 24% |
| Dietary Fiber | 11.8 g | 47% |
| Sugars | 15.1 g | 60% |
| Protein | 12.3 g | 24% |
Variations & Substitutions
- Dairy-Free Delight: To make this bread dairy-free, simply use a good quality margarine instead of butter, and ensure your coconut milk is dairy-free.
- Citrus Zest: For a brighter, more fragrant loaf, add the zest of one lime or lemon to the dry ingredients.
- Nutty Addition: Fold in 1/2 cup of chopped toasted almonds or macadamia nuts along with the coconut for an extra layer of texture and flavor.
- Chocolate Chips: For a touch of indulgence, stir in 1/2 cup of mini chocolate chips with the coconut and currants.
FAQs
Q: Can I use shredded sweetened coconut instead of unsweetened?
A: Yes, you can, but you may want to reduce the amount of granulated sugar in the recipe slightly to avoid an overly sweet loaf.
Q: My bread looks a bit pale on top. What can I do?
A: If your oven tends to bake unevenly or your loaves aren’t browning sufficiently, you can loosely tent them with aluminum foil during the last 10-15 minutes of baking, or briefly place them under the broiler (watching very carefully!).
Q: Why is it called “Quick” Coconut Bread?
A: It’s considered quick because it uses basic pantry staples and a straightforward mixing method, avoiding the more time-consuming processes often associated with yeast-leavened breads.
Q: How do I make my own coconut milk?
A: To make fresh coconut milk, you can blend shredded coconut meat with hot water and then strain it through a cheesecloth. The ratio typically involves 1 part coconut to 2 parts water for a rich milk.
Q: Can I make this bread into muffins?
A: Absolutely! The batter can be spooned into greased or lined muffin tins and baked at the same temperature for about 20-25 minutes, or until a toothpick inserted into the center comes out clean.
Final Thoughts
This Quick Coconut Bread is a testament to how simple ingredients can create something truly magical. It’s a recipe that brings warmth, comfort, and a delightful taste of the tropics into any kitchen. Whether you’re a seasoned baker or just starting out, this recipe is incredibly forgiving and always rewarding. I encourage you to give it a try, and if you do, I’d love to hear how it turned out for you. Perhaps serve it with a dollop of whipped cream and a sprinkle of toasted coconut, or simply enjoy it with a good cup of tea. Happy baking!