
Quick & Easy Apricot and Nut Truffles: A Sweet Escape in Minutes
There are certain treats that, for me, evoke the cozy warmth of autumn afternoons and the joyful anticipation of gifting. These apricot and nut truffles are precisely that. I remember the first time I stumbled upon a recipe for something similar; I was looking for a fast, yet impressive, way to use up a surplus of dried apricots and a forgotten bag of toasted nuts. What unfolded in my kitchen was pure magic – a simple process yielding intensely flavorful, delightfully chewy spheres that quickly became a staple for holiday goodie bags and impromptu dessert cravings. They possess a rustic elegance, a testament to how humble ingredients, when treated with a little care, can transform into something truly special.
Recipe Overview
- Prep Time: 15 minutes
- Cook Time: 10 minutes
- Total Time: 25 minutes (plus chilling time)
- Yields: 50 truffles
- Serves: 10
- Dietary Type: Vegetarian
Ingredients
To craft these delightful truffles, you’ll need a few key components that come together harmoniously:
- 397g Sweetened Condensed Milk: This forms the creamy, binding base of our truffle mixture.
- 70g Butter: Unsalted butter adds richness and a smooth texture.
- 35g Hazelnuts, toasted and chopped: The toasting brings out their inherent nutty aroma and flavor.
- 35g Almonds, toasted and chopped: Similar to the hazelnuts, toasting elevates the almonds’ taste.
- 75g Dates, finely chopped: These add natural sweetness and a wonderful chewy texture. Pitting them is essential before chopping.
- 200g Dried Apricots, finely chopped: The star of the show, these provide a vibrant, tangy sweetness.
- 100g Desiccated Coconut: This adds a subtle tropical note and helps with the truffle’s texture.
- 300g Dark Chocolate, melted: For dipping and coating the finished truffles. A good quality dark chocolate will yield the best flavor.
Equipment Needed
While this recipe is wonderfully straightforward, having a few key tools will make the process smoother:
- Medium saucepan
- Whisk or wooden spoon
- Small bowls for chopping and additions
- Baking sheet or tray
- Waxed paper or parchment paper
- Freezer
Instructions
The beauty of these truffles lies in their speed and simplicity. Let’s get started!
- Prepare the Cream Base: In a medium saucepan, combine the sweetened condensed milk and butter. Place the saucepan over low heat. Gently cook, stirring frequently, for about 10 minutes, or until the mixture turns a light golden color. Be patient; this gentle heating caramelizes the milk slightly, adding depth of flavor.
- Incorporate the Dry Ingredients: Once the mixture has reached the desired color, remove the saucepan from the heat. Now, add the toasted and chopped hazelnuts, toasted and chopped almonds, finely chopped dates, finely chopped dried apricots, and desiccated coconut to the warm cream mixture.
- Mix Thoroughly: Using a spoon or spatula, mix all the ingredients together thoroughly until everything is well combined and there are no dry pockets. The mixture will be thick and slightly sticky.
- Cool and Shape: Allow the mixture to cool slightly. This is important as working with it when it’s too hot can be difficult and potentially burn your fingers. Once it’s cool enough to handle, begin to shape it into small, equal-sized balls. Aim for a size that is comfortable to eat in one or two bites, roughly about 1 inch in diameter.
- Chill the Truffles: Place the shaped balls onto a baking sheet lined with waxed paper. Transfer the baking sheet to the freezer and chill the balls until firm. This usually takes about 20-30 minutes, but you want them solid enough to handle for dipping.
- Dip in Chocolate: While the truffle balls are chilling, melt your dark chocolate. You can do this in a double boiler or carefully in the microwave in 30-second intervals, stirring between each, until smooth. Once the truffle balls are firm, carefully dip each chilled truffle into the melted chocolate, ensuring it is fully coated.
- Set the Truffles: As you dip each truffle, place it back onto the tray lined with waxed paper. This allows the excess chocolate to drip off and sets the coating.
- Refrigerate Until Firm: Once all the truffles have been dipped, refrigerate the tray until the chocolate is firm. This will take approximately 30 minutes to an hour in the refrigerator.
Optional Decoration
For an extra touch of elegance, consider this optional step:
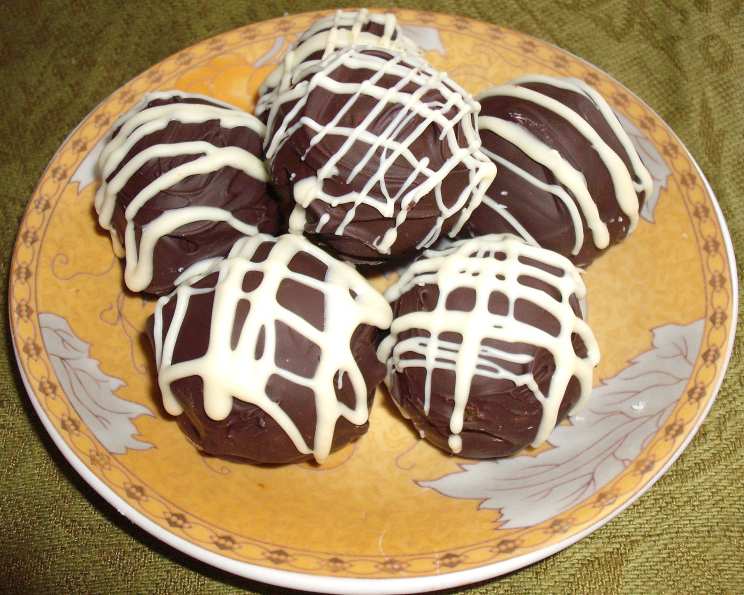
- Decorate with Swirl Patterns: If you have any melted white chocolate (or another contrasting color), you can pipe decorative swirl patterns onto the set dark chocolate coating. Use a fine nozzle or a cleverly folded paper cone for this delicate task.
Expert Tips & Tricks
- Toast Your Nuts Properly: Don’t skip toasting the nuts! It unlocks a depth of flavor that is crucial to these truffles. Spread them in a single layer on a baking sheet and toast in a preheated oven at 350°F (175°C) for 8-10 minutes, or until fragrant and lightly browned. Watch them carefully to prevent burning.
- Finely Chopping is Key: For the dates and apricots, a food processor can be your best friend for achieving a fine chop. This ensures a smooth texture within the truffle and prevents large, uneven chunks.
- Achieve the Perfect Chocolate Coating: Tempering your chocolate will give it a beautiful sheen and a satisfying snap, but for a quick truffle, simply melting it carefully will suffice. Ensure your bowls and utensils are completely dry, as even a drop of water can cause melted chocolate to seize.
- Work in Batches for Dipping: If you’re making a large quantity, you might want to dip the truffles in batches to ensure the truffle balls remain cold and firm while you’re working.
Serving & Storage Suggestions
These apricot and nut truffles are best served slightly chilled or at cool room temperature. They make a wonderful addition to a dessert platter, a thoughtful homemade gift, or a delightful accompaniment to coffee or tea.
To store, place the finished truffles in an airtight plastic container. It’s best to separate layers of truffles with wax paper to prevent them from sticking together. Store them in the refrigerator for up to two weeks. They also freeze beautifully if you want to make a larger batch ahead of time.
Nutritional Information
Here’s an estimated nutritional breakdown for these delicious truffles:
| Nutrient | Amount per Serving | % Daily Value |
|---|---|---|
| Calories | 517 kcal | |
| Calories from Fat | 316 kcal | |
| Total Fat | 35.2 g | 54% |
| Saturated Fat | 20.2 g | 101% |
| Cholesterol | 28.5 mg | 9% |
| Sodium | 140.1 mg | 5% |
| Total Carbohydrate | 56.3 g | 18% |
| Dietary Fiber | 9.1 g | 36% |
| Sugars | 42 g | 168% |
| Protein | 10.3 g | 20% |
Note: Nutritional values are approximate and can vary based on specific ingredients used.
Variations & Substitutions
The beauty of these truffles is their adaptability. Here are a few ideas:
- Other Dried Fruits: Experiment with other dried fruits like cranberries, figs, or cherries. Ensure they are finely chopped for the best texture.
- Nut-Free Option: For a nut-free version, you can substitute the nuts with toasted sunflower seeds or pepitas.
- Add Spices: A pinch of cinnamon, cardamom, or nutmeg can add an extra layer of warmth and complexity.
- Coconut Variations: Use shredded coconut instead of desiccated for a chewier texture, or even toasted coconut flakes for a more pronounced flavor.
- White Chocolate Coating: If you prefer a sweeter treat, a white chocolate coating can be used instead of dark chocolate.
FAQs
Q: Can I use fresh fruit instead of dried apricots?
A: No, this recipe relies on the concentrated flavor and lower moisture content of dried apricots. Fresh fruit would alter the texture and consistency significantly.
Q: How can I get a smoother coating of chocolate on my truffles?
A: Ensure your melted chocolate is at the right temperature – not too hot, not too cool. Using a fork or a dipping tool can help you get an even coating, and letting excess chocolate drip off before placing on the wax paper is crucial.
Q: My truffle mixture is too sticky to roll. What should I do?
A: If the mixture is too sticky to handle, you can chill it in the refrigerator for another 15-20 minutes. You can also lightly oil your hands with a neutral oil to prevent sticking.
Q: How long do these truffles last in the refrigerator?
A: Stored properly in an airtight container with wax paper, these truffles should last for up to two weeks in the refrigerator.
Q: Can I omit the butter?
A: While the butter adds richness and helps with the texture, you could potentially try using a coconut oil or vegan butter substitute if needed, though it may slightly alter the final consistency.
Final Thoughts
These apricot and nut truffles are a testament to the idea that delicious, impressive treats don’t need to be complicated. They are a perfect example of how a few simple, wholesome ingredients can be transformed into something truly delightful, requiring minimal effort but delivering maximum reward. They are a little ray of sunshine in edible form, perfect for sharing a moment of sweetness with loved ones, or simply for treating yourself. I encourage you to give them a try; I have a feeling they’ll quickly become a cherished recipe in your own repertoire. Enjoy the simple pleasure of creating something wonderful from scratch!