
Quick & Easy Veggie Chili: A Hug in a Bowl
I still remember the first time my husband, a devoted carnivore, confessed to truly enjoying a vegetarian meal. It wasn’t some elaborate, gourmet creation, but this incredibly satisfying, deeply flavorful chili. We were in the early days of our dating, navigating the delicious complexities of blending our culinary worlds. I, a lifelong vegetarian, craved something hearty and robust, while he sought that familiar, comforting depth often found in meat-based dishes. This chili, born out of that very desire, became our go-to, a testament to how delicious and fulfilling plant-based eating can be, proving that a meat-eater’s palate can be just as happy.
Recipe Overview
- Prep Time: 15 minutes
- Cook Time: 30 minutes
- Total Time: 45 minutes
- Servings: 8
- Yield: Approximately 8 cups
- Dietary Type: Vegetarian (easily adaptable to Vegan and Gluten-Free)
Ingredients
This chili truly shines with its straightforward list of readily available ingredients, promising a flavorful experience without a fuss.
- 1 cup onion, finely chopped
- 1 medium bell pepper, diced (any color will do, but red or green add a nice visual appeal)
- 2-3 garlic cloves, minced
- 1 (12 ounce) can spicy hot V8 juice (this adds a fantastic base of flavor and a hint of zest)
- 1 (15 ounce) can tomato puree
- 1 (14.5 ounce) can diced tomatoes with green chilies (undrained, for extra liquid and flavor)
- 1 (15 ounce) can black beans with lime juice, drained and rinsed
- 16 ounces Morningstar Farms Meal Starters Grillers recipe crumbles (these plant-based crumbles are key to achieving that satisfying texture)
- Ground pepper, to taste
- 1 tablespoon soy sauce (optional, for an umami boost) OR 1 tablespoon Worcestershire sauce (optional, for added depth – check for vegetarian/vegan versions if needed)
- Additional cumin (optional), to taste
- Chili powder, as desired (optional, for extra heat and complexity)
- Shredded sharp cheddar cheese (optional, for topping)
- Cooked elbow macaroni (optional, for serving)
Equipment Needed
While this recipe is designed for simplicity, a few standard kitchen tools will make the process smooth:
- A large pot or Dutch oven (for sautéing and simmering)
- A cutting board and knife (for chopping vegetables)
- A measuring cup and spoons
- A stirring spoon or spatula
Instructions
The beauty of this chili lies in its rapid assembly and delicious results. Follow these simple steps for a comforting meal:
- Begin by heating a tablespoon of olive or canola oil (not listed as an ingredient but implied for sautéing) in the bottom of a Dutch oven or large pot over medium heat. Add the chopped onion and sauté until it begins to soften, which should take about 3-5 minutes.
- Next, add the minced garlic and diced bell pepper to the pot. Cook for another 2-3 minutes, stirring frequently, until the garlic is fragrant and the bell pepper starts to soften slightly. Be careful not to burn the garlic.
- Stir in the Morningstar Farms Meal Starters Grillers recipe crumbles. If you’re using the soy sauce or Worcestershire sauce, sprinkle it over the crumbles now. Cook over medium heat, stirring occasionally, until the crumbles are warmed through and slightly browned, about 5-7 minutes. This step helps develop their texture and flavor.
- Now, it’s time to bring all the other ingredients together. Add the spicy hot V8 juice, tomato puree, diced tomatoes with green chilies (remember to include the liquid from the can!), and the drained and rinsed black beans to the pot.
- If you desire a deeper, more complex flavor, this is where you can also add your optional cumin and chili powder. Season with ground pepper to your liking.
- Stir everything well to combine. Bring the chili to a gentle simmer.
- Once simmering, reduce the heat to low, cover the pot, and let it cook for at least 20 minutes. This allows the flavors to meld beautifully. You can let it simmer longer if you have the time; the longer it simmers, the richer the flavor will become. Stir occasionally to prevent sticking.
- Taste and adjust seasonings as needed. You might want more pepper, a pinch more cumin, or a touch more chili powder for heat.
- To serve, ladle the hot chili over cooked elbow macaroni, if using.
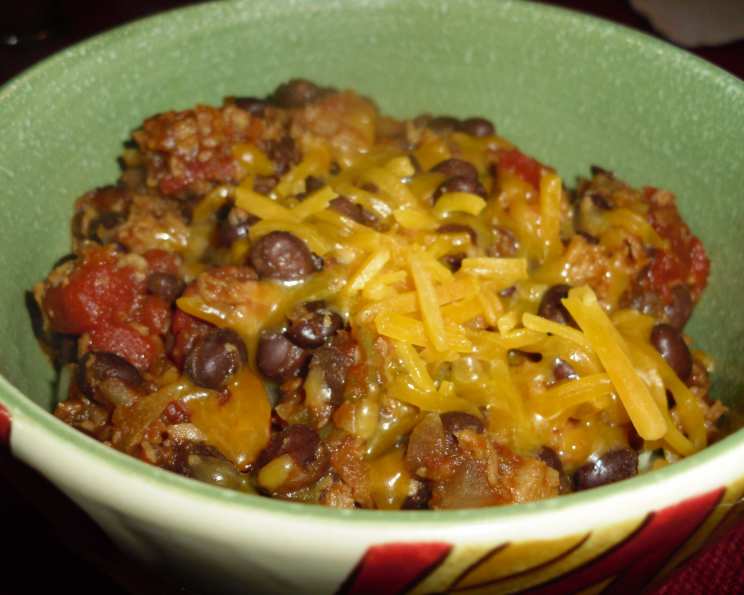
- Top with shredded sharp cheddar cheese, if desired, allowing it to melt into the warm chili.
Expert Tips & Tricks
For a truly exceptional bowl of this veggie chili, consider these chef-inspired enhancements:
- Bloom Your Spices: If you’re adding cumin or chili powder, consider toasting them lightly in the hot oil before adding the onions. This “blooming” process awakens their aromatic compounds, intensifying their flavor.
- The Power of Patience: While this recipe is “quick,” allowing the chili to simmer for even an extra 15-30 minutes on low heat will significantly deepen the flavors. The vegetables will become more tender, and the liquids will meld into a richer sauce.
- Texture Tweaks: For an even heartier chili, you can add other vegetables like corn (canned or frozen, added in the last 10 minutes of simmering) or diced zucchini.
- Spice Level Control: The “spicy hot” V8 is a good starting point, but if you prefer more heat, don’t hesitate to add a pinch of cayenne pepper or a finely minced jalapeño along with the bell pepper. Conversely, if it’s too spicy, a touch more tomato puree or a dollop of sour cream (or vegan alternative) when serving can temper the heat.
- Make-Ahead Magic: Chili is a dish that often tastes even better the next day. Prepare it fully, let it cool completely, and store it in an airtight container in the refrigerator. Gently reheat on the stovetop or in the microwave.
Serving & Storage Suggestions
This chili is wonderfully versatile when it comes to serving. It’s a star on its own, but pairing it with cooked elbow macaroni offers a comforting, classic combination. For a more substantial meal, serve it alongside a simple green salad or crusty bread for dipping.
Storage:
- Room Temperature: Let the chili cool completely before storing. It can be left at room temperature for no more than two hours.
- Refrigerator: Store leftover chili in an airtight container in the refrigerator for up to 3-4 days.
- Freezer: This chili freezes beautifully. Portion it into freezer-safe containers or bags for up to 3 months. Thaw overnight in the refrigerator before reheating.
- Reheating: Reheat gently on the stovetop over low heat, stirring occasionally, until heated through. You can also reheat in the microwave in 1-2 minute intervals, stirring in between.
Nutritional Information
Here’s an estimated breakdown of the nutritional content per serving (without optional toppings):
| Nutrient | Amount per Serving | % Daily Value |
|---|---|---|
| Calories | 140 kcal | 7% |
| Total Fat | 4.5 g | 6% |
| Saturated Fat | 0.5 g | 3% |
| Cholesterol | 0 mg | 0% |
| Sodium | 650 mg | 28% |
| Total Carbohydrate | 18 g | 7% |
| Dietary Fiber | 4 g | 14% |
| Sugars | 7 g | 14% |
| Protein | 7 g | 14% |
Note: Nutritional values are estimates and can vary based on specific ingredient brands and optional additions.
Variations & Substitutions
The beauty of a good chili recipe is its adaptability. Feel free to experiment with these ideas:
- Veganize It: Ensure your Worcestershire sauce (if using) is vegan. For a dairy-free topping, use a sprinkle of nutritional yeast or a vegan shredded cheese alternative.
- Gluten-Free: This recipe is naturally gluten-free if you omit the optional soy sauce and ensure your Worcestershire sauce is gluten-free. Serve it over gluten-free pasta or rice, or enjoy it on its own.
- Bean Bonanza: Don’t be afraid to swap out the black beans for other favorites like kidney beans, pinto beans, or cannellini beans. A mix of beans adds great texture and visual appeal.
- Corn Addition: Add a cup of frozen or canned corn kernels during the last 10 minutes of simmering for a touch of sweetness and texture.
- Smoky Kick: For a smoky depth, add a teaspoon of smoked paprika along with the other spices.
FAQs (Frequently Asked Questions)
Q: Can I make this chili ahead of time?
A: Absolutely! Chili is one of those dishes that often improves in flavor when made ahead, allowing the ingredients to meld together. Store it in an airtight container in the refrigerator for up to 3-4 days.
Q: How can I make this chili spicier?
A: To increase the heat, you can add a pinch of cayenne pepper, a dash of hot sauce, or a finely minced jalapeño pepper (seeds removed for less heat, left in for more) when you add the bell peppers and garlic.
Q: What can I serve with this veggie chili?
A: This chili is delicious served over cooked elbow macaroni, rice, or quinoa. It’s also great with a dollop of sour cream or plain Greek yogurt (or vegan alternatives), shredded cheese, chopped cilantro, or avocado.
Q: Is this chili suitable for a vegan diet?
A: Yes, this chili is easily made vegan by ensuring any Worcestershire sauce used is vegan and by omitting the optional cheddar cheese topping or substituting with a vegan cheese.
Q: How long does the chili need to simmer?
A: The recipe calls for a minimum of 20 minutes of simmering, but for deeper flavor development, you can let it simmer on low heat for up to an hour, stirring occasionally.
Final Thoughts
This Quick & Easy Veggie Chili is more than just a recipe; it’s a testament to the joy of simple, satisfying cooking. It’s proof that you don’t need meat to create a deeply flavorful and comforting meal that will please everyone at the table. It’s the kind of dish that warms you from the inside out, perfect for a chilly evening or a busy weeknight. So, gather your ingredients, stir with intention, and savor every spoonful. I encourage you to give this recipe a try, and please, share your experiences and any delicious twists you discover!