
Quick Refrigerator Dill Pickles: A Taste of Summer, Anytime
There’s something profoundly satisfying about a crisp, tangy dill pickle, isn’t there? For me, it’s a sensory time machine, instantly transporting me back to humid summer days spent at my grandparents’ farm. My grandmother, a woman whose kitchen was the heart of her home, had an uncanny ability to preserve the season’s bounty. While she had elaborate canning rituals for many things, her quick refrigerator dill pickles were her secret weapon for instant gratification. The scent of fresh dill and garlic wafting from her fridge was an invitation to a simple, unadulterated joy, a taste of pure summer that we could enjoy well into the cooler months.
Recipe Overview
- Prep Time: 10 minutes
- Cook Time: 5 minutes
- Total Time: 168 hours 10 minutes (minimum 1 week for pickling)
- Servings: N/A (Yields 2 quarts)
- Yield: 2 quarts
- Dietary Type: Vegan, Gluten-Free, Dairy-Free
Ingredients
This recipe is wonderfully straightforward, relying on fresh, vibrant ingredients to create that iconic pickle flavor. The beauty lies in its simplicity, allowing the natural goodness of the cucumbers and aromatics to shine.
- 10-12 pickling cucumbers or 10-12 Persian cucumbers: The key to a good pickle is the cucumber itself. Look for firm, unwaxed varieties. Pickling cucumbers, also known as Kirby cucumbers, are ideal for their bumpy skin and dense flesh, which holds up well to brining. Persian cucumbers are a fantastic alternative if Kirby pickles are unavailable; they are smaller and seedless, offering a delightful crunch.
- 12 garlic cloves, peeled: Don’t skimp on the garlic! These add a pungent depth that mellows beautifully during the pickling process.
- 8 large sprigs fresh dill: Fresh dill is non-negotiable here. Its feathery fronds infuse the brine with that unmistakable dill pickle aroma and flavor.
- 4 bay leaves: Bay leaves lend a subtle, almost herbaceous complexity to the brine, a classic addition to many pickling recipes.
- 1 tablespoon coriander seed: These tiny seeds offer a bright, citrusy, and slightly floral note that complements the other spices.
- 1 teaspoon black peppercorns: For a gentle warmth and a hint of spiciness.
- 1 teaspoon mustard seeds: These add a subtle tang and a touch of pungent heat.
- 1/4 teaspoon crushed red pepper flakes (optional): If you enjoy a little kick, a pinch of red pepper flakes will provide a welcome warmth without overpowering the other flavors.
- 3 cups water: The base of our brine.
- 2 tablespoons kosher salt: Kosher salt is preferred for its clean flavor and lack of anti-caking agents. It dissolves well and imparts a pure saltiness.
- 2 tablespoons granulated sugar: A touch of sugar balances the acidity of the brine and enhances the overall flavor profile.
Equipment Needed
The magic of these refrigerator pickles lies in their accessibility. You likely have most, if not all, of this equipment already in your kitchen:
- Two clean 1-quart glass jars with tight-fitting lids: Ensure these are thoroughly washed and sterilized to prevent any unwanted bacterial growth.
- Medium saucepan: For preparing the brine.
- Cutting board and sharp knife: For preparing the cucumbers and garlic.
Instructions
Crafting these quick dill pickles is more about assembly and patience than complex culinary techniques. It’s a process that anyone can master, yielding incredibly rewarding results.
-
Prepare the Cucumbers: Begin by thoroughly cleaning the cucumbers under cool running water. Gently scrub away any dirt or debris. Next, snip off the ends of each cucumber. This may seem like a small step, but it helps to release enzymes that can make pickles soft. Then, cut the cucumbers into your desired shapes. For a classic deli-style pickle, cut them into spears. If you prefer quick-to-grab pickle chips for sandwiches, cut them into thin rounds. Aim for a consistent thickness so they pickle evenly.
-
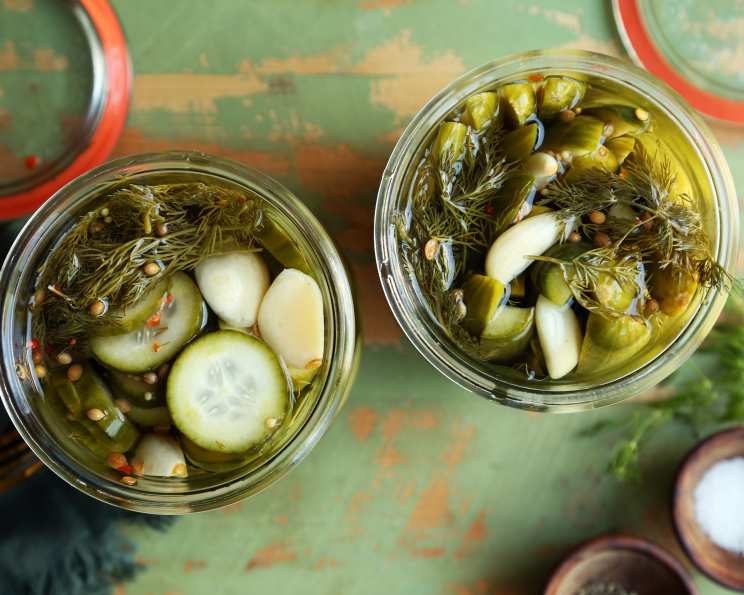
Jar the Aromatics: Carefully stuff the prepared cucumbers into your two clean 1-quart glass jars. Pack them in snugly, but avoid crushing them. Now, it’s time to add the flavor powerhouses. Divide the peeled garlic cloves, fresh dill sprigs, bay leaves, coriander seeds, black peppercorns, mustard seeds, and crushed red pepper flakes (if you’re using them) between both jars. Distribute them evenly to ensure each jar receives a good dose of aromatic goodness.
-
Prepare the Brine: In a medium saucepan, combine the 3 cups of water, 2 tablespoons of kosher salt, and 2 tablespoons of granulated sugar. Place the saucepan over moderate heat. Bring the mixture to a simmer, stirring occasionally, until both the sugar and salt have completely dissolved. This usually takes just a few minutes.
-
Cool the Brine: Once the salt and sugar are dissolved, remove the saucepan from the heat. It is crucial to let the brine cool down to room temperature before pouring it over the cucumbers. Pouring hot brine can cook the cucumbers and lead to a mushy texture, which is the opposite of what we want. This cooling process also allows the flavors of the brine to meld beautifully.
-
Combine and Seal: Once the brine has cooled to room temperature, carefully pour the mixture between both jars, filling them up to the very top. Ensure the cucumbers and aromatics are fully submerged. Seal the jars tightly with their lids.
-
Refrigerate and Wait: Now comes the most important part: patience! Place the sealed jars in the refrigerator. These are refrigerator pickles, meaning they don’t undergo the high-heat canning process. They require time in the cold to develop their characteristic tangy flavor and crisp texture. You can enjoy these pickles after at least 1 week of refrigeration. For a more intense flavor, you can let them pickle for up to 1 month. The longer they sit, the more the flavors will deepen.
Expert Tips & Tricks
- Cucumber Selection is Key: For the crispiest pickles, always opt for fresh, firm, unwaxed cucumbers. If you can’t find pickling cucumbers, Kirby or Persian cucumbers are excellent substitutes. Avoid large slicing cucumbers, as they tend to be more watery and can result in a softer pickle.
- Don’t Skip the Dill Flowers: If you can find fresh dill with the flower heads intact, use them! They are packed with an even more concentrated dill flavor and look beautiful in the jar.
- Sterilize Your Jars: While this recipe doesn’t involve traditional canning, it’s still good practice to sterilize your jars. You can do this by washing them thoroughly in hot, soapy water and then either running them through a dishwasher’s sanitizing cycle or boiling them in water for 10 minutes. Ensure they are completely dry before filling.
- Taste and Adjust: After about 4-5 days, you can open a jar to taste a pickle. While they are best after a week, this is a good opportunity to see how the flavor is developing. If you find you prefer them saltier or tangier, you can adjust the brine in future batches by slightly altering the salt or vinegar ratios (though this recipe is perfectly balanced as is).
- Get Creative with Spices: While the provided spice blend is classic and highly effective, feel free to experiment. A few slices of fresh jalapeño can add a nice heat, a pinch of turmeric can lend a vibrant yellow hue, or a few star anise pods can introduce a subtle licorice note.
Serving & Storage Suggestions
These refrigerator dill pickles are incredibly versatile. They are the perfect accompaniment to sandwiches, burgers, and wraps, adding a burst of acidity and crunch. Chop them up and add them to potato salad, tuna salad, or deviled eggs for an extra layer of flavor. Serve them alongside a charcuterie board or simply enjoy them straight from the jar as a refreshing snack.
Storage: These pickles are designed for refrigerator storage. Keep them sealed tightly in the refrigerator at all times. They will maintain their best quality and flavor for up to 1 month. Because they are not processed in a high-heat canning method, they are susceptible to spoilage at room temperature and should not be left out for extended periods.
Nutritional Information
While precise nutritional values can vary based on the exact size of cucumbers and ingredients used, here’s an estimated breakdown per serving, assuming a portion of the yield is consumed and considering the brine.
| Nutrient | Amount per Serving | % Daily Value |
|---|---|---|
| Calories | 32 | 2% |
| Total Fat | 0.2 g | 0% |
| Saturated Fat | 0 g | 0% |
| Cholesterol | 0 mg | 0% |
| Sodium | 702 mg | 30% |
| Total Carbohydrate | 7.6 g | 3% |
| Dietary Fiber | 0.9 g | 3% |
| Sugars | 3.8 g | 8% |
| Protein | 1.2 g | 2% |
Note: Percent Daily Values are based on a 2,000 calorie diet. Your daily values may be higher or lower depending on your calorie needs.
Variations & Substitutions
The beauty of this simple recipe is its adaptability.
- Spicy Kick: For a more pronounced heat, increase the crushed red pepper flakes to 1/2 teaspoon or even add a sliced fresh chili pepper like a serrano or jalapeño to the jar.
- Garlic Lovers’ Delight: Double the garlic for an intensely garlicky pickle.
- Vinegar Tang: If you prefer a tangier pickle, you can substitute 1 cup of the water in the brine with 1 cup of white vinegar or apple cider vinegar. Bring to a simmer as usual. This will speed up the pickling process slightly and add a sharper flavor.
- Herbaceous Infusions: Experiment with other fresh herbs like sprigs of fresh dill with mustard seeds, tarragon, or even a few sprigs of parsley.
FAQs
Q: Can I use regular cucumbers from the grocery store?
A: While pickling or Persian cucumbers are ideal for their texture, you can use regular cucumbers if they are fresh, firm, and unwaxed. Just be aware they might result in a slightly softer pickle.
Q: Why are my pickles soft?
A: Soft pickles are usually the result of using old or poor-quality cucumbers, not snipping the ends, or using hot brine. Ensuring fresh ingredients and a completely cooled brine is crucial for crispness.
Q: How long do these pickles really last in the fridge?
A: While they are best within the first month, they can remain safe to eat for longer, though their texture and flavor may degrade over time. Always inspect for any signs of spoilage before consuming.
Q: Can I can these pickles for shelf stability?
A: No, this recipe is specifically for quick refrigerator pickles and is not intended for traditional water bath canning for shelf stability. They must be stored in the refrigerator.
Q: My brine looks cloudy, is that normal?
A: A slight cloudiness in the brine is normal and often a sign of the fermentation process beginning, especially with fresh dill. If you see any signs of mold or a slimy texture, however, the pickles should be discarded.
Final Thoughts
There’s a profound satisfaction in creating something delicious and preserving it for enjoyment. These quick refrigerator dill pickles embody that sentiment perfectly. They are a testament to how simple ingredients, combined with a little time and care, can yield truly spectacular results. So, the next time a craving for that quintessential pickle crunch strikes, or you find yourself with an abundance of fresh cucumbers, reach for this recipe. Gather your ingredients, follow these straightforward steps, and in just a week, you’ll be rewarded with a jar of homemade pickles that are sure to impress. They are the perfect crisp counterpoint to a rich sandwich, a vibrant addition to a summer salad, or simply a delightful snack to brighten any meal. Happy pickling!