
Quick Sesame Sourdough Bread: A Weeknight Wonder
There’s something magical about the aroma of freshly baked bread filling the kitchen, a scent that always transports me back to my grandmother’s sun-drenched home. While she championed the slow, methodical art of traditional sourdough, I’ve always been fascinated by how we can adapt and accelerate cherished recipes to fit our modern lives. This Quick Sesame Sourdough Bread is a testament to that philosophy. It captures the essence of that beloved tang and hearty chew, but with a clever shortcut that brings artisanal bread within reach even on the busiest of evenings. The addition of whole wheat flour and nutty sesame seeds transforms a simple loaf into something truly special, offering a delightful crisp crust and a wonderfully soft interior.
Recipe Overview
- Prep Time: 2 hours (or 15 minutes active)
- Cook Time: 35 minutes
- Total Time: 3 hours 35 minutes
- Servings: 8
- Yield: 1 big loaf
- Dietary Type: Vegetarian
Ingredients
This recipe beautifully balances the earthy notes of whole wheat with the delicate fragrance of sesame.
- 2 cups bread flour
- 1 cup whole wheat flour
- 2 ¾ teaspoons yeast (one package)
- 1 teaspoon salt
- 2 teaspoons sugar
- 3 tablespoons butter, softened
- 1 tablespoon oil
- ½ cup plain yogurt (or ½ cup sour cream)
- 3 teaspoons lemon juice
- ⅔ cup water
- ¼ cup sesame seeds (black, white, or a mix)
Equipment Needed
- Bread machine (optional, but recommended for ease)
- Large mixing bowl
- Floured surface
- Baking sheet or pizza stone
- Oven
- Cooling rack
Instructions
The beauty of this recipe lies in its adaptability. While a bread machine simplifies the dough-making process, a little manual effort still yields a fantastic result.
-
Prepare the Dough: If using a bread machine, add all ingredients to the bread pan in the order recommended by your machine’s manual. Select the dough cycle. If mixing by hand, combine the bread flour, whole wheat flour, yeast, salt, and sugar in a large mixing bowl. In a separate small bowl, whisk together the softened butter, oil, plain yogurt (or sour cream), lemon juice, and water. Add the wet ingredients to the dry ingredients and mix until a shaggy dough forms. Turn the dough out onto a lightly floured surface and knead for about 8-10 minutes, or until it becomes smooth and elastic. Place the dough in a greased bowl, cover with a damp cloth or plastic wrap, and let it rise in a warm place for approximately 2 hours, or until doubled in size.
-
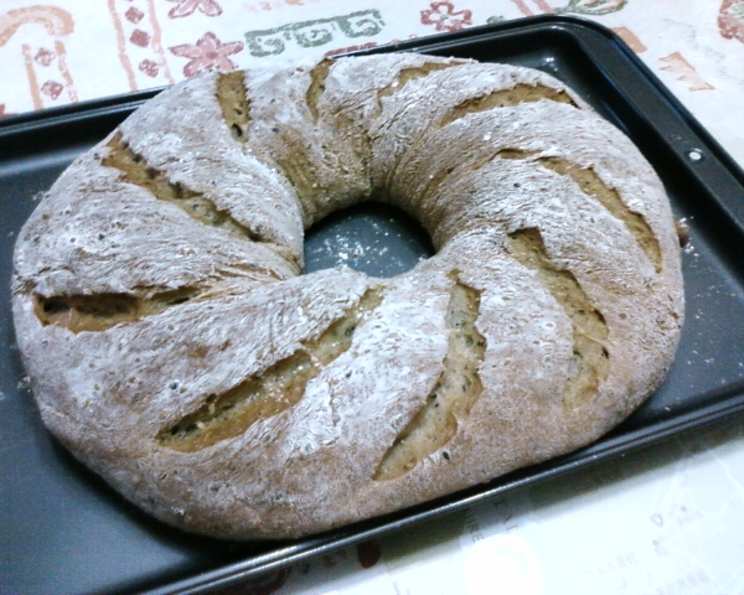
Shape the Dough: Once the dough has risen, gently punch it down to release the air. Turn the dough out onto a well-floured surface. The shaping of this bread is where you can get creative! The original method suggests forming a ring. To do this, you can flatten the ball of dough slightly. Generously flour the center of the dough and create a hole through it. You’ll want ample flour on the bottom center of the dough as well to prevent sticking. Insert both hands through the hole, lift the dough, and gently enlarge the ring into a doughnut shape, allowing gravity to help you. Alternatively, you can simply lengthen the dough into an oval or oblong shape and connect the ends to form a ring. Ensure you use enough flour throughout this process to prevent sticking.
-
Second Rise: Place the shaped dough ring onto a lightly floured baking sheet or a preheated pizza stone. Cover it loosely with a damp cloth or plastic wrap. Allow the dough to rise again in a warm place for 20-30 minutes, or until it has visibly doubled in size.
-
Score and Bake: Preheat your oven to 375°F (190°C). Once the dough has completed its second rise, it’s time to add your personal touch. Using a sharp knife or a lame, cut slashes into the top of the bread. You can create simple parallel lines, a crosshatch pattern, or even a more intricate design – have fun with it!
-
Bake the Bread: Carefully place the baking sheet or pizza stone with the bread into the preheated oven. Bake for 35 minutes. Keep a close eye on the bread, especially during the last few minutes of baking. The crust can darken very quickly, and you want to achieve a beautiful golden-brown hue without burning. The bread is done when it sounds hollow when tapped on the bottom and has an internal temperature of around 190-200°F (88-93°C).
-
Cool: Once baked, transfer the bread to a wire cooling rack immediately. Allow it to cool completely before slicing and serving. This step is crucial for the bread’s texture to set properly.
Expert Tips & Tricks
- Flour Power: Don’t be afraid to use plenty of flour when shaping the dough. A sticky dough is difficult to handle and can lead to a dense loaf. The flour will bake off.
- Warm Rise: For a quicker second rise, place the covered dough in a slightly warmed oven (turned off, but with the oven light on) or near a sunny window.
- Oven Temperature Variation: Ovens can vary significantly. If your bread tends to brown too quickly, consider reducing the temperature slightly during the last 10-15 minutes of baking or loosely tenting it with aluminum foil.
- Sesame Seed Toasting: For an even more intense nutty flavor, you can lightly toast the sesame seeds in a dry skillet over medium heat for a few minutes until fragrant before adding them to the dough. Be careful not to burn them.
Serving & Storage Suggestions
This Quick Sesame Sourdough Bread is incredibly versatile. It’s magnificent served warm, sliced thick, with a generous slathering of good quality butter. It makes an exceptional base for avocado toast, a hearty sandwich, or simply enjoyed on its own with a cup of soup.
Leftovers can be stored in a bread bag or airtight container at room temperature for up to 3 days. For longer storage, you can slice the cooled bread and freeze it in a freezer-safe bag for up to 3 months. To reheat, you can toast individual slices or warm a whole loaf gently in a low oven.
Nutritional Information
| Nutrient | Amount per Serving | % Daily Value |
|---|---|---|
| Calories | 262 kcal | 13% |
| Total Fat | 9.5 g | 12% |
| Saturated Fat | 3.7 g | 18% |
| Cholesterol | 13.4 mg | 4% |
| Sodium | 338.5 mg | 14% |
| Total Carbohydrate | 38.2 g | 12% |
| Dietary Fiber | 3.4 g | 13% |
| Sugars | 2 g | 7% |
| Protein | 7.2 g | 14% |
(Note: Nutritional values are approximate and can vary based on specific ingredients used.)
Variations & Substitutions
- Herb Infusion: Add dried herbs like rosemary or thyme to the dough for an aromatic twist.
- Seed Medley: Experiment with other seeds like poppy seeds, flax seeds, or sunflower seeds alongside the sesame seeds.
- Spicy Kick: For a touch of heat, mix in a pinch of red pepper flakes into the dough.
- Dairy-Free Option: Substitute the yogurt or sour cream with a dairy-free alternative like unsweetened coconut yogurt or cashew cream. You can also use a plant-based butter or oil for the fat.
FAQs (Frequently Asked Questions)
Q: Can I make this bread without a bread machine?
A: Absolutely! While the bread machine simplifies the process, you can easily make the dough by hand following the kneading and rising instructions in step 1.
Q: My dough didn’t rise much. What could be the reason?
A: Yeast can be sensitive. Ensure your yeast is fresh and that the water used was lukewarm, not hot, as excessive heat can kill the yeast. A cool environment can also slow down rising.
Q: How do I know if the bread is fully baked?
A: Besides the visual cues of a golden-brown crust, the bread should sound hollow when you tap its bottom, and an instant-read thermometer inserted into the center should register between 190-200°F (88-93°C).
Q: Can I add cheese to this bread?
A: Yes! You could fold in some shredded cheese like cheddar or Gruyère during the last few minutes of kneading or shaping.
Q: Is the lemon juice essential?
A: The lemon juice acts as a mild acidifier, which can help to enhance the tangy flavor characteristic of sourdough and improve the texture of the dough. It’s a subtle but important component.
Final Thoughts
This Quick Sesame Sourdough Bread is more than just a recipe; it’s an invitation to savor the simple pleasures of homemade bread without the commitment of lengthy fermentation. It’s proof that you can achieve delightful results with a little ingenuity and a few pantry staples. I encourage you to give this recipe a try, perhaps on a weekend morning when you have a bit more time, or on a weeknight when you crave that comforting aroma. Share your creations, your favorite serving suggestions, and any personal twists you’ve added. Happy baking!