
Quinoa Crepes: A Nutty, Gluten-Free Delight
There’s something magical about the humble crepe. For me, it conjures up lazy Sunday mornings, the scent of warm butter and sweet fillings wafting from the kitchen, and the sheer joy of a perfectly folded, delicately thin pancake. My grandmother, a formidable baker with a knack for turning simple ingredients into edible art, used to make the most ethereal crepes. They were a weekend ritual, a treat that signaled a pause in the everyday hustle. When I began exploring gluten-free baking, I was determined to recreate that same sense of comfort and indulgence. It was a quest to capture that light, airy texture without wheat, and after much experimentation, the Quinoa Crepe emerged as a revelation. The subtle nuttiness of quinoa flour, perfectly complemented by the earthiness of brown rice flour, creates a gluten-free canvas that’s both satisfying and surprisingly delicate.
Recipe Overview
- Prep Time: 15 minutes
- Cook Time: 30 minutes
- Total Time: 45 minutes
- Servings: 6
- Yield: 12 6-inch crepes
- Dietary Type: Gluten-Free
Ingredients
To craft these delightful gluten-free crepes, you’ll need a thoughtful blend of flours and a few pantry staples.
- For the Crepes:
- 1⁄3 cup quinoa flour
- 1⁄4 cup brown rice flour
- 2 teaspoons cornstarch
- 2 large eggs
- 2 egg whites
- 1 cup almond milk
Equipment Needed
A few essential tools will make the crepe-making process smooth and enjoyable.
- Medium mixing bowl
- Whisk
- Six-inch non-stick skillet (or a well-seasoned crepe pan)
- Spatula
- Plate
- Aluminum foil
Instructions
Crafting these Quinoa Crepes is a straightforward process, rewarding you with a delicious gluten-free treat.
- Begin by combining the dry ingredients. In a medium-sized mixing bowl, thoroughly whisk together the quinoa flour, brown rice flour, and cornstarch. Ensure there are no clumps, creating a uniform base for your batter.
- Introduce the wet ingredients to the bowl. Add the 2 large eggs, the 2 egg whites, and the 1 cup of almond milk to the dry mixture.
- Whisk everything together until the batter is perfectly smooth. This is crucial for achieving delicate crepes. Continue whisking until you have a lump-free consistency. A few minutes of diligent whisking will pay off.
- Prepare your skillet for cooking. Heat a lightly oiled six-inch skillet over medium-high heat. The oil should be just enough to coat the bottom of the pan and prevent sticking.
- Pour the batter and spread it evenly. Pour two tablespoons of batter into the center of the heated skillet. Immediately tilt the pan in a circular motion to ensure the batter spreads thinly and evenly across the entire bottom surface. This is key to getting that classic thin crepe texture.
- Cook the first side. Let the crepe cook until the edges begin to curl. This usually takes about 30 to 45 seconds. Keep a close eye on it, as gluten-free batters can cook quickly.
- Flip and cook the second side. Gently flip the crepe using a spatula. Cook the other side for an additional 30 seconds.
- Remove and keep warm. Once the second side is cooked, remove the crepe from the pan.
- Plate and cover. Place the hot crepe onto a plate and cover it loosely with aluminum foil. This will keep the crepes warm and pliable while you cook the rest.
- Repeat until all batter is used. Repeat steps 5 through 9 with the remaining batter, re-oiling the pan lightly between crepes if necessary to maintain even cooking and prevent sticking. You should yield approximately 12 6-inch crepes from this batter.
Expert Tips & Tricks
To elevate your Quinoa Crepe game, consider these insights from my years in the kitchen. A well-rested batter is a happy batter, so if you have the time, letting the batter sit for 15-30 minutes at room temperature can allow the flours to fully hydrate, potentially leading to a more tender crepe. When whisking, a few deliberate minutes can make a difference; aim for a consistency similar to heavy cream – not too thick, not too thin. The key to perfectly thin crepes lies in the rapid tilting of the pan immediately after pouring the batter. Practice this motion a few times before you even start cooking the first crepe to get a feel for it. If your first crepe isn’t perfect, don’t despair! It’s often a “tester” crepe, allowing you to adjust the heat or the amount of batter.
Serving & Storage Suggestions
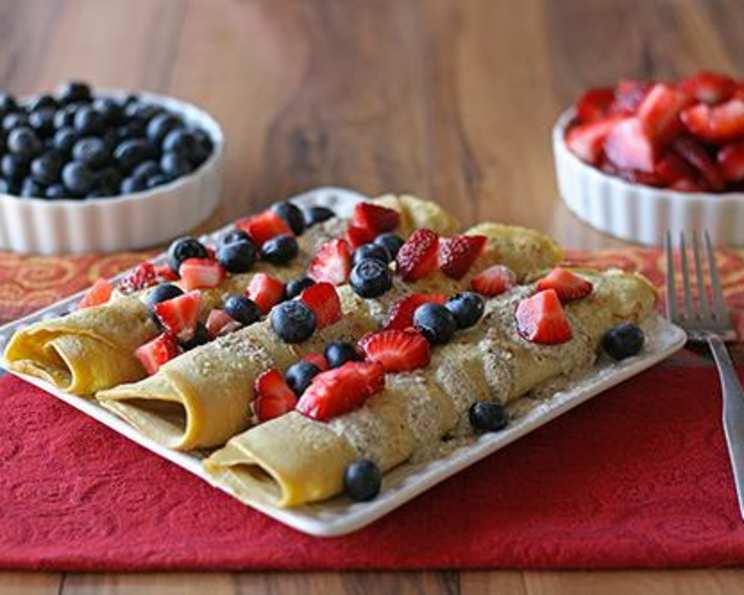
These Quinoa Crepes are wonderfully versatile. Serve them warm, folded or rolled, with your favorite toppings. Think fresh berries, a dollop of Greek yogurt or dairy-free alternative, a drizzle of honey or maple syrup, or even a sprinkle of toasted nuts. They are particularly delightful when paired with a light fruit salad or a rich, creamy sauce.
For storage, allow the crepes to cool completely before stacking them between layers of parchment paper or wax paper to prevent them from sticking. Store them in an airtight container in the refrigerator for up to 3 days. To reheat, you can gently warm them in a dry skillet over low heat or microwave them for a few seconds at a time until pliable. They can also be frozen, layered as described above, in a freezer-safe bag or container for up to 2 months. Thaw them overnight in the refrigerator before reheating.
Nutritional Information
Here’s an estimated breakdown of the nutritional content per crepe (this can vary based on specific ingredients and portion sizes):
| Nutrient | Amount per Serving | % Daily Value |
|---|---|---|
| Calories | 50 kcal | 3% |
| Total Fat | 1.5 g | 2% |
| Saturated Fat | 0.3 g | 2% |
| Cholesterol | 12 mg | 4% |
| Sodium | 20 mg | 1% |
| Total Carbohydrate | 6 g | 2% |
| Dietary Fiber | 0.5 g | 2% |
| Sugars | 0.5 g | 1% |
| Protein | 3 g | 6% |
Note: Nutritional information is an estimate and may vary.
Variations & Substitutions
While this recipe is designed for delicious gluten-free results, feel free to explore variations. For a dairy-free option, ensure your almond milk is unsweetened, or substitute it with other plant-based milks like soy milk, oat milk, or coconut milk. If you don’t have almond milk, any unsweetened milk alternative will work. You can also experiment with different gluten-free flour blends; just ensure the proportions remain similar to maintain the correct batter consistency. For a slightly sweeter crepe, you could add a teaspoon of sugar or a liquid sweetener to the batter, though I prefer to let the toppings provide the sweetness.
FAQs
Q: Why are my gluten-free crepes sticking to the pan?
A: Ensure your pan is adequately heated and lightly oiled before adding the batter. Also, make sure you’re using a good quality non-stick skillet.
Q: Can I make the batter ahead of time?
A: Yes, the batter can be made and stored in the refrigerator for up to 24 hours. Whisk it well before using, as some separation may occur.
Q: My crepes are too thick, what did I do wrong?
A: You might have used too much batter in the pan, or the pan might not have been hot enough for the batter to spread thinly. Try reducing the amount of batter poured or increasing the heat slightly.
Q: What kind of oil should I use for the pan?
A: A neutral-flavored oil with a medium-high smoke point is best, such as canola oil, grapeseed oil, or a light olive oil.
Q: Can I make these crepes without eggs?
A: While this recipe relies on eggs for structure and richness, you could experiment with an egg substitute like a flax egg (1 tablespoon flaxseed meal + 3 tablespoons water, let sit for 5 minutes) or a commercial egg replacer, though the texture may vary.
Final Thoughts
There’s a quiet satisfaction that comes with mastering a gluten-free version of a beloved classic. These Quinoa Crepes are a testament to that, offering all the delicate charm of traditional crepes with a wholesome, gluten-free twist. They’re a wonderful base for any filling or topping you can dream up, perfect for a leisurely brunch, a light dessert, or even a savory meal if you adjust the flavorings. I encourage you to try them, to experiment with your own favorite accompaniments, and to savor the simple pleasure they bring. They pair beautifully with a fresh fruit compote, a dollop of whipped coconut cream, or a vibrant drizzle of berry coulis. Happy cooking!