
The Art of the Rainbow Ribbon Mold: A Culinary Canvas of Color and Flavor
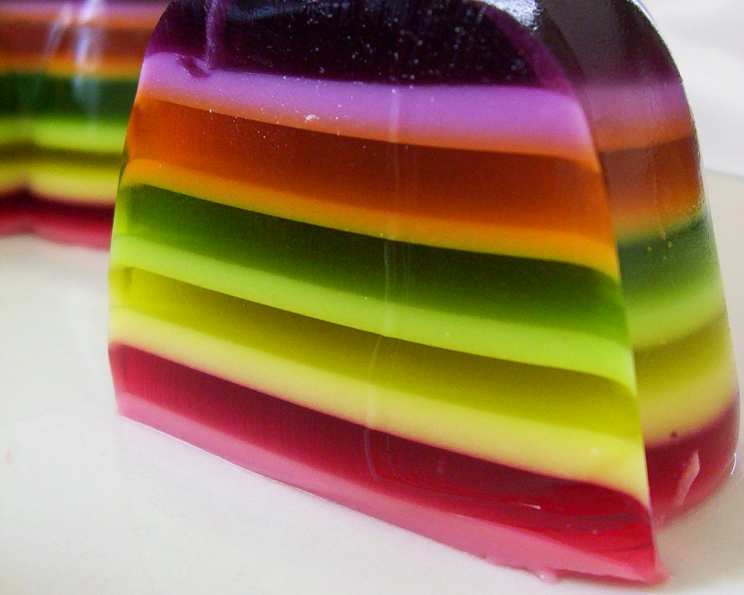
The moment a perfectly unmolded, vibrant Rainbow Ribbon Mold is revealed, there’s an immediate hush of admiration, followed by delighted gasps. I remember the first time I encountered one, a kaleidoscope of jewel-toned layers glistening under the party lights. It wasn’t just a dessert; it was edible art, a testament to patience and a celebration of flavor. That initial encounter sparked a passion for gelatin artistry, pushing me to master the delicate dance of temperatures and setting times, transforming simple ingredients into a show-stopping centerpiece that always brings smiles.
Recipe Overview
- Prep Time: Approximately 30 minutes, spread over several intervals
- Cook Time: N/A (Chill Time is crucial)
- Total Time: At least 3 hours chilling time (recommended overnight)
- Servings: 16 slices
- Yield: 1 mold (approximately 8-cup capacity)
- Dietary Type: Adaptable (Base recipe is vegetarian; can be made vegan with specific substitutions)
Ingredients
This recipe calls for a symphony of flavors and colors, brought to life with readily available ingredients. The magic lies in the careful layering and the subtle richness that the coconut milk imparts.
- 6 ¼ cups boiling water, divided
- 5 packages (85 g each) Jell-O gelatin, your favorite flavors (suggested: lemon, lime, orange, strawberry, raspberry, grape)
- 1 cup coconut milk, divided
Note on Flavors: The beauty of the Rainbow Ribbon Mold is its adaptability. Feel free to choose any combination of your favorite Jell-O flavors. For a truly vibrant spectrum, aim for a variety of colors. If you’re aiming for specific color themes (like team colors or holiday palettes), select your flavors accordingly. For a pristine white layer, you can substitute one package of Jell-O with plain Knox gelatin dissolved in the appropriate amount of boiling water and combined with coconut milk.
Equipment Needed
To bring this masterpiece to life, you’ll want a few key tools:
- An 8-cup ring mold (a Bundt pan or a decorative Jell-O mold works beautifully) or a 9×13 inch pan if you prefer a simpler presentation.
- Several small bowls for dissolving each gelatin package.
- A whisk for ensuring the gelatin is completely dissolved.
- A measuring cup for dividing liquids.
- A non-stick cooking spray or a light coating of vegetable oil for greasing the mold.
- A level surface in your refrigerator or freezer to ensure even setting.
- A towel for wiping the mold.
- A serving plate with a lip or a larger platter for unmolding.
- A large container or clean sink for the warm water bath.
Instructions
This dessert is a labor of love, requiring patience and a methodical approach. The key is to build layers gradually, allowing each to set just enough before adding the next. This process ensures those stunning, well-defined stripes when you finally reveal your creation.
-
Prepare the Mold: Begin by lightly spraying your chosen mold with non-stick cooking spray or coating it very lightly with vegetable oil. This is crucial for easy unmolding later.
-
Dissolve the First Gelatin Layer: In a small bowl, whisk together one package of Jell-O gelatin with 1 ¼ cups of boiling water. Continue whisking vigorously for at least 2 minutes, ensuring the gelatin is completely dissolved. This step is vital to prevent a grainy texture.
-
Pour and Chill the First Layer: Pour ¾ cup of the dissolved gelatin into your prepared mold. Place the mold on a level surface in the refrigerator for approximately 15 minutes, or until the gelatin is set but not firm. A good test is to gently touch the surface; it should feel slightly sticky and leave a faint imprint, but not be solid. To speed up this process, you can place the mold on a level surface in your freezer, but keep a close eye on it to prevent it from freezing solid.
-
Prepare the Creamy Layer: While the first layer chills, take the remaining dissolved gelatin from the first bowl and refrigerate it for about 5 minutes, or until it has slightly thickened to the consistency of unbeaten egg whites. Gradually stir in 3 tablespoons of the coconut milk into this slightly thickened gelatin, stirring until it is well blended and smooth.
-
Spoon the Creamy Layer: Once the clear gelatin layer in the mold is set but not firm, carefully spoon the prepared creamy mixture over it.
-
Chill the Creamy Layer: Return the mold to the refrigerator for another approximately 15 minutes, or until this creamy layer is set but not firm. Again, it should stick to your finger when touched. As before, you can use the freezer to expedite this setting, ensuring it remains on a level surface.
-
Repeat the Process: Now, you will repeat steps 2 through 6 with each of your remaining Jell-O flavors. For each new flavor, you will dissolve one package of Jell-O with 1 ¼ cups of boiling water, then pour a portion of the clear gelatin and follow it with a creamy layer made by combining a portion of the remaining clear gelatin with 3 tablespoons of coconut milk. Continue this alternating pattern of clear and creamy layers.
-
Crucial Temperature Note: It is very important to cool dissolved gelatin to room temperature before pouring it into the mold for the clear layers. If the gelatin is too warm, the layers will not be well-defined, though the dessert will still taste delicious. For the creamy layers, the thickened gelatin should be cool but still pourable.
-
Final Chill: Once you have completed all your alternating clear and creamy layers (aiming for a total of 10 alternating layers is ideal for a beautiful ribbon effect), refrigerate the entire mold for at least 2 hours, or until the entire mold is firm. For the best results and easiest unmolding, it’s recommended to let it set overnight.
-
Unmolding the Masterpiece:
- To unmold, prepare a warm water bath. Fill a larger container or a clean sink with warm water, being careful that it is not too hot, as this can melt the gelatin.
- Lightly rub a few drops of water onto your serving plate. This acts as a lubricant and will help you adjust the mold’s position on the plate if needed.
- Select a serving plate with a lip that is just a little bigger than the diameter of your mold, or a larger platter that is at least 2-3 inches wider than the mold. Remember, the gelatin will spread slightly when unmolded and cut.
- Dip the mold (briefly!) into the warm water, ensuring the water comes up to just below the rim of the mold. Hold it there for just a few seconds.
- Carefully wipe off any condensation with a towel. Gently check the edges to see if they are loose. If they are not yet releasing, repeat the dip for just a few seconds.
- Place your serving plate upside down on top of the mold.
- Quickly and confidently flip the mold and plate over together.
- Gently lift the mold off the gelatin. If it doesn’t release immediately, a second brief dip in the warm water should do the trick.
-
Serving: Cut the Rainbow Ribbon Mold into 16 slices to serve.
Expert Tips & Tricks
- Consistency is Key: The critical factor for distinct layers is the setting stage of each layer. You want it to be set enough to support the next layer but not so firm that the layers don’t adhere. The “sticks to your finger” test is your best guide.
- Freezer Speed-Up: While the freezer can speed things up, be vigilant. Over-frozen gelatin can become brittle and may not unmold as smoothly. A few minutes in the freezer is usually sufficient to accelerate the setting process without compromising the texture.
- Even Cooling: Ensure your dissolved gelatin is at a similar temperature when layering. If one layer is significantly warmer than the next, it can cause them to blend or slide.
- Mold Preparation: Don’t skimp on the mold preparation. A thorough, yet light, coating of non-stick spray or oil is paramount for a clean release.
- Practice Makes Perfect: Don’t be discouraged if your first attempt isn’t flawless. Gelatin molding is a technique that improves with practice. Each attempt will teach you more about the nuances of setting times and temperatures.
Serving & Storage Suggestions
The Rainbow Ribbon Mold is best served chilled. Its vibrant colors make it a natural showstopper, so a simple, elegant serving plate is all you need.
Storage: Leftover gelatin can be stored in the refrigerator. If the gelatin has been cut, it’s best to store the remaining slices in an airtight container. It will typically keep well in the refrigerator for 3-4 days. Avoid leaving it at room temperature for extended periods, as gelatin can begin to soften and break down. It is not recommended for freezing, as the texture can become compromised upon thawing.
Nutritional Information
Here is an approximate nutritional breakdown for a slice of Rainbow Ribbon Mold, based on standard Jell-O flavors and coconut milk.
| Nutrient | Amount per Serving | % Daily Value |
|---|---|---|
| Calories | 167.2 kcal | N/A |
| Calories from Fat | N/A | N/A |
| Total Fat | 3 g | 4% |
| Saturated Fat | 2.9 g | 14% |
| Cholesterol | 0 mg | 0% |
| Sodium | 133.2 mg | 5% |
| Total Carbohydrate | 33.9 g | 11% |
| Dietary Fiber | 0 g | 0% |
| Sugars | 32.4 g | 129% |
| Protein | 2.3 g | 4% |
Note: Nutritional values are estimates and can vary based on the specific brands and flavors of Jell-O and type of coconut milk used.
Variations & Substitutions
- Vegan Rainbow Mold: To make this recipe vegan, replace the Jell-O gelatin with a vegan agar-agar based alternative. You will need to follow the package instructions for dissolving and setting, which may vary. For the white layers, a blend of vegan white food coloring and agar-agar, or a plant-based milk with agar-agar, can be used.
- Dairy-Free Options: While coconut milk provides a lovely richness, other unsweetened plant-based milks like almond or soy milk can also be used for the creamy layers.
- Savory Gelatin: For a unique appetizer, experiment with savory gelatin mixes, using vegetable broth instead of water and a touch of cream or sour cream for the “creamy” layers.
- Flavored Water: Infuse your boiling water with herbs or citrus zest before dissolving the gelatin for an added layer of flavor complexity.
FAQs
Q: Why is it important for the layers to be “set but not firm”?
A: This stage ensures that each new layer will adhere properly to the one below it, preventing the layers from sliding apart once the mold is unmolded.
Q: What happens if I let a layer set too long before adding the next?
A: If a layer becomes too firm, the subsequent layer may not bond well, leading to separation when unmolded. You might need to gently score the surface of the over-set layer to help the next layer adhere.
Q: Can I use a different size mold?
A: Yes, but you will need to adjust the quantities of ingredients accordingly. A larger mold will require more gelatin and water to achieve the same number of layers, while a smaller mold might require less.
Q: How can I ensure my mold unmolds cleanly every time?
A: Proper greasing of the mold and the brief warm water bath are the most critical steps. Ensure you don’t over-soak the mold, as this can cause the gelatin to melt.
Q: My layers aren’t as defined as I’d like. What did I do wrong?
A: This often comes down to temperature control. Ensure the dissolved gelatin is cooled sufficiently before pouring, and that the previous layer is properly set but not too firm. Even slight variations can affect the clarity of the layers.
Final Thoughts
Creating a Rainbow Ribbon Mold is a rewarding journey from simple ingredients to a breathtaking centerpiece. It’s a dessert that invites you to play with color and flavor, to embrace a bit of kitchen chemistry, and to deliver a truly memorable experience for your guests. So gather your favorite Jell-O flavors, find a level spot in your refrigerator, and prepare to dazzle. The satisfaction of seeing those vibrant stripes emerge as you unmold your creation is truly unparalleled. I encourage you to try this recipe, share your colorful creations, and savor the joy it brings.