
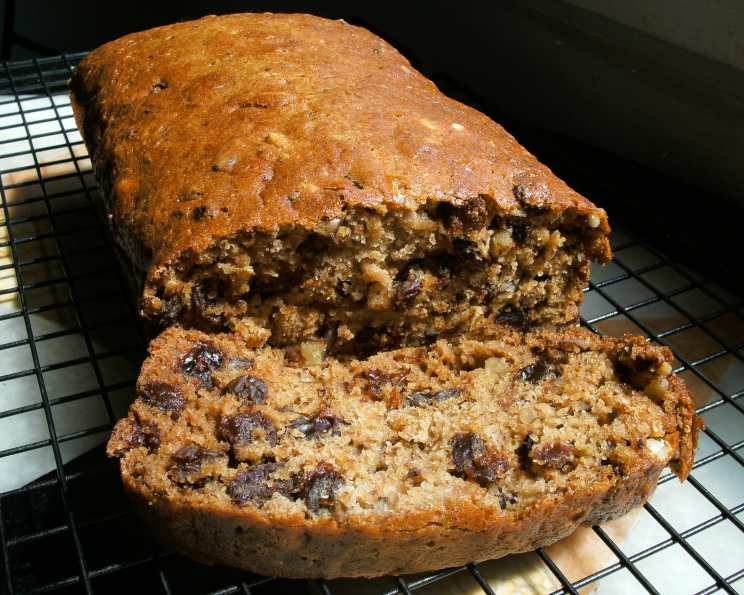
The Comforting Embrace of Homemade Raisin Bread
There’s a particular warmth that emanates from a baking loaf of raisin bread, a scent that instantly transports me back to my grandmother’s kitchen. The air, thick with the sweet perfume of cinnamon and caramelized raisins, was always the first sign that something special was about to emerge from her oven. I remember perched on a stool, my small hands dusted with flour, eagerly watching as she’d whisk together the ingredients, the anticipation building with each stir. This bread wasn’t just a treat; it was a tangible expression of love, a hug in edible form that made even the chilliest days feel cozy and bright.
Recipe Overview
- Prep Time: 15 minutes
- Cook Time: 1 hour
- Total Time: 1 hour 15 minutes
- Servings: 24
- Yield: 2 loaves
- Dietary Type: Not specified
Ingredients
This recipe is refreshingly straightforward, relying on pantry staples to create a wonderfully moist and flavorful raisin bread.
- 2 cups raisins
- 2 cups water
- 2 teaspoons baking soda
- 2 large eggs
- 1 1/2 cups sugar
- 2 teaspoons cinnamon
- 1 dash salt
- 1 1/2 teaspoons vanilla extract
- 3 cups all-purpose flour
- 1 cup chopped nuts (walnuts or pecans are lovely choices)
Equipment Needed
While this recipe is accessible, a few key pieces of equipment will make the process smoother:
- Medium saucepan
- Whisk
- Large mixing bowl
- Two well-greased and floured loaf pans (approximately 9×5 inches)
- Measuring cups and spoons
- Oven
- Wire cooling rack
Instructions
The beauty of this raisin bread lies in its simplicity, with a unique method that ensures a tender crumb.
- In a medium saucepan, combine the raisins, water, and baking soda. Place this mixture over medium-high heat and bring it to a boil.
- As the mixture begins to foam and bubble, immediately remove it from the heat. This reaction with the baking soda is crucial for the texture of the bread. Set this raisin mixture aside to cool slightly.
- In a large mixing bowl, whisk together the eggs, sugar, salt, cinnamon, and vanilla extract until well combined and slightly pale. This creates a fragrant base for our batter.
- Gently fold in the flour and the chopped nuts into the egg mixture. Be careful not to overmix; just incorporate until no dry streaks of flour remain.
- Now, carefully add the prepared raisin mixture to the bowl with the flour and egg mixture. Stir until everything is just combined and a thick batter forms.
- Pour the batter evenly into your two well-greased and floured loaf pans. Ensure the batter is distributed as evenly as possible for consistent baking.
- Bake in a preheated oven at 350°F (175°C) for approximately 1 hour. Keep a close eye on the loaves as baking times can vary slightly depending on your oven. If you are baking a half batch, as I’ve noted, it took about 35 minutes in my oven.
- Once baked, carefully remove the loaves from their pans and place them on a wire cooling rack to cool completely. This prevents the bottoms from becoming soggy.
Expert Tips & Tricks
To elevate your raisin bread experience from good to truly exceptional, consider these seasoned chef insights:
- Raisin Bloom: The initial boiling of the raisins with baking soda not only helps them plump up beautifully but also contributes to the bread’s unique, moist texture and slightly sweet, cooked-raisin flavor. Don’t skip this step!
- Nut Toasting: For an extra layer of flavor and crunch, lightly toast your chopped nuts in a dry skillet over medium heat for a few minutes until fragrant before adding them to the batter.
- Testing for Doneness: Besides the visual cues, the best way to check if your raisin bread is done is to insert a wooden skewer or toothpick into the center of the loaf. If it comes out clean, your bread is ready. If there’s wet batter, continue baking for a few more minutes and test again.
- Pan Preparation is Key: Properly greasing and flouring your loaf pans is essential to prevent the bread from sticking. You can also use parchment paper liners for extra assurance.
- Cooling Patience: While the aroma will be tantalizing, resist the urge to slice into the bread while it’s still hot. Allowing it to cool completely on a wire rack ensures the crumb structure sets properly, making it easier to slice and enjoy its full flavor.
Serving & Storage Suggestions
This delightful raisin bread is wonderfully versatile.
Serving:
Serve slices warm or at room temperature. It’s fantastic on its own, toasted lightly, or even as a base for a delicate cream cheese spread or a dollop of sweet butter. For a truly comforting experience, enjoy a slice with a warm cup of tea or coffee.
Storage:
Once completely cooled, wrap the raisin bread tightly in plastic wrap or store it in an airtight container at room temperature. It should stay fresh for 2-3 days. For longer storage, you can slice the cooled bread and freeze it in individual portions or as a whole loaf. Thaw at room temperature or reheat gently in a toaster oven or oven.
Nutritional Information
While specific dietary information can vary based on ingredient brands and precise measurements, here’s an approximate nutritional breakdown per serving (assuming 24 servings).
| Nutrient | Amount per Serving | % Daily Value |
|---|---|---|
| Calories | 183 kcal | |
| Calories from Fat | ||
| Total Fat | 4 g | 5% |
| Saturated Fat | 1 g | 5% |
| Cholesterol | 18 mg | 6% |
| Sodium | 158 mg | 7% |
| Total Carbohydrate | 36 g | 12% |
| Dietary Fiber | 1 g | 4% |
| Sugars | 21 g | |
| Protein | 3 g | 6% |
Note: The Daily Value percentages are based on a 2,000 calorie diet. Individual results may vary.
Variations & Substitutions
While this recipe is a classic for a reason, feel free to experiment with these ideas:
- Spice It Up: Add a pinch of nutmeg or allspice along with the cinnamon for a deeper, more complex spice profile.
- Citrus Zest: A tablespoon or two of finely grated orange or lemon zest can add a bright, refreshing note that complements the sweetness of the raisins.
- Different Dried Fruits: While raisins are traditional, you could experiment with dried cranberries, currants, or even finely chopped dried apricots for a twist.
- Gluten-Free: For a gluten-free version, you would need to experiment with a blend of gluten-free flours. The texture and liquid absorption might change, so adjustments to the flour quantity would likely be necessary.
- Nut-Free: Omit the nuts entirely for a nut-free version. The bread will still be delicious and moist.
FAQs (Frequently Asked Questions)
Q: Why do I need to boil the raisins with baking soda?
A: Boiling the raisins with baking soda helps them plump up and softens their texture, while also contributing to the unique moistness and flavor of the final bread.
Q: Can I use dried cranberries instead of raisins?
A: Absolutely! Dried cranberries will provide a wonderfully tart contrast to the sweetness of the bread. You might want to adjust the sugar slightly depending on your preference.
Q: My bread rose unevenly, what went wrong?
A: Uneven rising can sometimes happen if the batter wasn’t distributed evenly in the pans or if one side of the oven gets hotter than the other. Rotating the pans halfway through baking can help ensure even cooking.
Q: How can I make this bread less sweet?
A: You can try reducing the amount of sugar by 1/4 to 1/2 cup. The sweetness also comes from the raisins, so consider that as well.
Q: Can I make muffins from this batter?
A: Yes, you can likely adapt this batter for muffins. Fill muffin liners about two-thirds full and reduce the baking time significantly, checking for doneness around 20-25 minutes.
Final Thoughts
There’s a profound satisfaction that comes from creating something so comforting and delicious from scratch. This raisin bread is more than just a recipe; it’s an invitation to slow down, engage your senses, and fill your home with an aroma that speaks of warmth and care. Whether you’re sharing it with loved ones or savoring a quiet moment with a slice yourself, I encourage you to bake this raisin bread and experience the simple joy it brings. Don’t hesitate to share your creations and any delightful variations you discover – happy baking!