
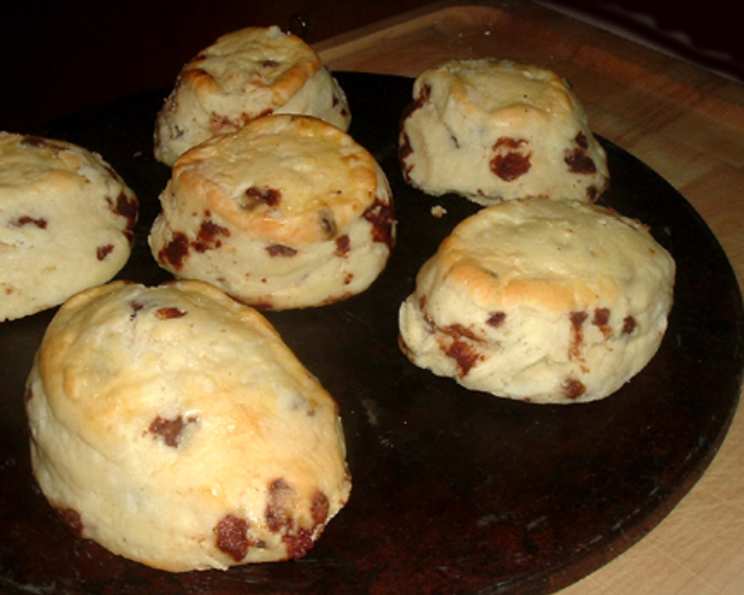
The Humble Charm of Raisin Scones: A Taste of Timeless Comfort
There’s something undeniably grounding about a perfectly baked scone, especially one studded with plump, sweet raisins. I remember, years ago, a dear friend named Janette shared her recipe with me. It wasn’t just a list of ingredients; it was a warm invitation into her kitchen, a testament to the simple pleasures of home baking. The aroma that filled my kitchen the first time I made them – a delicate blend of buttery pastry and the subtle sweetness of raisins – transported me back to childhood mornings, where the greatest luxury was a warm treat shared with loved ones. These aren’t fussy pastries; they are honest, comforting, and deeply satisfying, a true representation of Janette’s generous spirit.
Recipe Overview
- Prep Time: 20 minutes
- Cook Time: 12-15 minutes
- Total Time: 35-40 minutes
- Servings: 8 scones
- Yield: 8 scones
- Dietary Type: Vegetarian
Ingredients
At the heart of any good scone lies quality ingredients, treated with respect. For Janette’s classic raisin scones, we’ll need:
- 2 cups all-purpose flour
- 1/4 teaspoon baking soda
- 1 1/2 teaspoons cream of tartar
- 1 pinch salt
- 8 tablespoons chilled unsalted butter, cut into small pieces. The chill is crucial here, ensuring it stays in distinct pieces during mixing, which creates those desirable pockets of flakiness.
- 1/2 cup raisins (optional, but highly recommended for that classic sweetness and chewy texture). You can plump these up beforehand by soaking them in a little warm water or milk for about 10-15 minutes, then draining well.
- 1 egg, beaten. This adds richness and helps bind the dough.
- 1/2 cup buttermilk (approximately). Buttermilk contributes tenderness and a slight tang that beautifully balances the sweetness. You might need a little more or less, so have it ready.
For the Glaze:
- 1 egg yolk
- 1 tablespoon lukewarm water
Equipment Needed
While these scones are straightforward, a few key tools will make the process smoother:
- Large mixing bowl
- Pastry blender or your fingertips (for cutting in the butter)
- Measuring cups and spoons
- Whisk or fork (for the glaze)
- Bench scraper or sharp knife
- Baking sheets
- Pastry brush
- Wire cooling rack
Instructions
Let’s bring these delightful scones to life, step by step. Precision and gentle handling are your best allies here.
- Begin by preheating your oven to 425 degrees Fahrenheit (220 degrees Celsius). This high initial heat is key for a good rise.
- In your large mixing bowl, combine the all-purpose flour, baking soda, cream of tartar, and salt. Whisk them together thoroughly to ensure the leavening agents and salt are evenly distributed throughout the flour. This is the foundation of your scone’s lift.
- Now, it’s time to cut in the chilled unsalted butter. Using a pastry blender or your fingertips, work the butter into the dry ingredients until the mixture resembles coarse crumbs. If you’re using your hands, be quick and gentle to avoid warming the butter too much. For an even finer texture, grating frozen butter directly into the flour mixture is an excellent technique, as mentioned by many experienced bakers.
- Add the raisins (if using) to the crumb mixture. Then, pour in the beaten egg and begin adding the buttermilk, a little at a time. Mix with a fork or your hands until a soft dough begins to form. You want just enough buttermilk to bring the ingredients together into a cohesive, but not sticky, mass. Be mindful not to over-mix at this stage; we’re aiming for a tender crumb, not a tough one.
- Turn the dough out onto a lightly floured board. Knead very lightly, just enough to combine the ingredients. The goal is to handle the dough gently, preserving the air pockets that will contribute to a light and airy scone. Over-kneading will develop the gluten too much and result in tough scones. Think of it as coaxing the ingredients to become friends, not forcing them into submission.
- Gently roll out the dough to a thickness of ½ inch. Ensure an even thickness across the entire surface for uniform baking.
- Using a sharp knife or a bench scraper, cut the dough into 8 thick wedges. A clean, decisive cut is best.
- Carefully place the scones on 2 greased baking sheets, leaving about a ½ inch space between each scone. This allows for proper air circulation and even browning.
- Prepare the glaze: in a small bowl, whisk together the egg yolk and lukewarm water. Using a pastry brush, gently brush the tops of each scone with this glaze. Be diligent to avoid letting any glaze drip down the sides and onto the baking sheet. Any drips can cause the scones to stick and prevent them from rising properly.
- Bake in the preheated oven for 12 to 15 minutes, or until the scones are beautifully golden brown and have risen nicely. The exact baking time will depend on your oven, so keep a close eye on them. You can test for doneness by gently pressing the side of a scone; it should spring back slightly.
Expert Tips & Tricks
To elevate your scone-making, consider these professional insights:
- Cold is King: The secret to flaky scones is keeping your butter as cold as possible. If your kitchen is warm, pop your flour mixture back in the fridge for 10-15 minutes after cutting in the butter but before adding the liquids.
- Don’t Overwork the Dough: This is the most common pitfall. Treat the dough with the utmost delicacy. Gentle mixing and minimal kneading are paramount for a tender crumb.
- Buttermilk Substitute: If you don’t have buttermilk, you can make your own by adding 1 tablespoon of lemon juice or white vinegar to 1 cup of milk, letting it sit for 5-10 minutes until it slightly curdles.
- Raisin Prep: For an extra burst of flavor and moisture, soak your raisins in orange juice or a little rum before adding them to the dough. Ensure they are well-drained.
- Consistent Baking: If your oven has hot spots, rotating the baking sheets halfway through the baking time can ensure even browning.
Serving & Storage Suggestions
These raisin scones are best served warm, straight from the oven. They are delightful on their own, but for an extra treat, serve them with a dollop of clotted cream or whipped cream and a spoonful of your favorite jam. A cup of tea or coffee makes the perfect accompaniment for a truly comforting experience.
Once cooled, leftover scones can be stored in an airtight container at room temperature for 1-2 days. For longer storage, you can freeze them. Wrap them individually in plastic wrap, then place them in a freezer-safe bag or container. They will keep for up to 2-3 months. To reheat, gently warm them in a low oven (around 300°F or 150°C) for a few minutes until they are warmed through.
Nutritional Information
Here’s an approximate nutritional breakdown for Janette’s Raisin Scones:
| Nutrient | Amount per Serving | % Daily Value |
|---|---|---|
| Calories | 238.5 kcal | |
| Total Fat | 13.1 g | 20% |
| Saturated Fat | 7.8 g | 39% |
| Cholesterol | 81.2 mg | 27% |
| Sodium | 87 mg | 3% |
| Total Carbohydrate | 25.1 g | 8% |
| Dietary Fiber | 0.8 g | 3% |
| Sugars | 0.9 g | 3% |
| Protein | 5 g | 9% |
Note: Nutritional values are estimates and can vary based on specific ingredients and portion sizes.
Variations & Substitutions
While Janette’s recipe is perfection as is, feel free to play with it:
- Spice it Up: Add a pinch of cinnamon or nutmeg to the dry ingredients for a warmer flavor profile.
- Citrus Zest: A tablespoon of lemon or orange zest can add a bright, fresh note that complements the raisins beautifully.
- Different Dried Fruits: If raisins aren’t your favorite, consider using currants, chopped dates, or dried cranberries instead.
- Nutty Addition: For a bit of crunch, add 1/4 cup of chopped walnuts or pecans along with the raisins.
FAQs
Q: Why are my scones tough?
A: Tough scones are usually a result of over-mixing or over-kneading the dough. Handle the dough as little as possible to maintain tenderness.
Q: My scones didn’t rise much. What went wrong?
A: Ensure your baking soda and cream of tartar are fresh, and that your oven reached the correct temperature before baking. Overworking the dough can also hinder the rise.
Q: Can I make these scones ahead of time?
A: You can prepare the dough and cut the scones, then store them on a baking sheet, covered tightly with plastic wrap, in the refrigerator for up to 24 hours before baking. You may need to add a couple of extra minutes to the baking time.
Q: What’s the best way to cut scones if I don’t have a knife?
A: A bench scraper or even a pizza cutter can work well for cleanly dividing the dough into wedges.
Q: Can I use milk instead of buttermilk?
A: While buttermilk provides superior tenderness and flavor, you can use whole milk. However, the texture might be slightly less delicate.
Final Thoughts
Janette’s raisin scones are more than just a recipe; they are a warm embrace in edible form. They remind us that the simplest ingredients, treated with care and a touch of love, can yield extraordinary results. Whether you’re seeking a comforting breakfast treat, a delightful afternoon snack, or a way to share a bit of homemade joy, these scones are sure to hit the spot. Pour yourself a cup of tea, savor each buttery bite, and let the humble charm of these raisin scones bring a little extra warmth to your day. I encourage you to try them and share your own baking memories – there’s always room for more stories around a plate of good scones.