
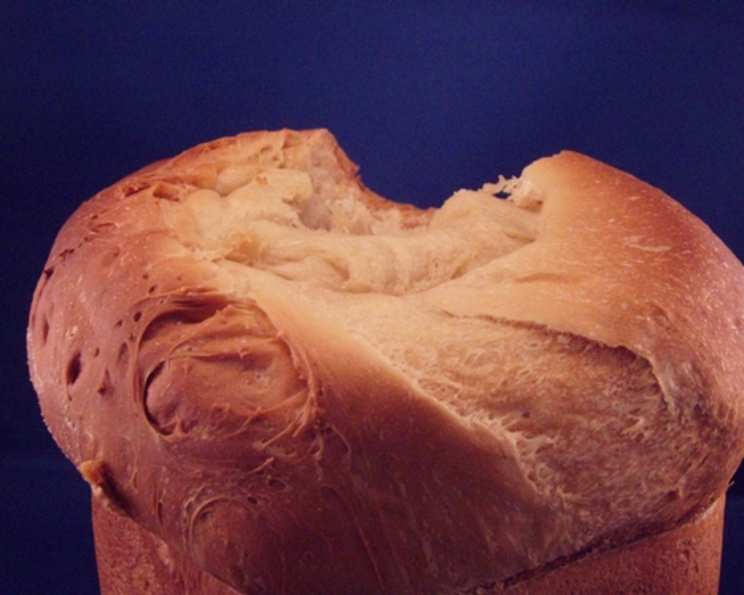
Rapid Basic White Bread (Bread Machine)
There’s a particular kind of comfort that emanates from a freshly baked loaf of bread. For me, it often conjures up memories of my grandmother’s kitchen, the air thick with the comforting aroma of yeast and warmth. While her methods were hands-on and traditional, I discovered a different kind of magic with my first bread machine. Tucked away in the pages of the manual, nestled alongside diagrams and warnings, was this unassuming recipe. It became my gateway to effortless, delicious bread, proving that even the busiest schedules could accommodate the simple joy of homemade.
Recipe Overview
- Prep Time: Under 5 minutes
- Cook Time: Approximately 1 hour to 1 hour 20 minutes (depending on machine cycle)
- Total Time: Approximately 1 hour 25 minutes to 1 hour 25 minutes
- Servings: 8-10 slices
- Yield: 1 standard 2-pound loaf
- Dietary Type: Vegetarian
Ingredients
- 1 2⁄3 cups water
- 3 tablespoons nonfat dry milk (powdered milk)
- 3 tablespoons margarine (or unsalted butter)
- 3 tablespoons granulated sugar
- 1 teaspoon salt
- 4 1⁄4 cups bread flour
- 2 teaspoons active dry yeast
Equipment Needed
- Bread Machine
Instructions
The beauty of a bread machine recipe lies in its simplicity, and this rapid basic white bread is no exception. It’s designed for maximum convenience without sacrificing that wonderful homemade taste and texture. The key to success is ensuring you follow the precise order of ingredients, as this allows the machine to work its magic efficiently.
-
Prepare the Liquids: Begin by adding the 1 2⁄3 cups water to your bread machine pan. If you’d like to give the yeast a little boost and ensure everything is at the ideal temperature, you can gently warm the water. A quick way to do this is to mix the water with the 3 tablespoons powdered milk and microwave on high for about 30 seconds. It should be lukewarm, not hot – think bathwater temperature. This helps the powdered milk dissolve completely and creates a slightly more enriched liquid base for the bread.
-
Add the Fats and Sweeteners: Next, add the 3 tablespoons margarine (or unsalted butter) and the 3 tablespoons granulated sugar to the pan. The margarine contributes to the softness of the crumb, while the sugar not only feeds the yeast but also adds a subtle sweetness and aids in browning.
-
Incorporate the Salt: Now, add the 1 teaspoon salt. Salt is crucial in bread making for several reasons: it controls yeast activity, strengthens the gluten structure, and, of course, enhances the flavor. It’s important to add it after the liquids and fats, as direct contact with a high concentration of salt can inhibit yeast growth.
-
Introduce the Flour: Carefully measure out 4 1⁄4 cups bread flour and add it to the pan, on top of the other ingredients. Bread flour is essential here because its higher protein content develops stronger gluten strands, which are necessary for a good rise and chewy texture in yeasted breads. Try to create a slight mound of flour over the wet ingredients.
-
Activate the Yeast: Finally, create a small well in the center of the flour mound and add the 2 teaspoons active dry yeast. It’s vital that the yeast doesn’t come into direct contact with the salt or the liquid just yet. This allows the machine’s mixing process to gradually incorporate the yeast into the flour and liquid mixture.
-
Assemble and Select: Place the baking pan into your bread machine chamber and secure it according to your machine’s manufacturer instructions. Ensure it’s locked in place properly to prevent any wobbling during the kneading cycle.
-
Start the Cycle: Select the “rapid bake” setting and choose the “2-pound loaf” option. These settings are specifically designed for this type of recipe, optimizing the bake time for a quicker result. Once your selections are made, turn on the machine.
-
Cooling for Perfection: When the bread machine cycle is complete, carefully remove the baking pan from the machine. The bread should have a beautiful golden-brown crust. While it’s tempting to slice into it immediately, the cooling process is critical for the perfect texture. To ensure even cooling and prevent a soggy bottom, gently remove the loaf from the pan and place it on a wire rack. A common practice for preserving the crust’s integrity and moisture is to place the warm loaf into a large zip-top bag, seal the bag, and let it cool completely on the wire rack. This allows the steam to escape gently while keeping the crust from becoming too hard. Once completely cooled, you can slice and enjoy.
Expert Tips & Tricks
- Room Temperature Ingredients: For optimal yeast activity, ensure your water, margarine, and milk are at room temperature (or as indicated in the machine’s manual). This creates a more consistent environment for the yeast to work.
- Flour Measurement is Key: Accurately measuring flour is paramount. Spoon the flour into your measuring cup and level it off with a straight edge rather than scooping directly from the bag. Too much flour can lead to a dry, dense loaf.
- Listen to Your Machine: While the rapid bake setting is quick, some machines may require a slightly longer bake time. If the crust appears pale after the cycle, you can often extend the bake time by a few minutes or use the machine’s “bake-only” function.
- The “Windowpane Test”: If you’re ever curious about gluten development in a bread machine, you can carefully remove a small piece of dough after the first few knead cycles. Gently stretch it between your fingers. If you can stretch it thin enough to see light through it without tearing (the “windowpane”), your gluten is well-developed.
Serving & Storage Suggestions
This rapid basic white bread is incredibly versatile. It’s perfect toasted with a slather of butter, used for sandwiches, or served alongside soups and stews. For a truly decadent treat, try it as French toast or bread pudding.
To store, ensure the loaf is completely cool before slicing. For immediate consumption within a day or two, keep it at room temperature in a bread box or a loosely sealed bag. If you plan to keep it for longer, slicing the bread and freezing it is the best option. Place slices in a freezer-safe bag or container, removing as much air as possible. Frozen bread will retain its quality for up to 2-3 months. To reheat, simply toast frozen slices directly from the freezer.
Nutritional Information
This information is an estimate for one slice of bread made with the specified ingredients.
| Nutrient | Amount per Slice (approx.) | % Daily Value (approx.) |
|---|---|---|
| Calories | 120-150 kcal | 6-8% |
| Total Fat | 2.5 – 3.5 g | 3-5% |
| Saturated Fat | 0.5 – 1 g | 3-5% |
| Cholesterol | 0 – 5 mg | 0-2% |
| Sodium | 150 – 200 mg | 6-9% |
| Total Carbohydrate | 22 – 28 g | 8-10% |
| Dietary Fiber | 1 – 1.5 g | 4-6% |
| Total Sugars | 3 – 5 g | Varies |
| Protein | 4 – 5 g | 8-10% |
Note: Nutritional values can vary based on specific ingredient brands and exact measurements used.
Variations & Substitutions
While this is a fantastic basic recipe, don’t be afraid to experiment!
- Whole Wheat Addition: For a heartier loaf, try substituting up to 1 cup of the bread flour with whole wheat flour. You might need to slightly adjust the water, adding a tablespoon at a time, as whole wheat flour can absorb more liquid.
- Herb & Garlic: Incorporate dried herbs like rosemary, thyme, or Italian seasoning, along with a teaspoon of garlic powder, into the dry ingredients for a savory twist.
- Sweet Swirls: Before the final rise (if your machine allows you to access the dough), you can press in a thin layer of jam, cinnamon sugar, or a spread of Nutella for a sweet treat.
FAQs (Frequently Asked Questions)
Q: Why is my bread machine bread dense?
A: This can be due to using the wrong type of flour (all-purpose instead of bread flour), inaccurate measurements, or expired yeast. Ensure you’re using bread flour and check the expiration date on your yeast.
Q: My bread has a sunken top. What did I do wrong?
A: A sunken top often indicates too much liquid, too much yeast, or an issue with the rise cycle. Double-check your liquid and yeast measurements, and ensure your ingredients are fresh.
Q: Can I use instant yeast instead of active dry yeast?
A: Yes, in most bread machines, you can often substitute instant yeast for active dry yeast. Usually, you can use slightly less instant yeast (around 1.5 teaspoons) and you don’t need to proof it first. Always check your bread machine’s manual for specific guidance on yeast types.
Q: Why does the recipe call for powdered milk?
A: Powdered milk adds richness, improves the texture of the crust, and contributes to a softer crumb, enhancing the overall quality of the bread.
Q: How can I make this bread vegan?
A: This recipe is already largely vegan if you use margarine that is dairy-free. Ensure your margarine is plant-based.
Final Thoughts
There’s a profound satisfaction that comes from creating your own bread, and this rapid white bread recipe makes it accessible to everyone. It’s the perfect canvas for your culinary creativity. Serve it warm with a drizzle of good olive oil and a sprinkle of sea salt, or use it as the foundation for your favorite sandwich. I encourage you to give it a try, and don’t hesitate to share your experience or any delightful variations you discover. Happy baking!