
Rapid Rise Skillet Yeast Rolls: A Shortcut to Homemade Warmth
There are moments in the kitchen that feel like pure magic, and for me, few are as satisfying as pulling a cast iron skillet brimming with impossibly soft, golden-brown yeast rolls from the oven. I remember a particularly chaotic week years ago when unexpected guests descended, and I found myself staring into a pantry that felt woefully empty of anything impressive. Panic started to set in, but then I recalled a recipe for quick yeast rolls, a true lifesaver that promised deliciousness without hours of waiting. That night, the aroma that filled my home, and the sheer delight on my guests’ faces as they bit into these warm, tender rolls, cemented this recipe as a staple. It’s a reminder that sometimes, speed and incredible flavor can indeed go hand-in-hand.
Recipe Overview
- Prep Time: 20 minutes
- Cook Time: 25 minutes
- Total Time: 45 minutes
- Servings: 12
- Yield: 12 Rolls
- Dietary Type: Vegetarian
Ingredients
Here’s what you’ll need to conjure up these delightful rolls:
- 1 tablespoon instant dry yeast
- 1 cup warm water (between 105-115°F)
- 1/4 cup honey
- 1/4 cup melted salted butter
- 1 teaspoon salt
- 1 large egg
- 2 1/2 to 3 cups all-purpose flour (plus extra for dusting)
Equipment Needed
- Large mixing bowl
- Whisk
- Measuring cups and spoons
- 12-inch cast iron skillet
- Oven
- Cooling rack (optional)
Instructions
Creating these rapid-rise rolls is a straightforward process, designed for speed and simplicity.
- Activate the Yeast: Begin by preheating your oven to 400 degrees F. In a large mixing bowl, combine the instant dry yeast, warm water, and honey. Give this mixture a gentle stir and let it sit for about 5-10 minutes. You’re looking for it to become foamy and bubbly, which indicates the yeast is alive and ready to work its magic.
- Incorporate Wet Ingredients: Once the yeast has bloomed, stir in the melted salted butter, salt, and the large egg until everything is well combined. This creates the flavorful base for your dough.
- Develop the Dough: Now, it’s time to add the flour. Start by adding 2 1/2 cups of all-purpose flour to the wet ingredients. Mix until a shaggy dough begins to form. Continue adding the all-purpose flour, about 1/4 cup at a time, mixing after each addition, until the dough forms into a cohesive ball and easily pulls away from the sides of the mixing bowl. You might find you need slightly more or less than the 3 cups, depending on your flour and humidity levels. The goal is a soft, slightly tacky dough, not overly sticky, but not dry either.
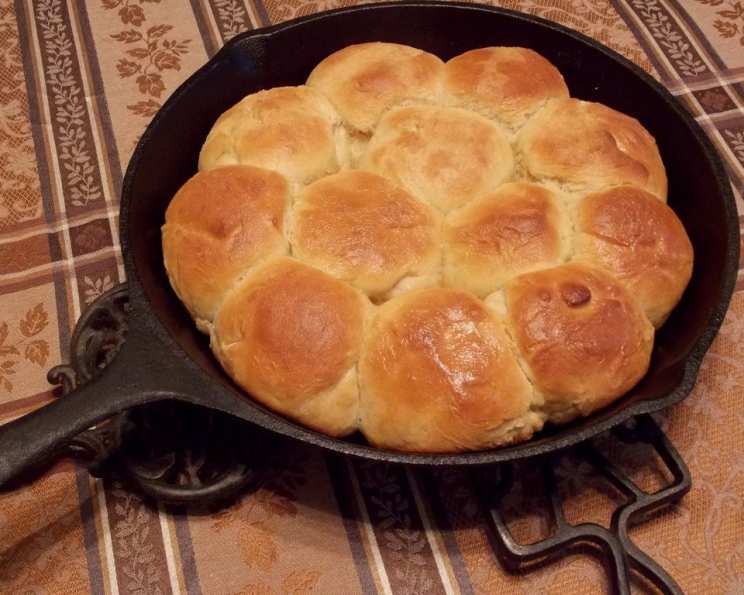
- Shape and Rise: Gently turn the dough out onto a lightly floured surface. Divide the dough into 12 even pieces. Roll each piece into a smooth ball. Arrange these dough balls closely together in your 12-inch cast iron skillet. Once they’re nestled in the skillet, cover the skillet and let the dough rise for 20 minutes, or until the rolls have visibly doubled in size.
- Bake to Golden Perfection: Place the covered skillet into the preheated oven. Bake for 25 minutes. After 25 minutes, the rolls should be beautifully golden brown and cooked through. If you desire an extra touch of richness and shine, you can brush the tops with another tablespoon of melted butter immediately after removing them from the oven.
Pro Tip: This recipe relies on a generous amount of yeast to significantly reduce the typical rising time for bread. For optimal results, especially if your kitchen tends to be on the cooler side, consider creating a slightly warmer environment for the dough to proof. An ideal environment for bread proofing is warm and humid, ideally between 80 and 90 degrees Fahrenheit. If your home consistently stays below 70-75 degrees, your rolls may not rise as quickly. You can achieve a warmer proofing spot by placing the covered dough in a slightly warm, turned-off oven (after preheating it briefly and then turning it off), or near a warm (but not hot) appliance.
Expert Tips & Tricks
To elevate your rapid-rise rolls from good to truly exceptional, consider these insights:
- Flour Power: The amount of flour needed can vary. Always start with the lower end of the range and add more gradually. Over-flouring will result in dense, tough rolls. The dough should be soft and slightly tacky, but manageable.
- Water Temperature is Key: Ensure your water is warm, not hot. Water that is too hot will kill the yeast, preventing it from activating. Aim for the sweet spot between 105-115°F.
- Cast Iron Charm: The cast iron skillet provides even heat distribution, which is crucial for getting those perfectly browned bottoms and sides on your rolls. If you don’t have a cast iron skillet, a 9×13 inch baking dish can also work, though the browning might be slightly different.
- Don’t Overwork the Dough: While you want the dough to come together, avoid excessive kneading once you’ve reached the correct consistency. Overworking can develop too much gluten, leading to a tougher roll.
Serving & Storage Suggestions
These rapid rise skillet yeast rolls are best served warm, straight from the oven, where their incredible softness and subtle sweetness truly shine. They are a perfect accompaniment to almost any meal, from hearty stews and roasts to lighter salads and soups.
For storage, once the rolls have cooled slightly, they can be kept at room temperature in a loosely covered container or bread bag for 1-2 days. They will gradually lose some of their initial tenderness. For longer storage, allow the rolls to cool completely, then wrap them tightly in plastic wrap and transfer to a freezer-safe bag or container. They will keep well in the freezer for up to 2-3 months. To reheat, simply place frozen rolls on a baking sheet and warm them in a 350°F oven for about 10-15 minutes, or until heated through and softened. You can also gently reheat them in the microwave, though this can sometimes alter the texture.
Nutritional Information
Here’s an approximate nutritional breakdown per roll:
| Nutrient | Amount per Serving | % Daily Value |
|---|---|---|
| Calories | 159.4 kcal | 8% |
| Total Fat | 4.6 g | 6% |
| Saturated Fat | 2.6 g | 13% |
| Cholesterol | 25.7 mg | 9% |
| Sodium | 235.4 mg | 10% |
| Total Carbohydrate | 26.1 g | 9% |
| Dietary Fiber | 1 g | 4% |
| Total Sugars | 5.9 g | 12% |
| Protein | 3.7 g | 7% |
Nutritional values are estimates and can vary based on specific ingredients and preparation methods.
Variations & Substitutions
While this recipe is wonderful as is, feel free to experiment:
- Herbed Rolls: Incorporate 1-2 tablespoons of finely chopped fresh herbs like rosemary, thyme, or chives into the dough along with the flour for an aromatic twist.
- Cheesy Delight: Sprinkle a generous amount of shredded cheese (cheddar, parmesan, or a blend) over the rolls during the last 5-10 minutes of baking.
- Sweet Swirl: Before dividing the dough, you could try rolling it out and spreading a thin layer of cinnamon-sugar or a fruit preserve, then rolling it up and slicing to create sweet-filled rolls.
- Dairy-Free: For a dairy-free version, substitute the melted salted butter with a neutral-flavored oil (like vegetable or canola) and ensure your egg substitute, if used, is suitable.
FAQs
Q: Why are my rolls not rising?
A: This is most likely due to inactive yeast, incorrect water temperature, or a cool proofing environment. Ensure your yeast is fresh and the water is the right temperature, and consider a warmer spot for proofing.
Q: Can I use active dry yeast instead of instant dry yeast?
A: Yes, but you’ll need to proof the active dry yeast first in the warm water and honey for about 5-10 minutes until foamy before proceeding with the recipe.
Q: My dough is too sticky, what should I do?
A: Add flour a tablespoon at a time until the dough is manageable and pulls away from the sides of the bowl. Be careful not to add too much flour, as this can make the rolls tough.
Q: Can I make these ahead of time?
A: While they are best fresh, you can bake the rolls and then cool and store them. Reheat them gently in the oven before serving to restore their warmth and texture.
Q: What’s the best way to ensure even browning?
A: The cast iron skillet helps immensely. Rotating the skillet halfway through baking can also ensure more even browning if your oven has hot spots.
Final Thoughts
There’s an undeniable comfort that comes from the aroma and taste of freshly baked bread, and these Rapid Rise Skillet Yeast Rolls deliver that joy in a fraction of the time. They’re a testament to the fact that you don’t need hours to create something truly special for your table. Whether you’re a seasoned baker or just starting out, this recipe is a fantastic way to bring a little warmth and homemade goodness into your day. Gather your ingredients, preheat your oven, and get ready to impress yourself and your loved ones with these quick, delicious, and utterly satisfying rolls. They’re the perfect companions to a comforting soup, a flavorful chili, or simply enjoyed with a generous smear of butter. Happy baking!