
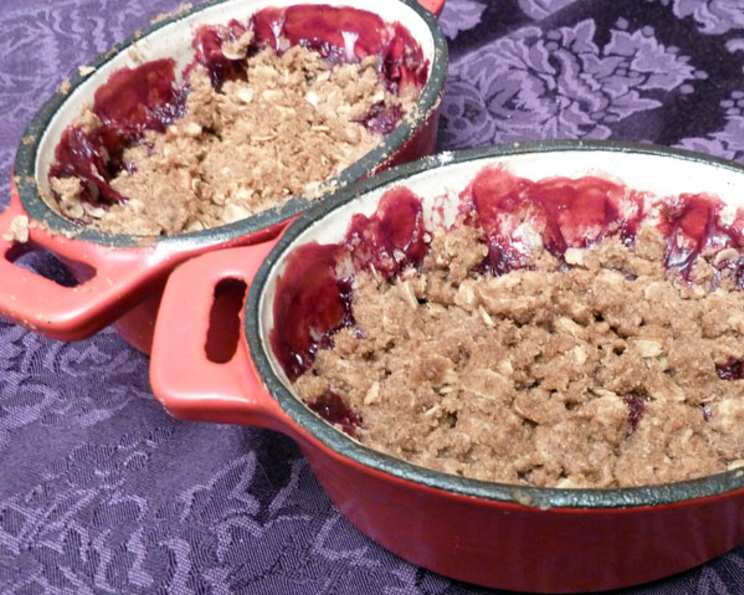
A Symphony of Tart and Sweet: My Raspberry Apple Crisp
There’s a particular magic that happens when the first chill of autumn whispers through the air, a scent that invariably leads my thoughts to warm spices and bubbling fruit. I remember one crisp September afternoon, the kind where the sunlight still holds warmth but the breeze carries a promise of cooler days, I was flipping through my local paper. Tucked away on the food section was a recipe that immediately piqued my interest: a raspberry apple crisp, distinct for its generous nod to the ruby-red berries. The idea of that tart raspberry counterpoint to the sweet, softened apples, all crowned with a buttery, oat-laden topping, was irresistible. I grabbed the reddest Granny Smiths I could find, their tartness a perfect canvas, and couldn’t wait to bring this delightful creation to life.
Recipe Overview
- Prep Time: 15 minutes
- Cook Time: 40-45 minutes
- Total Time: 55-60 minutes
- Servings: 8
- Yield: 1 (8×8 inch) crisp
- Dietary Type: Dessert
Ingredients
This dessert is a beautiful marriage of fruit and spice, brought together by a wonderfully textured crumble. The simplicity of the ingredients allows the natural flavors of the berries and apples to truly shine.
For the Fruit Filling:
- 3 cups raspberries
- 2 cups coarsely chopped apples (Granny Smith variety recommended for their tartness)
For the Crisp Topping:
- 1 cup brown sugar
- 3/4 cup rolled oats
- 3/4 cup all-purpose flour
- 1 1/2 teaspoons ground cinnamon
- 6 tablespoons butter, softened to room temperature
Equipment Needed
- 8×8 inch baking dish
- Medium mixing bowl
- Pastry blender or fork
- Spatula or spoon
Instructions
Bringing this Raspberry Apple Crisp to life is a straightforward and rewarding process, perfect for bakers of all levels. The steps are designed to create a harmonious balance of tender fruit and a delightfully crisp topping.
- Preheat your oven. Begin by setting your oven to 350°F (175°C). This ensures the oven is at the optimal temperature to bake both the fruit filling and the crisp topping to perfection.
- Prepare the fruit filling. In a bowl, gently toss together the raspberries and the coarsely chopped apples. Be mindful not to overmix, as you want to maintain the integrity of the berries. Once combined, spread this fruit mixture evenly across the bottom of your 8×8 inch baking dish.
- Create the crisp topping mixture. In a separate medium bowl, combine the brown sugar, rolled oats, flour, and cinnamon. Whisk these dry ingredients together to ensure they are well distributed.
- Incorporate the butter. Add the softened butter to the oat mixture. Using a pastry blender or a fork, work the butter into the dry ingredients until the mixture resembles coarse crumbs. This is the key step for achieving that signature crumbly texture in your crisp. Continue until no large pockets of butter remain and the mixture is cohesive yet crumbly.
- Assemble the crisp. Spread the crumbly oat mixture evenly over the fruit layer in the baking dish. Gently press down on the topping with the back of a spatula or your hand to lightly compact it. This helps the topping adhere to the fruit and creates a more unified crisp.
- Bake to golden perfection. Place the baking dish in the preheated oven. Bake for 40 to 45 minutes, or until the topping is a beautiful lightly browned hue and the fruit filling is bubbling around the edges. You should be able to see the juices from the fruit thickening slightly.
- Cool before serving. Once baked, carefully remove the crisp from the oven. Allow it to cool for at least 10-15 minutes before serving. This resting period allows the fruit to set slightly and prevents the crisp from being too runny.
Expert Tips & Tricks
To elevate your Raspberry Apple Crisp from delicious to absolutely divine, consider these insider tips:
- Apple Selection: While Granny Smith apples are recommended for their tartness which beautifully contrasts the sweet raspberries, a mix of apples can also work wonderfully. Consider adding a few Fuji or Honeycrisp apples for a touch of sweetness and a slightly different texture.
- Butter Temperature is Key: Ensure your butter is truly softened, not melted. This allows it to create those lovely, distinct crumbs when worked into the oat mixture, resulting in a superior crisp topping. If your butter is too cold, it will be difficult to incorporate. If it’s too warm, you risk a greasy topping.
- Don’t Overwork the Topping: When combining the butter with the dry ingredients, aim for a crumbly texture, not a paste. Overworking can lead to a tougher, less satisfying topping.
- Visual Cues: Rely on your senses when checking for doneness. The topping should be golden brown, and you should see the fruit filling actively bubbling. If the topping is browning too quickly but the fruit isn’t fully cooked, you can loosely tent the dish with aluminum foil.
- Enhance the Spices: For an extra layer of warmth, consider adding a pinch of nutmeg or a tiny grating of fresh ginger to the topping mixture.
Serving & Storage Suggestions
This Raspberry Apple Crisp is a versatile dessert that shines whether served warm or at room temperature.
- Serving: It is absolutely sublime served warm, straight from the oven (after its brief cooling period, of course!). A dollop of whipped cream, a scoop of vanilla ice cream, or a drizzle of crème fraîche are classic and perfect accompaniments. For a more refined touch, a light dusting of powdered sugar just before serving adds a touch of elegance.
- Storage: Leftovers can be stored, covered, at room temperature for up to 2 days if the weather is cool, or in the refrigerator for up to 4 days. To reheat, place individual portions in a microwave-safe dish and heat until warmed through, or reheat the entire dish in a 300°F (150°C) oven for about 15-20 minutes until heated through. The topping may lose some of its crispness upon reheating, but it will still be incredibly delicious.
Nutritional Information
Here is an estimated nutritional breakdown per serving, assuming 8 servings:
| Nutrient | Amount per Serving | % Daily Value |
|---|---|---|
| Calories | 293.7 kcal | 15% |
| Total Fat | 9.6 g | 12% |
| Saturated Fat | 5.6 g | 28% |
| Cholesterol | 22.9 mg | 8% |
| Sodium | 85.2 mg | 4% |
| Total Carbohydrate | 51.3 g | 19% |
| Dietary Fiber | 5.1 g | 18% |
| Total Sugars | 32.1 g | 64% |
| Protein | 3 g | 6% |
(Note: Nutritional information is an estimate and can vary based on specific ingredients and brands used.)
Variations & Substitutions
While this recipe is wonderfully balanced as is, it also lends itself beautifully to creative variations:
- Berry Medley: Feel free to swap out some of the raspberries for other berries like blueberries, blackberries, or even a mix.
- Nutty Crunch: For added texture and flavor, incorporate a handful of chopped nuts (walnuts, pecans, or almonds) into the crisp topping mixture.
- Gluten-Free: To make this a gluten-free treat, substitute the all-purpose flour with a good quality gluten-free all-purpose flour blend. Ensure your oats are certified gluten-free if needed.
- Spice It Up: A pinch of nutmeg, cardamom, or a touch of fresh grated ginger can add an extra dimension to the spice profile.
- Citrus Zest: A teaspoon of orange or lemon zest added to the fruit filling can brighten the overall flavor.
FAQs
Q: Can I use frozen raspberries in this recipe?
A: Yes, you can certainly use frozen raspberries. There’s no need to thaw them completely; just toss them with the apples and proceed with the recipe as directed. They may release a little more liquid during baking.
Q: What kind of apples are best for apple crisp?
A: Tart and firm apples like Granny Smith, Honeycrisp, or Fuji are ideal. They hold their shape well during baking and provide a lovely tartness to balance the sweetness of the topping and raspberries.
Q: How do I know when the crisp is done baking?
A: The crisp is ready when the topping is golden brown and the fruit filling is bubbling around the edges. This typically takes 40-45 minutes.
Q: Can I make this crisp ahead of time?
A: You can prepare the fruit filling and the topping separately a day in advance and store them covered in the refrigerator. Assemble and bake just before serving for the best texture.
Q: How should I store leftover crisp?
A: Leftovers can be stored, covered, at room temperature for up to 2 days in cool weather or in the refrigerator for up to 4 days.
Final Thoughts
There’s a comforting, rustic charm to a fruit crisp that’s hard to resist. This Raspberry Apple Crisp, with its delightful balance of tart berries and sweet apples beneath a buttery, oat-laden blanket, is a testament to the simple pleasures of home baking. It’s a dessert that welcomes everyone to the table, offering warmth and a touch of seasonal celebration. I encourage you to try this recipe, perhaps on a cool evening, and savor the harmonious blend of flavors and textures. Serve it with your favorite topping, share it with loved ones, and don’t hesitate to experiment with the variations. I’d be delighted to hear about your experience!