
Ray Gregg’s Batch Biscuits: A Taste of the Texas State Fair
There’s something truly magical about the smell of freshly baked biscuits. It’s a scent that instantly transports me back to my grandmother’s kitchen, the aroma mingling with the low hum of the radio playing country music. But for me, that scent also evokes the vibrant, bustling atmosphere of the Texas State Fair, a place where culinary legends were made. One such legend was Ray Gregg, whose “Batch Biscuits” were a star attraction for two decades. I still remember watching his demonstrations, a whirlwind of flour dust and infectious laughter, as he turned simple ingredients into a cascade of golden, fluffy goodness. He proved that with a bit of technique and a whole lot of heart, you could make perfect biscuits, whether you were baking six or two hundred.
Recipe Overview
- Prep Time: 20 minutes
- Cook Time: 12 minutes
- Total Time: 32 minutes
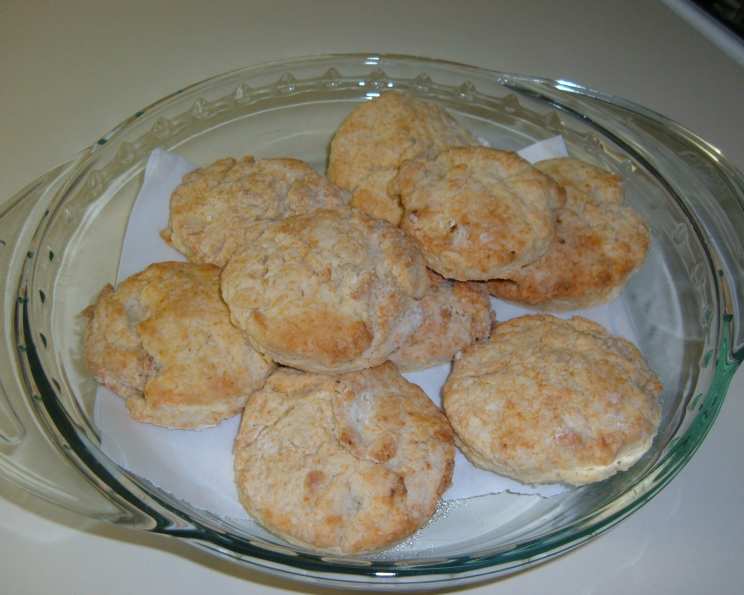
- Servings: 12 biscuits
- Yield: 12 biscuits
- Dietary Type: Vegetarian
Ingredients
- 2 cups self-rising flour
- 1/4 cup shortening
- 3/4 cup milk
For All-Purpose Flour Substitution:
If you don’t have self-rising flour, you can easily make your own. To 2 cups of all-purpose flour, add:
- 3 teaspoons baking powder
- 1 teaspoon salt
For Buttermilk Biscuits (Chef’s Preference):
For a tangier, richer biscuit, try this variation:
- To the self-rising flour (or the corrected all-purpose flour mix), add: 1/2 teaspoon baking soda.
- Increase the milk to 1 cup. For true buttermilk biscuits, use 1 cup of buttermilk instead of regular milk.
Equipment Needed
- Large mixing bowl
- Measuring cups and spoons
- Pastry blender or your hands
- Floured surface or cutting board
- Rolling pin
- 2-inch biscuit cutter
- Baking sheet
- Wire cooling rack
Instructions
- Preheat Your Oven: Begin by preheating your oven to a robust 450 degrees Fahrenheit (232 degrees Celsius). This high heat is crucial for achieving that perfect rise and golden-brown exterior.
- Measure the Flour: Into your large mixing bowl, accurately measure the self-rising flour. If you’re using the all-purpose flour substitution, ensure you’ve combined it with the baking powder and salt beforehand.
- Incorporate the Shortening: Add the shortening to the flour. Now comes the gentle incorporation. Ray Gregg famously used his hands, but a pastry blender works beautifully. The goal is to cut the shortening into the flour until the mixture resembles coarse cornmeal. You want to avoid overworking it; think of it as pinching and squeezing the shortening into the flour, creating small, pea-sized pieces. This step is key to creating flaky layers.
- Add the Milk: Pour in the milk. Here’s where you’ll gauge the consistency. You’re aiming for a soft, puffy dough. If the dough seems too dry and isn’t pliable, gradually add a little more milk, a tablespoon at a time, until it just comes together. Be mindful not to add too much; a sticky dough will lead to dense biscuits. Conversely, too little milk will result in dry, crumbly biscuits.
- Gentle Kneading: Turn the dough out onto a lightly floured surface. Ray Gregg’s demonstrations highlighted the importance of gentleness. You want to knead slightly – just enough to bring the dough together and ensure all the dry bits are incorporated, but without overdeveloping the gluten. A few gentle folds and presses are all you need. The objective is to avoid toughness.
- Rolling the Dough: Roll out the dough to about 1/2-inch thickness. For those who love a truly substantial, puffy biscuit, aim for a thicker roll. For a thinner, crispier biscuit, roll it out more thinly. Consistency in thickness will ensure even baking.
- Cutting the Biscuits: Using a 2-inch biscuit cutter, cut out your biscuits. Press straight down without twisting the cutter. Twisting can seal the edges, preventing an even rise. Place the cut biscuits on an ungreased baking sheet.
- Bake to Golden Perfection: Bake in the preheated oven for approximately twelve minutes, or until the biscuits are beautifully golden brown. The high heat will puff them up quickly.
Expert Tips & Tricks
Ray Gregg’s approach, while comedic, underscored crucial baking principles. His emphasis on gentleness with the dough is paramount. Overhandling develops gluten, leading to tough, chewy biscuits. When incorporating the shortening, think of it as creating little pockets of fat that will melt during baking, creating those coveted flaky layers.
For those using the all-purpose flour substitution, ensuring the baking powder and salt are thoroughly mixed into the flour before adding the shortening is vital for an even rise and balanced flavor.
If you find your oven runs a bit hot or cool, keep a close eye on the biscuits during the last few minutes of baking. They should be beautifully puffed and golden.
Serving & Storage Suggestions
These Ray Gregg Batch Biscuits are at their absolute finest served warm, straight from the oven. They are divine with a generous smear of butter, a dollop of honey, or alongside a hearty breakfast of fried eggs, bacon, and sausage. They also make a delightful accompaniment to stews, soups, and barbecue.
Leftover biscuits can be stored in an airtight container at room temperature for up to two days. To reheat, a brief stint in a warm oven (around 300°F or 150°C) will revive their warmth and texture. For longer storage, wrap them tightly and freeze for up to two months. Reheat from frozen in a 350°F (175°C) oven until warmed through.
Nutritional Information
(Please note: Nutritional information is an estimate and can vary based on specific ingredients and portion sizes.)
| Nutrient | Amount per Serving | % Daily Value |
|---|---|---|
| Calories | 121.2 kcal | |
| Calories from Fat | 45g | 7% |
| Total Fat | 5g | 7% |
| Saturated Fat | 1.4g | 7% |
| Cholesterol | 2.1mg | 0% |
| Sodium | 272.1mg | 11% |
| Total Carbohydrate | 16.2g | 5% |
| Dietary Fiber | 0.6g | 2% |
| Sugars | 0.1g | 0% |
| Protein | 2.6g | 5% |
Variations & Substitutions
The beauty of these biscuits lies in their simplicity, allowing for wonderful variations. As mentioned, the buttermilk version adds a delightful tang. For a more savory biscuit, consider adding a tablespoon or two of finely chopped herbs like chives or rosemary to the dry ingredients, or a sprinkle of shredded cheese like cheddar into the dough just before shaping.
A fun twist, and one that might make my hypothetical Southern Mama clutch her pearls, is the use of a food processor. For those who appreciate speed, pulse the flour and shortening together until it resembles cornmeal. Then, add the milk and pulse just until the dough forms a ball. While this method is efficient, it requires careful attention to avoid overprocessing.
FAQs
Q: Why are my biscuits tough?
A: Tough biscuits are usually the result of overworking the dough. Handle it as little as possible during the kneading and shaping stages to keep them tender.
Q: My biscuits didn’t rise well. What went wrong?
A: Ensure your self-rising flour is fresh (check the expiration date, as leavening agents lose potency). Also, make sure your oven is preheated to the correct temperature before baking.
Q: Can I make these biscuits ahead of time?
A: While best served fresh, you can cut out the biscuit dough, place them on a baking sheet, cover them tightly with plastic wrap, and refrigerate for a few hours before baking. You may need to add a minute or two to the baking time.
Q: What’s the best way to cut biscuits?
A: Use a sharp, straight-down motion with your biscuit cutter. Avoid twisting, as this can seal the edges and inhibit the rise.
Q: Can I use butter instead of shortening?
A: Yes, you can substitute butter for shortening, but it may result in a slightly different texture and a more golden hue. If using butter, ensure it’s very cold and cut into small pieces.
Final Thoughts
Ray Gregg’s Batch Biscuits are more than just a recipe; they are a testament to the joy of simple, honest baking and the enduring charm of a good story. Whether you’re a seasoned baker or just starting, these biscuits offer a rewarding experience, filling your kitchen with an irresistible aroma and your table with pure comfort. Serve them with your favorite jams, gravies, or simply enjoy them on their own with a glass of cold milk. I encourage you to give them a try, embrace the process, and savor the delicious results. Happy baking!