
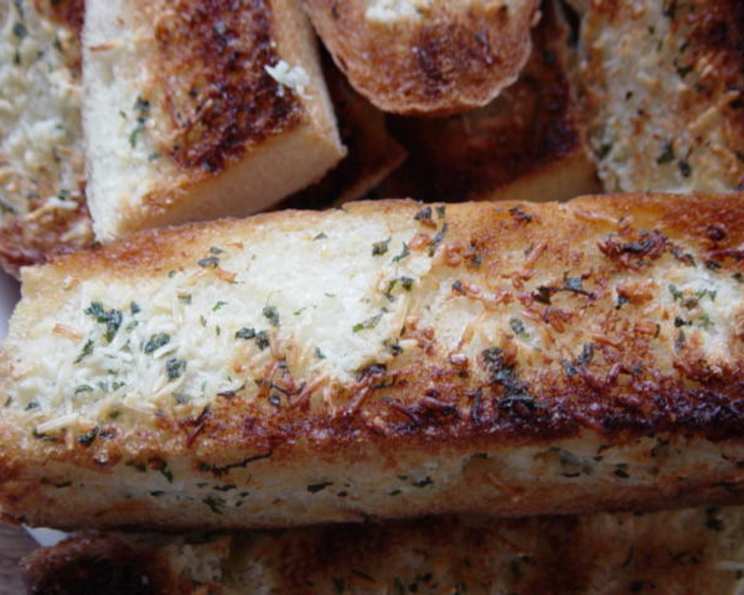
Really Easy and Good French Breadsticks
There are certain aromas that, for me, instantly transport me back to childhood kitchens, filled with laughter and the promise of something delicious. The scent of toasting garlic and butter, mingling with the crisping crust of French bread – it’s a memory I can almost taste. These French breadsticks aren’t just a recipe; they’re an edible echo of simpler times, a testament to how profoundly satisfying humble ingredients can be when treated with care. Even now, with countless complex dishes under my belt, the sheer joy of pulling a batch of these golden, fragrant sticks from the oven never fades. They’re a little slice of happiness, ready to elevate any meal from ordinary to exceptional.
Recipe Overview
- Prep Time: 8 minutes
- Cook Time: Broiling time depends on size, approximately 2-4 minutes per side
- Total Time: Approximately 10-12 minutes
- Servings: 12-14 breadsticks
- Yield: 1 loaf of French bread, cut into approximately 12-14 strips
- Dietary Type: Vegetarian
Ingredients
For these delightfully simple breadsticks, the focus is on quality and freshness.
- 1 large French bread
- ½ cup butter, softened (no substitutions, please – butter truly makes all the difference here in flavor and texture!)
- ¼ cup grated Parmesan cheese
- 2-3 finely minced fresh garlic cloves (or adjust to your personal garlic preference; we love it, so a tablespoon is often my go-to!)
- 4-5 tablespoons chopped fresh parsley or 2-3 teaspoons dried parsley flakes
Equipment Needed
A few basic kitchen tools are all you’ll need to bring these delicious breadsticks to life:
- Baking sheet
- Aluminum foil (for easy cleanup)
- Non-stick cooking spray
- Small mixing bowl
- Spatula or butter knife
Instructions
The beauty of these French breadsticks lies in their utter simplicity and speed. They are the perfect accompaniment when you need something quick and satisfying to serve alongside your favorite soup, stew, or pasta dish.
-
Preheat your oven to broil. Ensure the oven rack is positioned about 4-6 inches from the broiler element. For the best results and even cooking, it’s important to have the broiler at a medium-high heat.
-
Prepare your baking sheet. Line a cookie sheet or a shallow baking pan with aluminum foil. This makes for incredibly easy cleanup, a welcome bonus after any cooking session. Then, lightly spray the foil-lined pan with non-stick cooking spray. This will prevent the breadsticks from sticking and ensure a beautiful, crisp bottom.
-
Prepare the French bread. Take your large French bread and cut it into three roughly even pieces. This initial division makes it easier to manage the bread for the next step.
-
Cut into breadsticks. From each of those three pieces, cut again into your desired size strips. The size will dictate how many breadsticks you end up with, and also how quickly they cook. Generally, you should aim for about 12-14 strips in total. Thicker strips will take slightly longer to broil than thinner ones.
-
Create the flavorful spread. In a small bowl, combine the softened butter, grated Parmesan cheese, finely minced fresh garlic, and chopped fresh parsley (or dried parsley flakes). Stir everything together well until it’s thoroughly combined into a cohesive, fragrant spread. Taste this mixture at this stage – it’s your chance to ensure the garlic and parsley levels are exactly to your liking.
-
Spread the goodness. Using a spatula or a butter knife, generously spread the prepared butter mixture onto each stick of French bread. Make sure to cover the top surface evenly, getting close to the edges.
-
Arrange for broiling. Place the prepared breadsticks onto the prepared baking pan. Ensure they are in a single layer and not overcrowding the pan; this allows for even exposure to the heat.
-
Broil to perfection. Carefully place the baking pan under the preheated broiler. Broil until the breadsticks are golden brown and crispy. This is where attentiveness is key! Because broilers vary in intensity, and the size of your breadsticks will affect cooking time, you’ll want to watch them very closely. It typically takes only 2-4 minutes per side, but they can go from perfectly browned to burnt in a matter of seconds. You may need to flip them halfway through the broiling process to ensure both sides are beautifully toasted. Keep an eye on the color and listen for the gentle sizzle.
Expert Tips & Tricks
While these breadsticks are incredibly straightforward, a few seasoned touches can elevate them further.
- Butter Consistency is Key: Ensure your butter is truly softened, not melted. This allows it to spread easily without making the bread soggy and helps create a lovely crust when broiled. If you forget to soften it, you can quickly do so by microwaving it in 5-second bursts, checking in between, until pliable.
- Garlic Power: For an even more intense garlic flavor, you can gently roast whole garlic cloves in their skins before mincing and adding them to the butter mixture. This mellows the sharpness while deepening the sweetness.
- Herb Freshness: If using fresh parsley, give it a quick rinse and pat it thoroughly dry before chopping. Moisture can cause herbs to clump.
- Broiler Vigilance: I cannot stress this enough: do not walk away when broiling. It’s the fastest cooking method and requires your full attention. Rotate the pan or flip the breadsticks as needed to ensure even browning.
- Outdoor Grill Option: As mentioned in the original note, these are fantastic on an outdoor grill! Prepare them as usual, then grill over medium heat for a few minutes per side, watching carefully for charring. The smoky notes add a wonderful dimension.
Serving & Storage Suggestions
These breadsticks are at their absolute peak when served warm, straight from the oven. Their crisp exterior and tender, garlicky interior make them a versatile companion.
- Serving: Serve them immediately alongside your favorite soups, stews, hearty pasta dishes, or even as a standalone appetizer with a light dip like marinara or pesto.
- Storage: Leftovers can be stored in an airtight container at room temperature for up to two days. To reheat, a quick trip under the broiler or a few minutes in a toaster oven will restore their crispness. For longer storage, you can freeze them in a freezer-safe bag for up to a month. Reheat directly from frozen under the broiler or in a low oven.
Nutritional Information
Here’s an approximate breakdown of the nutritional content per serving (assuming 14 breadsticks per loaf):
| Nutrient | Amount per Serving | % Daily Value |
|---|---|---|
| Calories | 181.6 kcal | |
| Total Fat | 14.3 g | 18% |
| Saturated Fat | 8.4 g | 42% |
| Cholesterol | 33.3 mg | 11% |
| Sodium | 377.1 mg | 16% |
| Total Carbohydrate | 19.9 g | 7% |
| Dietary Fiber | 1.2 g | 4% |
| Sugars | 0.1 g | 0% |
| Protein | 4.3 g | 8% |
Please note that these values are estimates and can vary based on the exact size of the French bread and the specific ingredients used.
Variations & Substitutions
While the original recipe calls for specific ingredients to achieve its delightful simplicity, there are always ways to put your own spin on things, keeping in mind that some changes may alter the texture and taste.
- Spicy Kick: For those who enjoy a bit of heat, add a pinch of red pepper flakes to the butter mixture.
- Herb Garden: Feel free to experiment with other fresh herbs like chives, thyme, or a touch of rosemary, finely chopped.
- Cheesy Delight: While Parmesan is classic, a sprinkle of shredded mozzarella or provolone added in the last minute of broiling can create a wonderfully gooey topping.
- Gluten-Free Adaptation: For a gluten-free version, use a good quality gluten-free baguette. Keep in mind that the texture may be slightly different.
- Vegan Option: To make these vegan, substitute the butter with a high-quality vegan butter spread and use nutritional yeast in place of Parmesan cheese. The result will be a bit different but still delicious.
FAQs
Q: Why should I use only butter and not margarine?
A: Butter contributes a richer flavor and a superior texture to these breadsticks, especially when broiled, that margarine simply cannot replicate.
Q: How do I know when my garlic breadsticks are done?
A: They are done when they are golden brown and crispy on the edges and the butter mixture is bubbling. Keep a very close eye on them under the broiler as they can burn quickly.
Q: Can I make these ahead of time?
A: You can prepare the butter mixture and spread it on the breadsticks, then cover them tightly and refrigerate for a few hours. However, for the best crispness, it’s ideal to broil them just before serving.
Q: My breadsticks are burning on top but not toasting on the bottom, what should I do?
A: Adjust your oven rack position. If the top is burning, move the rack lower, farther from the broiler. If the bottom isn’t toasting, move the rack higher, closer to the broiler. Always watch them closely!
Q: What’s the best way to serve these breadsticks?
A: Serve them warm, fresh from the oven, to enjoy their optimal crispness and aroma. They are perfect alongside soups, pasta, or salads.
Final Thoughts
These Really Easy and Good French Breadsticks are a testament to the power of simplicity. They prove that with just a few quality ingredients and minimal effort, you can create something truly wonderful. They are the unsung heroes of many a meal, the dish that disappears first from the table, leaving behind only satisfied sighs and requests for the recipe. So, go ahead, whip up a batch and experience the pure joy they bring. I’d love to hear how they enhance your favorite meals!