
Really Easy and Good Sugar-Free Strawberry Jam/Spread
There’s a particular kind of magic in a jar of homemade jam, isn’t there? It’s the sweet whisper of summer captured, a vibrant jewel box of flavor ready to brighten even the dreariest breakfast. For me, that magic is inextricably linked to my grandmother’s kitchen, a place perpetually filled with the comforting aroma of simmering fruit. While her jams were always a labor of love, often involving copious amounts of sugar to achieve that perfect set and sweetness, I found myself craving that same joy without the sugar overload. This recipe, born from that desire, has become my go-to for a guilt-free, intensely fruity spread that truly lets the natural sweetness of the strawberries shine.
Recipe Overview
- Prep Time: 15 minutes
- Cook Time: 30 minutes
- Total Time: 45 minutes
- Servings: 6
- Yield: Approximately 3 cups
- Dietary Type: Sugar-Free
Ingredients
- 2 cups strawberries, fresh or frozen (if frozen, no need to thaw)
- 1 cup cold water
- 1 (3 ounce) box sugar-free strawberry gelatin (Jell-O brand is a reliable choice here)
Equipment Needed
- Medium saucepan
- Potato masher or sturdy fork
- Whisk
- Small jars for storage (sterilized if planning long-term refrigeration)
Instructions
This sugar-free strawberry jam comes together with remarkable ease, proving that delicious homemade preserves don’t need to be complicated or loaded with sugar.
- Begin by preparing your strawberries. If using fresh, hulled strawberries, place them directly into a medium saucepan. If you’re opting for frozen strawberries, you can add them straight from the freezer without thawing; they will break down beautifully as they cook.
- Using a potato masher or the back of a sturdy fork, crush the strawberries directly in the saucepan. You want to break them down into a chunky, pulpy consistency. Don’t worry about achieving a perfectly smooth puree at this stage; some small pieces of strawberry are delightful in the finished spread.
- Next, pour in the cold water to the saucepan with the crushed strawberries.
- Now, it’s time to add the star of our sugar-free magic: the sugar-free strawberry gelatin. Sprinkle the entire contents of the gelatin box over the strawberry and water mixture.
- Mix well, ensuring the gelatin powder is thoroughly incorporated into the liquid and fruit. It’s important to stir until there are no dry pockets of gelatin powder visible.
- Place the saucepan over medium heat. Begin to stir constantly as the mixture heats up. This is crucial to prevent the gelatin from clumping and to ensure even cooking.
- Continue stirring until the mixture brings to a boil. Once it reaches a rolling boil, reduce the heat to low.
- Allow the mixture to simmer for 5 minutes, continuing to stir periodically. This simmering period is essential for the gelatin to fully activate and for the flavors to meld and thicken.
- Once the simmering time is complete, carefully pour the hot jam into jars. You can use any heatproof jars you have on hand. If you plan to store the jam for longer periods in the refrigerator, it’s a good practice to use sterilized jars.
- Allow the jam to cool at room temperature before placing any lids on. This gradual cooling helps prevent condensation inside the jars and ensures a better seal if you’re canning. Once cooled, you can then put the lids on tightly.
Expert Tips & Tricks
- Strawberry Quality Matters: For the most vibrant flavor, use the freshest, ripest strawberries you can find. If your strawberries are a bit tart, the gelatin will help balance that out nicely.
- Don’t Rush the Boil: Make sure you reach a full boil before reducing the heat. This ensures the gelatin sets correctly.
- Stirring is Key: Constant stirring during the initial heating and simmering phases is your best friend. It prevents scorching and ensures a smooth, consistent texture.
- For a Smoother Spread: If you prefer a jam with less texture, you can briefly pulse the crushed strawberries in a blender or food processor before adding the water and gelatin. However, I find the slightly chunky texture incredibly appealing.
- Cooling Process: Letting the jam cool completely before capping is a good habit for shelf stability if you’re not actively canning. If you plan to eat it within a week, room temperature cooling is perfectly adequate.
Serving & Storage Suggestions
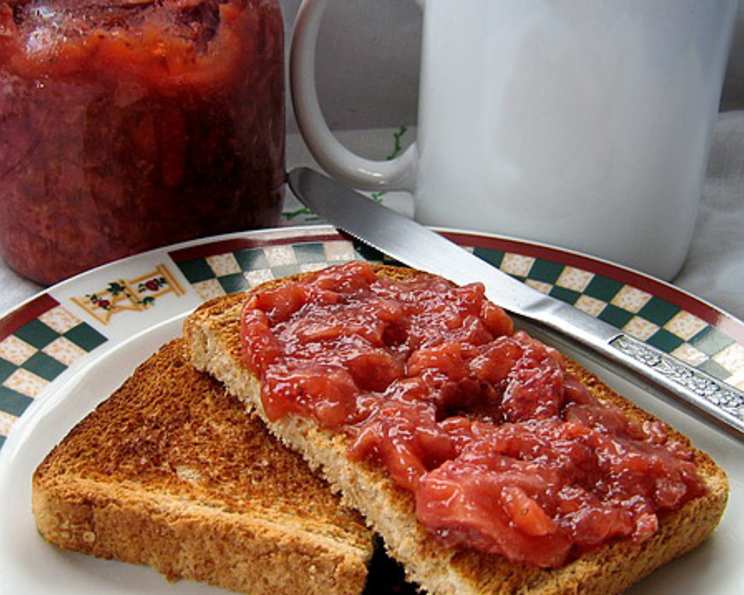
This sugar-free strawberry jam is incredibly versatile. Spoon it generously over toasted whole-wheat bread, spread it on sugar-free pancakes or waffles, or use it as a delightful filling for sugar-free yogurt parfaits. It’s also wonderful dolloped onto cottage cheese or even used as a glaze for baked chicken or pork.
Storage:
- Refrigerator: Store the jam in the refrigerator for up to 1 week. Ensure the jars are tightly sealed.
- Freezer: For longer storage, freeze the jam in freezer-safe containers for up to 1 month. Remember to leave a little headspace in the container, as the jam may expand slightly when frozen. Thaw in the refrigerator before use.
Nutritional Information
Here’s an estimated nutritional breakdown for this sugar-free strawberry jam. Please note that these values can vary based on the specific brands of ingredients used, particularly the sugar-free gelatin.
| Nutrient | Amount per Serving (Approx. 1/2 cup) | % Daily Value |
|---|---|---|
| Calories | 86.9 kcal | – |
| Calories from Fat | – | – |
| Total Fat | 0.3 g | 0% |
| Saturated Fat | 0 g | 0% |
| Cholesterol | 0 mg | 0% |
| Sodium | 246.9 mg | 10% |
| Total Carbohydrate | 30.1 g | 10% |
| Dietary Fiber | 1.9 g | 7% |
| Sugars | 4.5 g | 17%* |
| Protein | 5.1 g | 10% |
Note: The “Sugars” listed here are naturally occurring sugars from the strawberries. The sugar-free gelatin contains no added sugars.
Variations & Substitutions
The beauty of this recipe lies in its adaptability!
- Different Berries: While this recipe is specifically for strawberries, you can absolutely experiment with other fruits. Raspberries, blueberries, or a mix of berries would work wonderfully. You might need to adjust the cooking time slightly depending on the water content of the fruit.
- Citrus Zest: For an added layer of brightness, consider adding the zest of half a lemon or orange along with the strawberries. It complements the fruit beautifully without adding sweetness.
- Thicker Jam: If you prefer a very thick, spreadable jam, you can slightly increase the amount of sugar-free gelatin used, perhaps by about half a teaspoon. However, be cautious not to add too much, as it can affect the texture negatively.
FAQs (Frequently Asked Questions)
Q: Can I use fresh strawberries instead of frozen ones?
A: Absolutely! You can use fresh strawberries. If you do, make sure to hull them first before crushing them in the saucepan.
Q: How do I ensure my jam sets properly?
A: The key is to bring the mixture to a full boil and then simmer it for the instructed 5 minutes while stirring. Using a good quality sugar-free gelatin is also important.
Q: Can I make this jam sweeter?
A: This recipe is designed to be sugar-free. If you prefer a sweeter jam, you would need to add a sugar substitute like erythritol or xylitol (use xylitol with caution if you have pets, as it’s toxic to them). Add your chosen sweetener to taste during the simmering stage.
Q: My jam seems a bit runny. What can I do?
A: If your jam is still a bit loose after cooling, you can gently reheat it and simmer for a few more minutes. Alternatively, you can try incorporating a tiny bit more sugar-free gelatin, ensuring it dissolves completely.
Q: How long will this sugar-free jam last?
A: Stored properly in the refrigerator, it will keep for about a week. For longer storage, freezing for up to a month is a great option.
Final Thoughts
There’s a profound satisfaction in creating something as simple yet delightful as this sugar-free strawberry jam. It’s a testament to how straightforward ingredients and a little bit of kitchen magic can yield incredibly delicious results, all while aligning with a sugar-conscious lifestyle. I hope this recipe brings a little bit of that summer sweetness into your kitchen, and I’d be delighted to hear how you enjoy it. Perhaps you’ll pair it with a batch of fluffy almond flour biscuits or a crisp green salad with a strawberry vinaigrette. Happy preserving!