
Really, Really Good (And Easy!) Buttercream Frosting
There are certain flavors that just instantly transport me back to childhood kitchens, the air thick with the scent of something wonderful baking. For me, one of those quintessential aromas is the sweet, comforting smell of buttercream frosting. I remember vividly my grandmother’s kitchen, a place where flour dust motes danced in sunbeams and the clatter of mixing bowls was a constant symphony. She’d make this buttercream for absolutely everything – birthday cakes, simple cupcakes for after school, and even just as a treat to smear on a biscuit. It was never overly complicated, always perfectly sweet, and undeniably delicious. This recipe, which I discovered on the Confessions of a Cookbook Queen blog, has become my absolute go-to. It’s the epitome of a country-style, non-cook buttercream, and it’s so forgiving and straightforward that anyone can master it.
Recipe Overview
- Prep Time: 10 minutes
- Cook Time: 0 minutes
- Total Time: 10 minutes
- Servings: Depends on usage
- Yield: 2 ½ cups
- Dietary Type: Vegetarian
Ingredients
This recipe relies on simple, pantry-staple ingredients to create a frosting that’s both incredibly flavorful and delightfully easy to make.
- 1 cup salted butter, softened (this is equivalent to 2 sticks)
- 4 cups powdered sugar
- 1 teaspoon vanilla extract
- 2 tablespoons milk (any type except fat-free will work beautifully here)
- 1-2 tablespoons corn syrup (I typically reach for light corn syrup for its neutral flavor and excellent emulsifying properties)
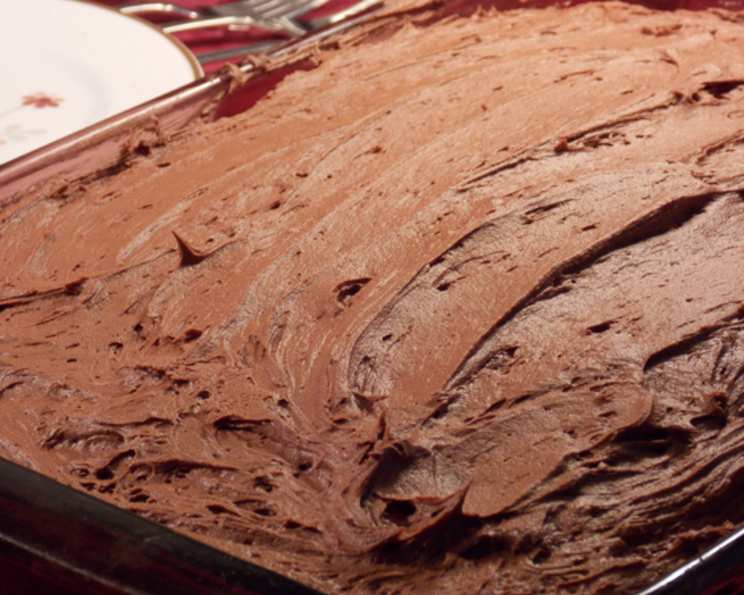
- ⅓ cup unsweetened cocoa powder (this is optional, but essential if you’re craving a rich chocolate frosting)
Equipment Needed
While this recipe is delightfully simple, a few key tools will make the process even smoother.
- Stand mixer or hand mixer
- Large mixing bowl
- Spatula
- Measuring cups and spoons
Instructions
The beauty of this buttercream lies in its straightforward assembly. There’s no cooking involved, just careful mixing to achieve the perfect texture.
- Begin by placing the softened butter, milk, and vanilla extract into the bowl of your stand mixer. If you don’t have a stand mixer, a reliable hand mixer will work just as effectively.
- Start mixing on low speed. You’ll want to mix until the ingredients just begin to come together, which should take about a minute. Don’t overmix at this stage.
- Pause your mixer and use your spatula to scrape down the sides of the bowl. This ensures all the ingredients are incorporated evenly.
- Increase the mixer speed to medium-low and continue to beat for another minute or so. You’re looking to start incorporating a bit of air into the butter.
- Now, elevate the mixer speed to medium high and beat for approximately another minute. At this point, the butter should be starting to lighten in color and become fluffy.
- It’s time to introduce the powdered sugar. If you’re making chocolate frosting, add the unsweetened cocoa powder now as well. Beat on low speed until the powdered sugar is just barely incorporated into the butter mixture. This is crucial to prevent a cloud of sugar from exploding out of the bowl.
- Scrape down the sides of the bowl once more with your spatula. Then, slowly increase the mixer speed to medium and beat for about a minute.
- Now comes the critical step: checking your frosting’s consistency. This is where you’ll fine-tune it for the perfect spreadability. Your frosting is likely too thick if your spatula does not glide through it with ease.
- If the frosting is too thick, add about 1 tablespoon of corn syrup and beat on medium speed for about 30 seconds. The corn syrup acts as a humectant and also helps to create a smoother, more pliable texture.
- If you intend to pipe decorations onto your cakes or cupcakes, this is a good moment to set aside a portion of the frosting in a separate bowl. Frosting that is just holding its shape is ideal for piping.
- Add another tablespoon of corn syrup and beat on medium speed for another 30 seconds.
- Continue to repeat this process of adding a tablespoon of corn syrup and beating until the frosting reaches a good, spreadable consistency. You don’t want it too runny, as it will slide right off your baked goods, but it should be smooth enough to easily spread with an offset spatula or knife.
- Once you’ve achieved your desired spreadable consistency, increase the mixer speed to medium high and beat for one final minute. This last step is key to making your frosting incredibly fluffy and light, giving it that professional finish.
Expert Tips & Tricks
- Butter Temperature is Key: For the creamiest frosting, your salted butter needs to be truly softened, not melted. Leave it at room temperature for about an hour to an hour and a half. You should be able to press your finger into it easily, leaving an indentation.
- Sifting is Your Friend: For the smoothest possible frosting, especially when adding cocoa powder, I highly recommend sifting your powdered sugar and cocoa powder before adding them to the butter mixture. This removes any lumps and ensures a silky texture.
- Adjusting Consistency: The amount of milk and corn syrup can be slightly adjusted based on humidity and the fat content of your butter. Start with the minimum amount and add more gradually until you reach your desired consistency. Remember, it’s easier to thin out frosting than to thicken it.
- Flavor Variations: While vanilla and chocolate are classics, don’t hesitate to experiment! Add a teaspoon of espresso powder to the chocolate version for a mocha twist, or a touch of citrus zest to the vanilla for brightness.
- Achieving Fluffiness: Don’t skip that final minute of beating on medium-high speed. This step aerates the frosting significantly, making it light, airy, and wonderfully spreadable.
Serving & Storage Suggestions
This Really, Really Good (And Easy!) Buttercream Frosting is incredibly versatile. It’s perfect for frosting cakes, filling cupcakes, or even just enjoying by the spoonful (we won’t judge!).
- Serving: Apply frosting to cooled cakes and cupcakes. For a professional finish, use an offset spatula or piping bag.
- Storage: Store any leftover frosting in an airtight container at room temperature for up to 2 days, provided your kitchen isn’t excessively warm. If you need to store it longer, refrigerate it in an airtight container for up to a week.
- Refrigerated Frosting: Before using refrigerated frosting, let it sit at room temperature for about 30 minutes to soften. You may need to give it a quick whisk with your mixer to restore its smooth, fluffy texture.
- Freezing: This buttercream freezes beautifully. Store it in an airtight container or a freezer-safe bag for up to 2 months. Thaw overnight in the refrigerator, then bring to room temperature and re-whip as described above.
Nutritional Information
(Please note: Nutritional information is an estimate and can vary based on specific ingredients and brands used.)
| Nutrient | Amount per ½ cup (approx.) | % Daily Value |
|---|---|---|
| Calories | 600 kcal | 30% |
| Total Fat | 30 g | 38% |
| Saturated Fat | 19 g | 95% |
| Cholesterol | 78 mg | 26% |
| Sodium | 273 mg | 12% |
| Total Carbohydrate | 80 g | 29% |
| Dietary Fiber | 0 g | 0% |
| Sugars | 75 g | 150% |
| Protein | 0.5 g | 1% |
Variations & Substitutions
While this recipe is fantastic as is, here are a few ideas to switch things up:
- Chocolate Frosting: As noted in the ingredients, simply add ⅓ cup of unsweetened cocoa powder along with the powdered sugar.
- Lemon Buttercream: Omit the corn syrup and add 1-2 tablespoons of fresh lemon juice and 1 teaspoon of lemon zest for a bright, tangy flavor. You might need to adjust the powdered sugar slightly.
- Cream Cheese Frosting Base: For a richer, tangier frosting, use a combination of cream cheese and butter. Beat 4 ounces of softened cream cheese with the softened butter before adding the other ingredients. You may need slightly less milk or corn syrup.
FAQs
Q: Can I make this frosting ahead of time?
A: Absolutely! This buttercream can be made a day or two in advance and stored in an airtight container in the refrigerator. Just be sure to let it come to room temperature and re-whip it before using.
Q: My frosting is too stiff. What can I do?
A: If your frosting is too stiff, gradually add more milk or corn syrup, one teaspoon at a time, while mixing on low speed until you achieve your desired consistency.
Q: My frosting is too runny. How can I fix it?
A: If your frosting is too runny, you can try adding more powdered sugar, a tablespoon at a time, while mixing on low speed. Be cautious not to add too much, as it can make the frosting too stiff.
Q: Can I use a different type of sugar besides powdered sugar?
A: For this specific recipe, powdered sugar (also known as confectioners’ sugar or icing sugar) is essential. It’s finely milled and contains cornstarch, which helps to create the smooth, lump-free texture of buttercream. Granulated sugar will result in a gritty frosting.
Q: Is this frosting suitable for piping decorations?
A: Yes, with a slight adjustment. The frosting at the point where it’s just holding its shape (before adding extra corn syrup for spreadability) is excellent for piping. You can also achieve piping consistency by chilling a slightly too-soft batch for about 15-20 minutes.
Final Thoughts
This buttercream frosting is more than just a sweet topping; it’s a shortcut to pure joy. It’s the kind of recipe that makes baking accessible and rewarding, transforming simple cakes and cupcakes into showstoppers with minimal effort. Whether you’re celebrating a birthday, a holiday, or just a Tuesday, this frosting is guaranteed to bring smiles. I encourage you to whip up a batch and experience its delightful simplicity. Pair it with a classic vanilla or chocolate cake, or even a simple batch of sugar cookies, and savor the sweet success!