
Red Velvet Crepes with Dreamy Cheesecake Filling: A Decadent Delight
There are certain desserts that just feel like a special occasion, even when you’re enjoying them on a Tuesday afternoon. For me, red velvet has always held that magical allure – that deep, rich color promising an equally intense flavor. I still remember the first time I encountered a red velvet cake, a towering creation at a local bakery that seemed almost too beautiful to eat. Later, I discovered the magic of red velvet in more playful forms, and when I combined that beloved flavor with the delicate elegance of crepes, and then cradled it all in a cloud of creamy cheesecake filling, it was pure culinary bliss. This recipe is a testament to that discovery, a delightful dance of textures and tastes that will undoubtedly enchant your taste buds.
Recipe Overview
- Prep Time: 45 minutes
- Cook Time: 30 minutes
- Total Time: 1 hour 15 minutes (plus 30 minutes chilling time)
- Servings: 6
- Yield: 12 crepes
- Dietary Type: Dessert
Ingredients
For the Red Velvet Crepes:
- 1 ½ cups all-purpose flour
- 2 tablespoons unsweetened cocoa powder
- 1 tablespoon granulated sugar
- 1 teaspoon baking powder
- ½ teaspoon salt
- 2 cups whole milk
- 2 large eggs
- 1 tablespoon unsalted butter, melted
- 1 teaspoon vanilla extract
- Red gel food coloring (amount to achieve desired color)
- Nonstick cooking spray
For the Cheesecake Filling:
- 16 ounces cream cheese, softened
- 1 cup powdered sugar
- 4 tablespoons unsalted butter, softened
- 1 teaspoon vanilla extract
- ¼ teaspoon salt
- ¼ cup mini chocolate chips
For Garnish:
- Confectioners’ sugar
- Chocolate syrup
- Whipped cream
- Fresh berries
Equipment Needed
- Blender
- Glass bowl
- Whisk
- 8-inch nonstick skillet
- Spatula (offset spatula is helpful)
- Food processor or mixing bowl with electric mixer
- Pastry bag (optional, but recommended for neat filling application)
- Measuring cups and spoons
Instructions
- To begin crafting your luscious red velvet crepes, combine all the ingredients for the crepes – that’s the flour, unsweetened cocoa powder, granulated sugar, baking powder, salt, whole milk, eggs, melted butter, and vanilla extract – in a blender. Process these ingredients until they are thoroughly combined and boast a smooth, homogenous consistency.
- Next, introduce about ¾ teaspoon of red gel food coloring to the blender. Blend again until the color is evenly distributed throughout the batter, achieving that signature vibrant red hue.
- Pour the crepe batter into a glass bowl. Cover it with plastic wrap, ensuring a snug seal, and refrigerate for a minimum of 30 minutes. This chilling period allows the gluten to relax, resulting in more tender crepes.
- While your crepe batter is chilling, prepare the decadent cheesecake filling. In a food processor or a mixing bowl using an electric mixer, combine the softened cream cheese, unsalted butter, powdered sugar, vanilla extract, and salt. Mix until the filling is smooth, creamy, and well-combined.
- Gently fold in the mini chocolate chips into the cheesecake filling. Take care not to overmix at this stage.
- Transfer the cheesecake filling to a pastry bag. If you don’t have a pastry bag, you can use a sturdy zip-top bag with a corner snipped off, or simply plan to spoon the filling directly from the bowl. Place the pastry bag on the counter to ensure the filling remains at a workable room temperature.
- When the crepe batter has finished chilling, uncover it and give it a quick whisk to ensure it’s thoroughly incorporated.
- Heat an 8-inch nonstick skillet over medium heat. Lightly spray the skillet with nonstick cooking spray.
- Scoop ¼ cup of the red velvet crepe batter into the center of the heated skillet. Immediately tilt and swirl the pan to evenly coat the bottom of the skillet with a thin layer of batter. This technique is crucial for creating delicate, uniform crepes.
- Cook the crepe for approximately 2 minutes. You’ll know it’s ready to flip when the edges have dried and are beginning to lift slightly from the sides of the pan, and the center appears set. Carefully flip the crepe over and cook for an additional 30 to 60 seconds on the other side.
- Repeat this process with the remaining batter, adding a little more cooking spray to the pan between crepes as needed. You should yield a total of 12 crepes. Set the cooked crepes aside on a plate, perhaps with a sheet of parchment paper between each to prevent sticking.
- To assemble your red velvet crepes, lay one crepe flat. Pipe or spread a generous, thick layer of the cheesecake filling onto the bottom half of the crepe. If needed, use an offset spatula to spread the filling evenly.
- Carefully fold the top half of the crepe over the cheesecake filling, creating a semicircle. Then, fold this semicircle in half once more to form a neat, elegant triangle.
- Repeat this assembly process with the remaining crepes and cheesecake filling.
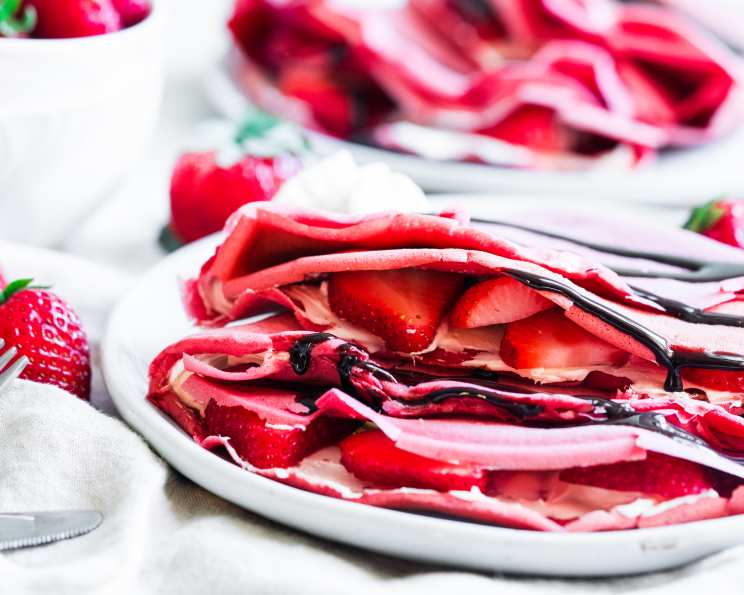
- For the final touch, serve each red velvet crepe with a delicate dust of confectioners’ sugar, a tempting drizzle of chocolate syrup, a dollop of fluffy whipped cream, and a few fresh berries on the side for a burst of color and freshness.
Expert Tips & Tricks
- Achieving the Perfect Red: For the most vibrant red color without affecting the flavor or texture, use a good quality red gel food coloring. Liquid food coloring can sometimes dilute the batter too much. Start with ¾ teaspoon and add more, a tiny bit at a time, until you achieve your desired shade.
- Crepe Consistency is Key: The key to successful crepes lies in a thin, even layer of batter. If your first crepe is a little wonky, don’t worry! It’s often a learning curve for the pan’s temperature. Subsequent crepes will likely be more uniform.
- Don’t Overfill: While it’s tempting to load up on the cheesecake filling, resist the urge to overstuff. Too much filling can make the crepes difficult to fold neatly and may cause them to break.
- Pastry Bag Precision: Using a pastry bag for the cheesecake filling offers the most control and creates a very professional-looking finish. If you don’t have one, a thick zip-top bag works well. Squeeze gently and evenly.
- Temperature Control: Ensuring your cream cheese and butter are truly softened for the filling is vital for a smooth, lump-free consistency. Left out on the counter for about an hour should do the trick.
Serving & Storage Suggestions
These Red Velvet Crepes with Cheesecake Filling are best enjoyed fresh, allowing the textures of the tender crepe and creamy filling to shine. Serve them immediately after assembly.
For any leftovers, store them in an airtight container in the refrigerator for up to 2 days. The crepes may become slightly softer due to the filling, but they will still be delicious. It’s not recommended to freeze assembled crepes as the cheesecake filling can change in texture. If you have leftover crepe batter, it can be stored in an airtight container in the refrigerator for up to 2 days, but it may require a quick whisk before use.
Nutritional Information
| Nutrient | Amount per Serving | % Daily Value |
|---|---|---|
| Calories | 330.1 kcal | |
| Calories from Fat | 191 kcal | |
| Total Fat | 21.2 g | 32% |
| Saturated Fat | 12.1 g | 60% |
| Cholesterol | 89.4 mg | 29% |
| Sodium | 336.6 mg | 14% |
| Total Carbohydrate | 29.5 g | 9% |
| Dietary Fiber | 0.9 g | 3% |
| Sugars | 16.2 g | 64% |
| Protein | 6.6 g | 13% |
(Nutritional values are approximate and can vary based on specific ingredients used.)
Variations & Substitutions
- Gluten-Free Crepes: For a gluten-free version, you can substitute a good quality all-purpose gluten-free flour blend for the all-purpose flour. Ensure the blend contains xanthan gum.
- Dairy-Free Filling: While challenging to perfectly replicate the classic cream cheese texture, you could experiment with a dairy-free cream cheese alternative and vegan butter for the filling. The flavor profile will differ.
- Chocolate Chip Alternatives: If mini chocolate chips aren’t your favorite, consider finely chopped dark chocolate or white chocolate chips.
- Fruity Twist: Instead of chocolate chips in the filling, try folding in a small amount of finely diced fresh strawberries or raspberries for a fruity counterpoint.
- Boozy Kick: For an adult version, a tablespoon of a red liqueur like Chambord could be added to the cheesecake filling for an extra layer of flavor.
FAQs
Q: Why did my crepes stick to the pan?
A: Ensure your pan is adequately heated and properly greased with nonstick cooking spray or butter before adding the batter. Also, make sure you’re using a good quality nonstick skillet.
Q: My cheesecake filling is lumpy. What did I do wrong?
A: The most common reason for lumpy filling is not using softened cream cheese and butter. Ensure these ingredients are at room temperature for easy incorporation and a smooth result.
Q: Can I make the crepe batter ahead of time?
A: Yes, the red velvet crepe batter can be made up to 2 days in advance and stored in an airtight container in the refrigerator. Remember to whisk it well before using.
Q: How do I get my crepes perfectly round?
A: The key is to pour the batter into the center of the pan and immediately tilt and swirl the pan quickly and evenly to create a thin, circular layer.
Q: Can I make the cheesecake filling ahead of time?
A: The cheesecake filling can be made a day in advance and stored in an airtight container in the refrigerator. It may firm up slightly, so allow it to sit at room temperature for about 15-20 minutes before piping or spreading.
These Red Velvet Crepes with Cheesecake Filling are more than just a recipe; they’re an experience. They represent a fusion of comfort and elegance, a way to elevate a simple meal into a moment of pure indulgence. Whether you’re celebrating a special occasion or simply craving something extraordinary, I encourage you to try this delightful creation. And when you do, perhaps pair them with a chilled glass of sparkling rosé or a warm cup of coffee for a truly perfect pairing. I can’t wait to hear about your delicious adventures!