
The Undeniable Allure: Crafting Perfect Reese’s Peanut Butter Cups (Copycat)
There are few flavor combinations as universally beloved as peanut butter and chocolate. It’s a classic pairing that evokes childhood memories, celebratory treats, and pure, unadulterated joy. For me, the ultimate embodiment of this perfect union has always been the iconic Reese’s Peanut Butter Cup. I still remember the thrill of unwrapping those distinctive orange packages, the anticipation of that first glorious bite where creamy, salty peanut butter meets rich, sweet chocolate. This recipe, a faithful rendition inspired by the masters of copycat creations, allows us to recreate that magic in our own kitchens, bringing a little piece of confectionery heaven right to our countertops.
Recipe Overview
- Prep Time: 25 minutes
- Cook Time: 5 minutes (for melting chocolate)
- Total Time: 30 minutes (plus chilling time)
- Servings: 12 cups
- Yields: 12 candies
- Dietary Type: Vegetarian (can be made dairy-free/vegan with ingredient swaps)
Ingredients
The beauty of this recipe lies in its simplicity, using just a handful of core ingredients to achieve that familiar, craveable taste.
- 12 ounces milk chocolate chips
- 1 cup creamy peanut butter
- 1/3 cup confectioners’ sugar
- 1/4 teaspoon salt
Equipment Needed
To bring these delicious copycat cups to life, you’ll need a few essential kitchen tools:
- Muffin tin (preferably with shallow cups, but regular size will work)
- Paper or foil liners (for the muffin tin)
- Small bowl (for peanut butter mixture)
- Medium heatproof bowl (for melting chocolate)
- Small saucepan (if using a double boiler)
- Spoon
- Offset spatula or the back of a spoon
Instructions
Crafting these Reese’s Peanut Butter Cups is a rewarding process, breaking down into simple, achievable steps. Pay close attention to the details, and you’ll be rewarded with a truly authentic-tasting treat.
-
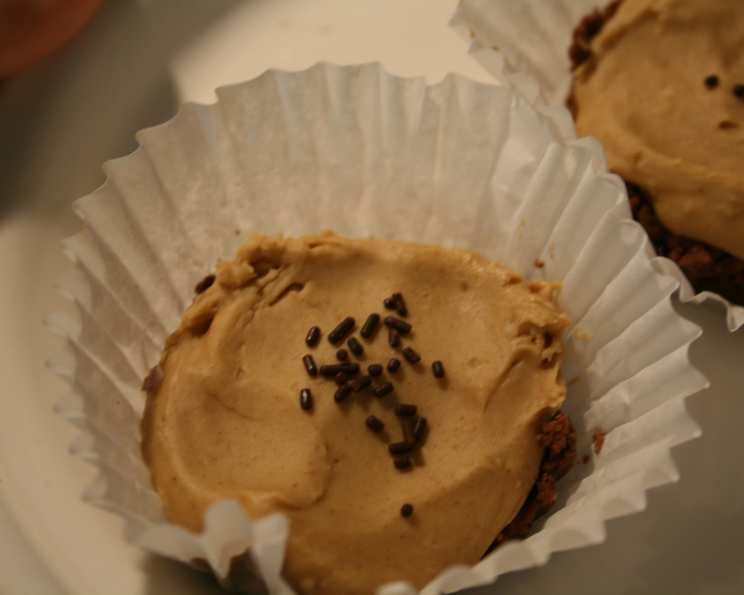
Prepare the Peanut Butter Filling: In a small bowl, combine the creamy peanut butter, confectioners’ sugar, and salt. Mix these ingredients thoroughly until a firm, cohesive mixture forms. You want it to be firm enough to hold its shape when spooned. Set this aside.
-
Melt the Chocolate: You have two excellent methods for melting the milk chocolate chips.
- Double Boiler Method: Fill a small saucepan with about an inch of water and bring it to a simmer over medium heat. Place a heatproof bowl on top of the saucepan, ensuring the bottom of the bowl does not touch the water. Add the milk chocolate chips to the bowl. Stir occasionally as the chocolate melts, until it is completely smooth and liquid.
- Microwave Method: Place the milk chocolate chips in a heatproof bowl. Microwave on 50% power for about two minutes, stopping to stir midway through. Continue microwaving in 30-second increments, stirring after each interval, until the chocolate is smooth and fully melted. Be careful not to overheat, as chocolate can seize.
-
Assemble the Base Layer: Line your muffin tin cups with paper or foil liners. Spoon a portion of the melted milk chocolate into the bottom of each liner, filling it about halfway.
-
Coat the Edges: Using the back of a spoon or a small offset spatula, carefully draw the melted chocolate up the sides of each cup, ensuring that all sides are coated. This creates the characteristic “cup” shape.
-
Chill the Base: Place the muffin tin into the refrigerator. Allow the chocolate cups to chill until they are completely firm to the touch. This usually takes about 15–20 minutes.
-
Add the Peanut Butter Filling: Once the chocolate base is firm, remove the muffin tin from the refrigerator. Spoon approximately one teaspoon of the prepared peanut butter mixture onto the center of the hardened chocolate in each cup. Ensure you leave some space around the edges for the final chocolate layer.
-
Top with Chocolate: You may need to gently re-heat the remaining milk chocolate if it has thickened too much. Pour a bit more melted chocolate over the peanut butter filling in each cup, spreading it carefully to the edges to cover the peanut butter completely and create the top layer of the candy.
-
Final Setting: Allow the assembled candies to set. You can do this by leaving them at room temperature for a while, or for a quicker set, cover the muffin tin and place it back in the refrigerator.
-
Unmold and Enjoy: Once the chocolate is completely firm and set, carefully turn out the candies from the muffin tin.
Expert Tips & Tricks
To elevate your homemade Reese’s Peanut Butter Cups from good to extraordinary, consider these insider tips:
- Peanut Butter Consistency is Key: The firmness of your peanut butter mixture is crucial. If it’s too soft, it will ooze out. If it’s too dry, it might crumble. Aim for a consistency that’s easily spoonable but holds its shape. You can achieve this by adjusting the confectioners’ sugar slightly, adding a teaspoon at a time if needed.
- Chocolate Quality Matters: While standard milk chocolate chips work wonderfully, using high-quality chocolate will significantly impact the final flavor. Consider using a good brand of milk chocolate baking chips or even chopped chocolate bars for a richer, more complex taste.
- Tempering for Shine (Optional): For that professional, glossy finish often seen in store-bought candies, you can temper your chocolate. This is a more advanced technique that involves carefully controlling the chocolate’s temperature to create stable cocoa butter crystals. While not strictly necessary for a delicious copycat, it will give your cups a beautiful sheen and a satisfying snap.
- Smooth Edges: When coating the sides of the muffin tin with chocolate, take your time. A thin, even layer is best. If the chocolate is too thick, it can make the cups difficult to remove or result in a bite that’s too heavily chocolate-flavored.
- Don’t Overfill: When adding the peanut butter layer, resist the urge to overfill. A modest amount ensures the top chocolate layer will fully encapsulate it without creating an uneven surface.
Serving & Storage Suggestions
These homemade Reese’s Peanut Butter Cups are best enjoyed when they’ve had a chance to fully set. Serve them slightly chilled for the best texture, where the chocolate has a pleasant snap and the peanut butter filling is creamy and yielding.
For storage, these delightful treats are quite forgiving. Keep them in an airtight container at room temperature for up to 3-4 days. If your kitchen is particularly warm, or if you prefer them firmer, store them in the refrigerator. They will last for about 2 weeks when refrigerated. You can also freeze them for longer storage, up to 2-3 months, ensuring they are well-wrapped to prevent freezer burn. When ready to enjoy from frozen, allow them to thaw in the refrigerator for a few hours or at room temperature for about 30 minutes.
Nutritional Information
Here is an estimated nutritional breakdown for one copycat Reese’s Peanut Butter Cup. Please note that these are approximations and can vary based on specific brands of ingredients used.
| Nutrient | Amount per Serving | % Daily Value |
|---|---|---|
| Calories | 291 | |
| Total Fat | 19.2 g | 29% |
| Saturated Fat | 7.5 g | 37% |
| Cholesterol | 6.5 mg | 2% |
| Sodium | 169.6 mg | 7% |
| Total Carbohydrate | 24.4 g | 8% |
| Dietary Fiber | 2.2 g | 9% |
| Sugars | 19.8 g | 79% |
| Protein | 7.6 g | 15% |
Calories from Fat: 173 g (approximately 59% of total calories)
Variations & Substitutions
While this recipe aims for the classic Reese’s experience, feel free to get creative!
- Dark Chocolate: For those who prefer a richer, less sweet profile, swap the milk chocolate chips for high-quality dark chocolate chips.
- White Chocolate: A delightful twist can be achieved by using white chocolate chips for a different flavor dimension.
- Peanut Butter Alternatives: While traditional peanut butter is the star, consider using almond butter, cashew butter, or sunflower seed butter for a nut-free option. Adjust the confectioners’ sugar and salt as needed, as different nut butters have varying flavor profiles and sweetness.
- Sea Salt Flakes: For an extra gourmet touch, sprinkle a few flakes of flaky sea salt on top of the final chocolate layer before it sets.
FAQs (Frequently Asked Questions)
Q: Why is my chocolate seizing when I try to melt it?
A: Chocolate can seize if it comes into contact with even a tiny amount of water, or if it’s overheated. Ensure your bowls and utensils are completely dry, and use gentle heat when melting.
Q: Can I make these without a muffin tin?
A: Yes, you can use silicone candy molds designed for cups or even create “bark” style pieces by spreading the layers thinly on parchment paper.
Q: My peanut butter mixture seems too crumbly. What can I do?
A: Add a tiny bit more peanut butter, or a teaspoon of melted butter or coconut oil, to help bind the ingredients. Mix thoroughly until you achieve a workable consistency.
Q: How do I get that smooth, even chocolate coating on the sides?
A: A small offset spatula or the back of a spoon works best. Work quickly while the chocolate is fluid and press gently to ensure good adhesion to the liner and the bottom layer.
Q: Can I make these vegan?
A: Absolutely! Use dairy-free milk chocolate chips and ensure your peanut butter is vegan (most are, but check the label).
A Sweet Conclusion
Recreating the beloved Reese’s Peanut Butter Cup in your own kitchen is not just about satisfying a craving; it’s about the joy of creation and the pleasure of sharing something truly delicious. This recipe offers a wonderfully accessible path to that iconic taste and texture. I encourage you to gather your ingredients, embrace the process, and allow the magic of peanut butter and chocolate to unfold. The results are a testament to the power of simple ingredients when combined with care and a touch of culinary adventure. I’d love to hear about your experiences and any creative twists you discover along the way!