
Refrigerator Garlic Dill Pickles: The Ultimate Deli Dill Experience
There are few things in my culinary journey that evoke such pure, unadulterated joy as the perfect dill pickle. I remember vividly the weekends spent at my grandparents’ home, the air thick with the scent of summer produce and my grandmother’s tireless kitchen efforts. Among her many treasures, the jar of “refrigerator dills” always held a special place. They weren’t the brightly colored, aggressively vinegary kind, but rather a more nuanced, deeply flavorful pickle that tasted of sun-ripened cucumbers, fresh dill, and pungent garlic. The satisfying crunch, the tangy brine – it was a taste of pure nostalgia, a testament to simple ingredients treated with respect. This recipe, a close replica of her cherished method, brings that exact memory back to life with every crisp bite, and it’s a recipe I’ve been asked for countless times by friends and family who’ve had the pleasure of tasting them.
Recipe Overview
- Prep Time: 20 minutes
- Cook Time: 0 minutes (brine is boiled but not cooked with pickles)
- Total Time: 20 minutes + 5 days chilling
- Servings: Varies depending on cucumber size and jar packing
- Yield: 4 Quarts
- Dietary Type: Vegan, Gluten-Free, Dairy-Free
Ingredients
- 4-5 quarts cucumbers (enough to fill your chosen ice cream bucket or large jars)
- 2-4 heads fresh dill
- 2-4 garlic cloves
- 1 small onion
- 7 ½ cups water
- 2 cups vinegar
- ½ cup salt (or just a bit less than ½ cup, to your preference)
Equipment Needed
- Large ice cream bucket or several large glass jars (approximately 4-quart capacity total)
- Medium saucepan
- Cutting board
- Knife
- Measuring cups and spoons
Instructions
-
Begin by preparing your brine. In a medium saucepan, combine the 7 ½ cups of water, 2 cups of vinegar, and ½ cup of salt (or your slightly adjusted amount). Place the saucepan over medium-high heat and bring the brine solution to a boil. Once it reaches a rolling boil, immediately turn off the burner. The brine is now ready.
-
While the brine is heating, prepare your pickling vessel. If you are using an ice cream bucket, ensure it is thoroughly cleaned and sanitized. If using jars, sterilize them beforehand.
-
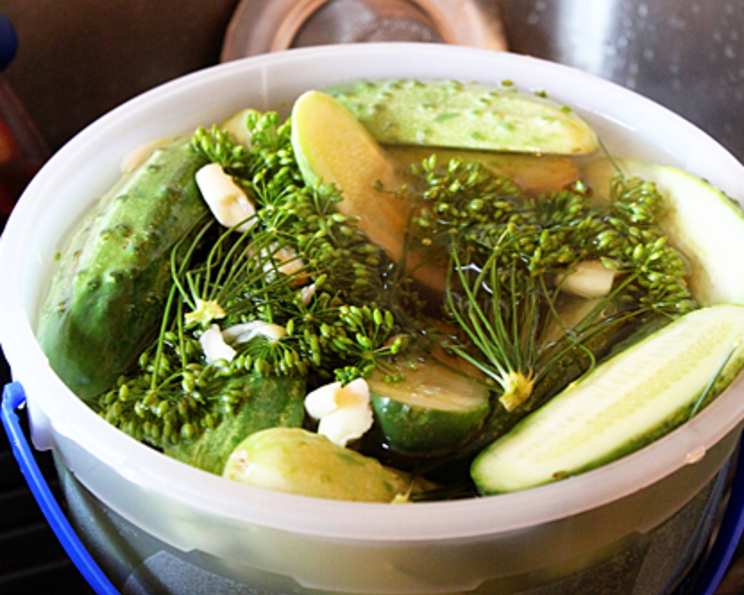
Begin layering the flavor components in your bucket or jars. Place a dill head at the bottom. Then, add a few garlic cloves and a few onion slices. If your cucumbers are on the smaller side, you can toss them in whole. For larger cucumbers, it’s best to quarter them to ensure they fit snugly and are fully submerged in the brine. Continue layering the cucumbers, dill heads, garlic cloves, and onion slices until your container is full. Aim for a dense pack to maximize the number of pickles you can fit.
-
Once your pickling vessel is packed, carefully pour the warm brine over the cucumbers and other ingredients. The brine should be warm, not piping hot, to avoid “cooking” the cucumbers and affecting their crispness.
-
It is crucial that the cucumbers remain submerged in the brine to prevent spoilage and ensure proper pickling. Place a plate or a smaller jar filled with water on top of the cucumbers to keep them pressed down.
-
Cover the bucket or jars tightly.
-
Place the covered container in your refrigerator.
-
Allow the pickles to chill and pickle for at least 5 days before consuming. This period allows the flavors to meld and the cucumbers to absorb the brine’s tang.
-
These refrigerator pickles are designed to last. They will keep well in the refrigerator for 9 to 12 months.
NOTE: For a truly customized flavor experience, feel free to add other ingredients to the ice cream bucket alongside the dill, garlic, and onion. Consider adding hot peppers for a spicy kick, whole black peppercorns, mustard seeds, or red pepper flakes for added depth and zing.
Expert Tips & Tricks
The beauty of these refrigerator pickles lies in their simplicity, but a few pointers can elevate them even further. When selecting your cucumbers, opt for fresh, firm, and unwaxed pickling varieties like Kirby or Boston picklers. Their thin skins and dense flesh are ideal for pickling. Avoid mature cucumbers with large seeds, as they can lead to a softer pickle. When preparing the garlic, you can lightly smash the cloves before adding them; this releases more of their pungent aroma and flavor into the brine. If you’re using a large ice cream bucket, ensure it’s one that has been used solely for food storage and is impeccably clean. For those who prefer a less intense garlic flavor, you can always reduce the number of garlic cloves. Remember, the salt level is key; while ½ cup is standard, tasting the brine before pouring it over the cucumbers (once it’s cooled slightly) can help you gauge if you’d prefer a touch more or less.
Serving & Storage Suggestions
These Garlic Dill Refrigerator Pickles are incredibly versatile. Serve them chilled, straight from the refrigerator, alongside sandwiches, burgers, or as a crunchy accompaniment to a charcuterie board. They also make a fantastic addition to potato salads or as a refreshing snack on their own.
For storage, as mentioned, they are designed to last up to 9-12 months in the refrigerator when kept submerged in their brine. Ensure the lid is always tightly sealed and that the pickles remain submerged under the brine. If you notice any cloudiness or off smells, it’s best to discard them.
Nutritional Information
| Nutrient | Amount per Serving (estimated, 1 pickle) | % Daily Value (estimated) |
|---|---|---|
| Calories | 93.1 kcal | |
| Calories from Fat | ||
| Total Fat | 0.5 g | 0% |
| Saturated Fat | 0.2 g | 0% |
| Cholesterol | 0 mg | 0% |
| Sodium | 14171.7 mg | 590% |
| Total Carbohydrate | 17.3 g | 5% |
| Dietary Fiber | 2.4 g | 9% |
| Sugars | 7.8 g | 31% |
| Protein | 3 g | 5% |
Note: Nutritional information is an estimation and can vary based on the exact size of cucumbers and the amount of brine absorbed.
Variations & Substitutions
The beauty of this recipe is its adaptability. As noted in the instructions, feel free to experiment with added spices for a unique twist. For a spicier pickle, a few jalapeño or serrano peppers, sliced, can be added to the layering. A pinch of dill seed or coriander seed can also impart a deeper herbal note. If you’re looking for a more complex brine, consider adding a tablespoon of mustard seeds or a few whole peppercorns. For those who enjoy a touch of sweetness with their sour, a small amount of sugar could be added to the brine, though this moves away from the classic deli dill profile.
FAQs
Q: Can I use any type of cucumber for this recipe?
A: It’s best to use firm pickling cucumbers like Kirby or Boston varieties. Their flesh is denser, which results in a crisper pickle.
Q: Why do the pickles need to sit for 5 days before eating?
A: The 5-day chilling period allows the cucumbers to absorb the brine’s flavors and become properly pickled, developing their signature tangy taste and crunchy texture.
Q: How do I ensure my pickles stay submerged in the brine?
A: Using a plate, a smaller jar filled with water, or even a clean fermentation weight on top of the cucumbers will help keep them submerged.
Q: My pickles seem soft. What could have gone wrong?
A: Soft pickles can result from using older cucumbers, not keeping them properly submerged, or using a weak brine. Ensure your cucumbers are fresh and firm, and that they are always covered by brine.
Q: Can I can these pickles for shelf stability?
A: This recipe is specifically designed for refrigerator pickles and is not intended for water bath canning. They must be stored in the refrigerator.
Final Thoughts
Bringing this recipe to life is more than just making pickles; it’s about preserving a taste of tradition and creating a delightful culinary experience. The simple act of layering fresh ingredients and watching them transform in the brine is incredibly rewarding. I encourage you to try your hand at these Refrigerator Garlic Dill Pickles. Share them with loved ones, enjoy them with your favorite meals, and perhaps create your own delicious memories. They are the perfect accompaniment to a hearty sandwich or a crisp summer salad. Happy pickling!