
Refrigerator Lemonade Pie: A Sweet Slice of Nostalgia
There are certain flavors that, for me, are inextricably linked to childhood summers. The scent of freshly cut grass, the distant jingle of an ice cream truck, and the impossibly bright, tangy-sweet punch of my grandmother’s refrigerator lemonade pie. It wasn’t baked; it was assembled, a magical transformation happening in the cool, quiet hum of the fridge. I remember peering into the glass pie plate, marveling at the billowy whipped topping studded with flecks of lemon zest, a promise of pure, unadulterated refreshment. This pie, with its remarkably simple assembly and its deeply satisfying flavor, was a staple at our family gatherings, a testament to how a few well-chosen ingredients can create something truly extraordinary.
Recipe Overview
- Prep Time: 10 minutes
- Cook Time: 0 minutes
- Total Time: 10 minutes (plus chilling time)
- Servings: 8
- Yield: 1 Pie
- Dietary Type: Vegetarian
Ingredients
This pie is a beautiful example of minimal effort yielding maximum flavor. The magic lies in the alchemy of just a few key components.
For the Pie:
- 1 (14-ounce) can sweetened condensed milk
- 1 tablespoon lemon juice (freshly squeezed is always best for that vibrant tang!)
- 6 ounces frozen lemonade concentrate (undiluted – this is where the intense lemon flavor comes from!)
- 1 teaspoon vanilla extract
- 1 (8-ounce) container whipped topping (thawed, if frozen)
- 6 ounces small pre-made graham cracker pie crust
Equipment Needed
The beauty of this recipe is its simplicity, requiring only basic kitchen tools.
- A medium-sized mixing bowl
- A whisk or rubber spatula
- A 6-ounce pre-made graham cracker pie crust (this is a specific size and type, so ensure you have this on hand for the perfect fit)
Instructions
This is less of a recipe and more of an assembly guide, a delightful testament to the power of chilled convenience.
- In your medium mixing bowl, combine the sweetened condensed milk, lemon juice, frozen lemonade concentrate, and vanilla extract. Whisk or stir these ingredients together until they are thoroughly blended and the mixture is smooth. This initial blend is where the tartness and sweetness begin to meld.
- Gently fold the whipped topping into the sweetened condensed milk mixture. Be careful not to overmix; you want to maintain the airy texture of the whipped topping. The goal is to incorporate it fully without deflating it, creating a light and fluffy filling.
- Carefully pour the filling into the pre-made graham cracker pie crust. Use your spatula to spread it evenly, ensuring it reaches all the edges of the crust.
- Refrigerate the pie for at least 4 hours, or until thoroughly chilled and set. This chilling time is crucial for the pie to firm up and for the flavors to meld beautifully.
Expert Tips & Tricks
While this pie is delightfully straightforward, a few chef-approved insights can elevate your experience from good to glorious.
- The Importance of Thawed Whipped Topping: Ensure your whipped topping is completely thawed but not melted. If it’s too frozen, it will be difficult to fold in, and if it’s too warm, it can affect the texture of the finished pie, making it less firm.
- Zest for Extra Zing: For an even more intense lemon flavor and a pop of color, consider adding the zest of one fresh lemon to the filling mixture in step 1. This adds a lovely brightness that complements the concentrated lemonade.
- Chilling is Key: Don’t rush the chilling process. The minimum of 4 hours is essential for the pie to set properly. For an even firmer texture, an overnight chill is ideal. This allows the flavors to deepen and the consistency to become perfectly sliceable.
- Crust Perfection: While a pre-made crust is convenient, you can also make your own graham cracker crust if you prefer. Combine about 1.5 cups of graham cracker crumbs with 6 tablespoons of melted butter and 2 tablespoons of sugar. Press this mixture firmly into a 9-inch pie plate and bake at 350°F (175°C) for 8-10 minutes. Let it cool completely before filling.
Serving & Storage Suggestions
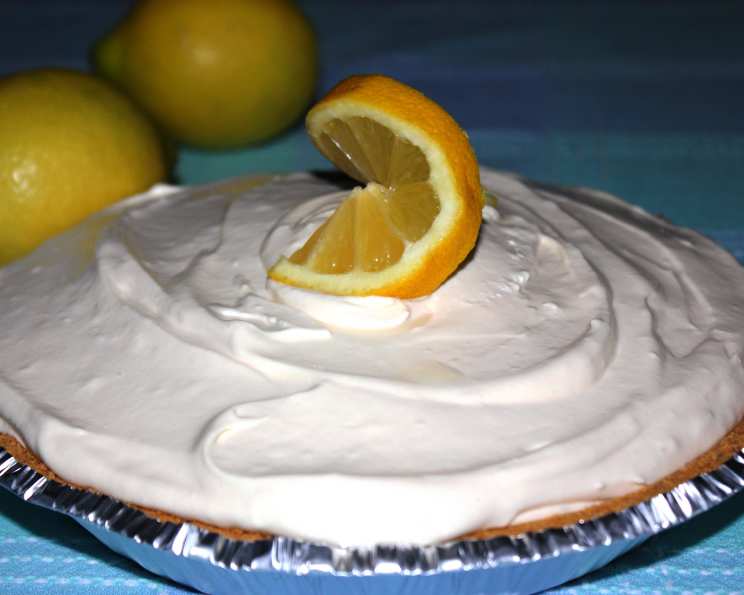
This Refrigerator Lemonade Pie is best served cold, a welcome respite on a warm day. It slices beautifully when properly chilled, revealing its creamy, pale yellow interior.
- Serving: Garnish with a dollop of extra whipped topping, a sprinkle of graham cracker crumbs, or a thin slice of fresh lemon for an elegant presentation. A few fresh berries, like raspberries or blueberries, also add a lovely contrast in color and flavor.
- Storage: Leftover pie can be stored, covered tightly with plastic wrap or in an airtight container, in the refrigerator for up to 3 days. Because it’s a no-bake pie with a whipped topping, it’s not recommended for freezing, as the texture can become compromised.
Nutritional Information
Here’s an estimated breakdown of the nutritional content per serving. Please note that these are approximate values and can vary based on specific brands and ingredient variations.
| Nutrient | Amount per Serving | % Daily Value |
|---|---|---|
| Calories | 395.7 kcal | |
| Calories from Fat | ||
| Total Fat | 16.4 g | 25% |
| Saturated Fat | 8 g | 39% |
| Cholesterol | 39.7 mg | 13% |
| Sodium | 224 mg | 9% |
| Total Carbohydrate | 58.3 g | 19% |
| Dietary Fiber | 0.4 g | 1% |
| Sugars | 49.7 g | 198% |
| Protein | 5.8 g | 11% |
Variations & Substitutions
While the classic recipe is perfection, there’s always room for creative interpretation.
- Limeade Twist: For a delightful variation, substitute the frozen lemonade concentrate with an equal amount of frozen limeade concentrate. This will yield a refreshing Limeade Pie.
- Key Lime Kiss: Use frozen Key Limeade concentrate for a distinctively tart and tropical flavor profile.
- Citrus Blend: Experiment with a combination of lemonade and limeade concentrates for a unique citrus symphony.
- Crust Options: If graham cracker isn’t your preference, a vanilla wafer crust or even a pre-made shortbread crust can offer a delicious alternative. For a gluten-free option, use a gluten-free graham cracker or cookie crust.
FAQs
Q: Why is this called a “refrigerator” pie?
A: It’s called a refrigerator pie because it doesn’t require any baking. All the ingredients are mixed and then chilled in the refrigerator until firm.
Q: Can I make my own graham cracker crust instead of using a pre-made one?
A: Absolutely! A homemade graham cracker crust is a wonderful option. You’ll typically need about 1.5 cups of graham cracker crumbs mixed with melted butter and a touch of sugar, pressed into a pie plate and baked briefly.
Q: How long does this pie last in the refrigerator?
A: This pie is best enjoyed within 3 days of being made. After that, the texture may start to degrade.
Q: Can I use fresh lemon juice instead of frozen concentrate?
A: While fresh lemon juice is fantastic for flavor, you would need a significantly larger quantity and potentially adjust other ingredients to achieve the right consistency and sweetness without the concentrate. For this specific recipe, the frozen concentrate is key to its structure and intense flavor.
Q: My pie didn’t set properly. What could have gone wrong?
A: The most common reasons for a pie not setting are insufficient chilling time or over-mixing the whipped topping, which deflates it. Ensure you’ve chilled it for the full recommended time and folded the whipped topping in gently.
Final Thoughts
This Refrigerator Lemonade Pie is more than just a dessert; it’s a memory in a slice. It’s the embodiment of simple pleasures, a testament to the fact that you don’t need complex techniques or exotic ingredients to create something truly delightful. It’s the perfect antidote to a sweltering afternoon, a comforting presence at a potluck, or a simple, sweet ending to any meal. Gather your ingredients, embrace the ease of its assembly, and let the refrigerator work its magic. I hope this bright, tangy, and wonderfully creamy pie brings as much joy and nostalgia to your table as it has to mine.