
Rice and Beef Porcupines: A Comforting Classic
The aroma of simmering tomato sauce, fragrant with garlic and herbs, has always been a nostalgic trigger for me. It instantly transports me back to my childhood kitchen, where my mom, with flour dusting her apron and a smile on her face, would conjure up dishes that felt like edible hugs. Among her repertoire, one dish always stood out: Rice and Beef Porcupines. It wasn’t just a meal; it was a lesson in simple, honest cooking, a testament to how a few humble ingredients could transform into something truly special. Winning second place at a Scouting Camporee in a cooking contest with this very recipe cemented its status as an award-winning favorite, a memory I cherish deeply.
Recipe Overview
- Prep Time: 15 minutes
- Cook Time: 45 to 50 minutes
- Total Time: 1 hour to 1 hour 5 minutes
- Servings: 4 to 6
- Yields: 12-15 Balls
- Dietary Type: Contains Beef
Ingredients
Here’s what you’ll need to bring these savory porcupines to life:
- 1 pound ground beef
- 1/2 cup uncooked rice
- 3 tablespoons onions, chopped
- 1 teaspoon garlic powder
- 1 teaspoon salt
- 1/2 teaspoon pepper
- 1/4 teaspoon poultry seasoning (optional, but recommended for an extra layer of flavor)
- 3 tablespoons oil (vegetable or canola oil works well)
- 2 (8-ounce) cans tomato sauce
- 1 cup water
Equipment Needed
You won’t need any fancy gadgets for this recipe. A few standard kitchen tools will do:
- A large mixing bowl
- A skillet or Dutch oven with a lid
- A spoon or spatula for stirring
Instructions
Creating these flavorful Rice and Beef Porcupines is a straightforward process, yielding a dish that is both comforting and deeply satisfying.
- Prepare the Porcupine Mixture: In your large mixing bowl, combine the ground beef, uncooked rice, chopped onions, garlic powder, salt, pepper, and the poultry seasoning if you’re using it. Gently mix these ingredients together until they are just combined. Be careful not to overmix, as this can result in tough porcupines.
- Form the Porcupines: Using your hands, gently shape the beef mixture into small balls. Aim for a size that’s easy to manage, roughly 1 to 1.5 inches in diameter. You should get about 12 to 15 porcupines from this quantity.
- Brown the Porcupines: Place your skillet or Dutch oven over medium-high heat. Add the 3 tablespoons of oil and allow it to heat up. Once the oil is shimmering, carefully add the formed beef balls to the hot skillet. You may need to do this in batches to avoid overcrowding the pan, which can lead to steaming instead of browning. Brown the balls lightly on all sides. This step is crucial for developing flavor and a pleasing texture.
- Add the Sauce: Once the porcupines are lightly browned, pour in the two 8-ounce cans of tomato sauce and the 1 cup of water. Stir gently to combine everything, making sure to scrape up any flavorful browned bits from the bottom of the pan.
- Simmer to Perfection: Bring the mixture to a gentle simmer. Once simmering, cover the skillet or Dutch oven tightly with a lid. Reduce the heat to low and let the porcupines simmer for 45 to 50 minutes, or until the rice is tender and cooked through. You can test a porcupine by carefully removing one and cutting into it to check the rice’s texture.
Expert Tips & Tricks
To elevate your Rice and Beef Porcupines from good to extraordinary, consider these insights from my years in the kitchen:
- Rice Matters: While standard uncooked white rice works perfectly, you could experiment with medium-grain rice for a slightly chewier texture. Just ensure it’s uncooked when mixed in.
- Don’t Skip the Browning: This step is non-negotiable for optimal flavor. The Maillard reaction that occurs during browning creates deep, savory notes that are fundamental to this dish.
- Gentle Handling: Treat the beef mixture with care when forming the balls. Overworking the meat can make the final porcupines dense and unappealing.
- Low and Slow: Simmering with the lid on is key to ensuring the rice cooks thoroughly without drying out the beef. Resist the urge to peek too often, as this can release too much steam.
- Seasoning Adjustments: Taste the sauce once you add the tomato sauce and water. You might find it needs a pinch more salt or pepper, depending on your preference and the saltiness of your tomato sauce.
Serving & Storage Suggestions
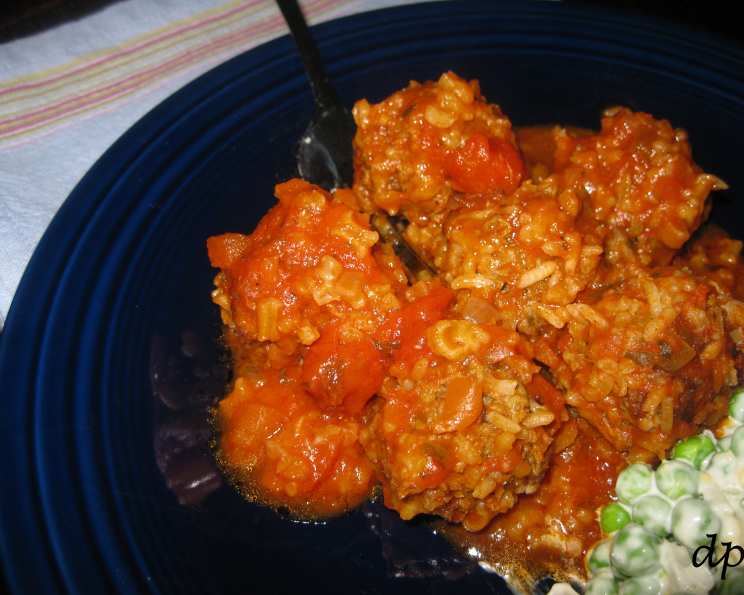
Rice and Beef Porcupines are wonderfully versatile. They are traditionally served as a hearty main course, perhaps alongside a simple green salad or some steamed vegetables like green beans or peas. The rich, savory sauce is perfect for spooning over mashed potatoes or a side of buttered noodles.
Storage:
Leftovers can be stored in an airtight container in the refrigerator for up to 3-4 days. When reheating, gently warm them on the stovetop over low heat, or in the microwave, being careful not to overcook the beef. If the sauce seems a little thick after refrigeration, you can add a tablespoon or two of water or beef broth to loosen it up.
Nutritional Information
Here’s an estimated nutritional breakdown for this delightful dish. Please note these are approximate values and can vary based on specific ingredient choices and portion sizes.
| Nutrient | Amount per Serving | % Daily Value |
|---|---|---|
| Calories | 455.4 kcal | |
| Calories from Fat | 248 g | |
| Total Fat | 27.6 g | 42% |
| Saturated Fat | 8.1 g | 40% |
| Cholesterol | 77.1 mg | 25% |
| Sodium | 1257.9 mg | 52% |
| Total Carbohydrate | 26.9 g | 8% |
| Dietary Fiber | 2.3 g | 9% |
| Sugars | 5.2 g | 20% |
| Protein | 24.4 g | 48% |
Variations & Substitutions
While the classic recipe is undeniably delicious, there’s always room for a personal touch!
- Leaner Beef: For a lighter version, opt for 90% or 93% lean ground beef.
- Spicy Kick: Add a pinch of red pepper flakes to the beef mixture for a subtle heat.
- Herbaceous Notes: Fresh parsley or a touch of dried thyme can be added to the meatball mixture for an extra layer of aromatic complexity.
- Vegetable Boost: Finely diced bell peppers or carrots could be incorporated into the onion mixture, adding color and extra nutrients.
- Gluten-Free Option: If you need to make this gluten-free, ensure your tomato sauce and any other added ingredients are certified gluten-free. The rice itself is naturally gluten-free.
FAQs
Q: Why are they called “Porcupines”?
A: They are named “porcupines” because the uncooked rice peeking out from the surface of the browned beef balls resembles the quills of a porcupine.
Q: Can I use brown rice instead of white rice?
A: While white rice is recommended for its quicker cooking time and tender texture, you could try using brown rice. However, you may need to increase the simmering time significantly to ensure the brown rice is fully cooked.
Q: Can I make the porcupine balls ahead of time?
A: Yes, you can form the porcupine balls and refrigerate them for up to 24 hours. Brown them just before adding the sauce and simmering.
Q: My sauce seems too thin, what can I do?
A: If your sauce is thinner than you prefer after simmering, you can remove the lid for the last 10-15 minutes of cooking to allow some of the liquid to evaporate, or you can whisk together a tablespoon of cornstarch with a tablespoon of cold water and stir it into the simmering sauce until thickened.
Q: Can I freeze Rice and Beef Porcupines?
A: Yes, you can freeze the cooked porcupines in their sauce. Let them cool completely, then transfer to a freezer-safe container. Reheat thoroughly on the stovetop or in the oven.
Final Thoughts
This dish, Rice and Beef Porcupines, is a true testament to the power of simple, home-style cooking. It’s the kind of meal that warms you from the inside out, perfect for a busy weeknight or a comforting Sunday dinner. I encourage you to gather your ingredients, embrace the process, and create your own cherished memories around the table with this award-winning classic. Serve it with a dollop of sour cream or a sprinkle of fresh parsley for an extra touch of elegance, and perhaps pair it with a crisp, dry white wine or a smooth, fruity red. Enjoy!