
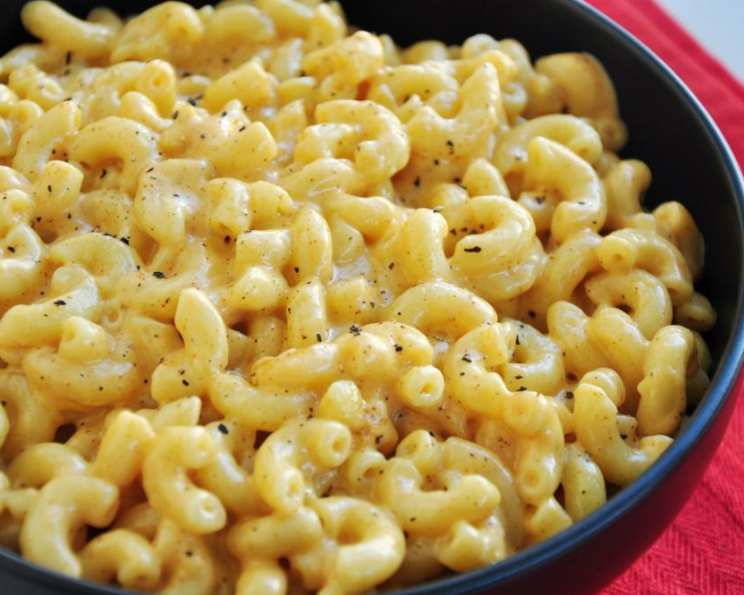
The Unbelievable Ease of Rice Cooker Mac and Cheese
There are some culinary shortcuts that feel like a betrayal of tradition, a quick fix that compromises soul. Then, there’s the magic of this rice cooker mac and cheese. I still remember the first time I stumbled upon a recipe for this seemingly outlandish concept. My skepticism was immediate; mac and cheese, a dish requiring careful stovetop stirring and a watchful eye on the melting cheese, in a rice cooker? Yet, the promise of effortless, creamy goodness, far surpassing the humble boxed version, was too intriguing to ignore. That first batch was a revelation – a testament to how modern appliances can simplify cherished comfort foods without sacrificing an ounce of flavor or that coveted gooey texture. It’s become my secret weapon for busy weeknights and impromptu gatherings, a dish that always surprises and delights.
Recipe Overview
- Prep Time: 10 minutes
- Cook Time: 30 minutes
- Total Time: 40 minutes
- Servings: 2-3
- Yield: A pot of creamy mac and cheese
- Dietary Type: Vegetarian (can be adapted)
Ingredients
This recipe relies on a few pantry staples and a trio of cheeses to create that signature decadent flavor.
- 1 ½ cups elbow macaroni
- 1 ½ cups chicken broth or 1 ½ cups water and a good-quality chicken bouillon cube
- 1 cup heavy cream
- ¾ cup shredded cheddar cheese
- ½ cup shredded mozzarella cheese
- ¼ cup shredded Parmesan cheese
- ¼ teaspoon kosher salt (to taste)
- ½ teaspoon dry mustard
- ½ teaspoon paprika
- ¼ teaspoon pepper
Equipment Needed
The beauty of this recipe lies in its minimal equipment.
- A rice cooker with a “cook” and “keep warm” function.
Instructions
The simplicity of this method is its greatest strength. You’ll be amazed at how your rice cooker transforms these basic ingredients into a gourmet-level comfort food.
- Begin by combining the elbow macaroni, chicken broth (or water and bouillon), and heavy cream directly in the bowl of your rice cooker.
- Close the lid and press the “cook” button. Allow the mixture to cook, stirring occasionally to prevent the macaroni from sticking to the bottom.
- Once the rice cooker automatically switches to the “keep warm” setting, it’s time to add the magic.
- Gently stir in the shredded cheddar cheese, shredded mozzarella cheese, shredded Parmesan cheese, kosher salt, dry mustard, paprika, and pepper. Stir thoroughly until all the cheese is completely melted and the sauce is wonderfully smooth and creamy.
- Press the “cook” button again. Don’t be alarmed when the rice cooker switches back to “keep warm” after just a few minutes. This brief cooking period is crucial for achieving that coveted slightly caramelized, delicious brown cheese on the bottom – a hallmark of perfectly made mac and cheese.
- Once the machine switches to “keep warm” for the second time, your mac and cheese is ready to be served.
Expert Tips & Tricks
- Cheese Quality Matters: For the best melt and flavor, opt for good quality, real cheeses that you shred yourself from a block. Pre-shredded cheeses often contain anti-caking agents that can make the sauce slightly less smooth.
- Broth vs. Water: While water and bouillon work perfectly well, using chicken broth will lend a deeper, more savory flavor profile to your mac and cheese.
- The “Browned” Bottom: The instruction to press “cook” again after the initial switch to “keep warm” is key. This short, intense burst of heat on the bottom of the pot is what creates those irresistible browned bits of cheese that add so much character. Don’t skip this step!
- Adjusting Consistency: If you find your mac and cheese is a little thicker than you prefer after all the cheese has melted, you can stir in a tablespoon or two more of heavy cream or milk while it’s on “keep warm” until you reach your desired consistency.
Serving & Storage Suggestions
This rice cooker mac and cheese is best served piping hot, straight from the rice cooker, allowing everyone to appreciate its creamy, cheesy goodness.
- Serving: Ladle generous portions into bowls. For an extra touch, you could sprinkle a little more paprika or some chopped fresh chives on top. It pairs wonderfully as a side dish to grilled meats, fried chicken, or even a simple green salad for a balanced meal.
- Storage: Leftovers can be stored in an airtight container in the refrigerator for up to 3 days.
- Reheating: To reheat, gently warm the mac and cheese in a saucepan over low heat, stirring frequently and adding a splash of milk or cream if it seems too thick. Alternatively, you can microwave it in short intervals, stirring between each, until heated through. Be mindful that reheating can sometimes alter the texture slightly, but it will still be delicious.
Nutritional Information
Here’s an approximate breakdown of the nutritional content for a serving of this rich and satisfying mac and cheese. Please note that these values are estimates and can vary based on specific brands and ingredient choices.
| Nutrient | Amount per Serving | % Daily Value |
|---|---|---|
| Calories | 1045.5 kcal | N/A |
| Calories from Fat | 70.4 g | 108% |
| Saturated Fat | 42.7 g | 213% |
| Cholesterol | 240.6 mg | 80% |
| Sodium | 1531 mg | 63% |
| Total Carbohydrate | 65.1 g | 21% |
| Dietary Fiber | 2.9 g | 11% |
| Sugars | 3.5 g | 13% |
| Protein | 38.2 g | 76% |
Variations & Substitutions
While this recipe is wonderfully classic, feel free to experiment with these ideas to make it your own:
- For a Deeper Flavor: Consider adding a finely minced clove of garlic or a pinch of nutmeg to the initial liquid before cooking.
- Spicy Kick: Incorporate a pinch of cayenne pepper or some finely diced jalapeños along with the shredded cheeses.
- Cheese Combinations: Don’t be afraid to swap out some of the cheeses. Gruyère, fontina, or a sharp white cheddar can add delightful nuances.
- Vegetarian Option: Simply use vegetable broth instead of chicken broth, and ensure your bouillon cube is vegetarian.
FAQs
Q: Can I use a different type of pasta?
A: While elbow macaroni is traditional and cooks evenly, other small shapes like shells, rotini, or penne can also work. Adjust cooking time slightly if necessary.
Q: My rice cooker doesn’t have a “cook” and “keep warm” function. What should I do?
A: If your rice cooker only has a “cook” setting, you’ll need to monitor it closely and manually switch it to a low heat setting or “warm” when the initial cooking stage is done to prevent burning.
Q: How can I make this mac and cheese creamier?
A: Ensure you’re using full-fat heavy cream and good quality cheese. Stirring in a little extra milk or cream at the end on “keep warm” can also help.
Q: Can I add protein to this recipe?
A: Absolutely! Cooked bacon bits, shredded chicken, or even some cooked sausage can be stirred in with the cheeses for a heartier meal.
Q: Will the cheese on the bottom burn?
A: The second “cook” cycle is designed to lightly brown the cheese on the bottom, not to burn it. However, always keep an eye on it, especially if your rice cooker tends to run hot.
Final Thoughts
This rice cooker mac and cheese is more than just a recipe; it’s a testament to the ingenious ways we can adapt and simplify our favorite comfort foods. It’s a dish that proves you don’t need to spend hours slaving over a hot stove to achieve incredibly delicious results. So, next time you’re craving that cheesy, soul-warming goodness, bypass the box and let your rice cooker do the heavy lifting. Gather your ingredients, embrace the ease, and prepare to be thoroughly impressed. I’d love to hear how it turns out for you!