
Rice Krispies Chocolate Dream Bars: A Childhood Classic Reimagined
As a chef, I’ve spent decades in the kitchen, meticulously crafting everything from elegant multi-course meals to humble, soul-warming comfort foods. But there are some dishes that transcend mere technique, carrying with them a potent dose of nostalgia. These Rice Krispies Chocolate Dream Bars are precisely that for me. I remember them being the undisputed star of every church fellowship gathering, disappearing from the dessert table with astonishing speed. The sheer joy of watching people’s faces light up as they took their first bite always made me feel a deep sense of satisfaction, a reminder of the simple magic that good food can conjure.
Recipe Overview
- Prep Time: 20 minutes
- Cook Time: 20-23 minutes
- Total Time: 2 hours 43 minutes (includes chilling)
- Servings: 6 (approximate, based on 6 servings for a standard pie)
- Yield: 48 2×1 inch bars
- Dietary Type: Vegetarian
Ingredients
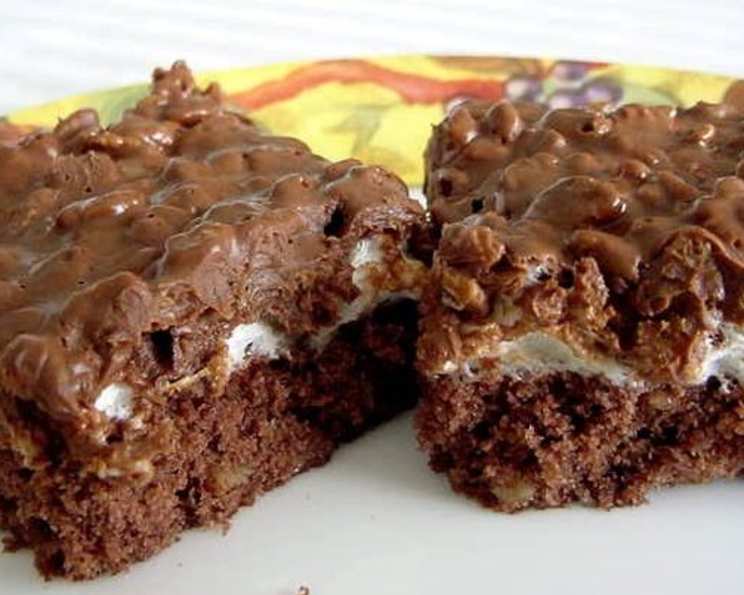
This recipe beautifully balances a tender, chocolatey base with a gooey marshmallow middle and a rich, chocolate-peanut butter topping, all punctuated by the satisfying crunch of Rice Krispies.
For the Bottom Layer:
- 1/2 cup softened butter or 1/2 cup margarine
- 3/4 cup granulated sugar
- 1 teaspoon vanilla extract
- 2 large eggs
- 3/4 cup all-purpose flour
- 2 tablespoons unsweetened cocoa powder
- 1/4 teaspoon baking powder
- 1/8 teaspoon salt (or a pinch)
- 1/2 cup chopped walnuts or 1/2 cup chopped pecans (optional, but highly recommended for added texture)
For the Middle Layer:
- 2 cups miniature marshmallows
For the Top Layer:
- 1 cup semi-sweet chocolate chips
- 1 cup creamy peanut butter
- 2 cups Rice Krispies cereal
Equipment Needed
- 13×9 inch baking pan
- Large mixing bowl
- Electric mixer (handheld or stand mixer) or a sturdy whisk and strong arm
- Small saucepan
- Rubber spatula
- Measuring cups and spoons
- Cooling rack
- Knife or pizza cutter for slicing
Instructions
Crafting these bars is a delightful journey through layers of flavor and texture. Follow these steps carefully to achieve the perfect Rice Krispies Chocolate Dream Bars.
Prepare the Bottom Layer:
- Begin by preheating your oven to 350°F (175°C). Grease your 13×9 inch baking pan. This is crucial to prevent sticking and ensure easy removal of the finished bars.
- In a large mixing bowl, cream together the softened butter (or margarine) and the granulated sugar until the mixture is light and fluffy. This process incorporates air, which contributes to the tender texture of the base.
- Add the vanilla extract and then beat in the eggs, one at a time, ensuring each egg is fully incorporated before adding the next. This builds a stable emulsion for the batter.
- In a separate, smaller bowl, whisk together the all-purpose flour, cocoa powder, baking powder, salt, and chopped nuts (if using). Combining the dry ingredients separately ensures they are evenly distributed.
- Gradually stir the dry ingredients into the wet egg mixture until everything is just well combined. Be careful not to overmix at this stage, as it can lead to tough bars.
- Spread this chocolatey mixture evenly across the bottom of your prepared 13×9 inch pan. Ensure the layer is consistent for even baking.
- Bake at 350°F (175°C) for 15-20 minutes. You’re looking for the edges to be set and a toothpick inserted into the center to come out with moist crumbs, not wet batter.
Assemble the Middle Layer:
- Once the bottom layer has baked, carefully sprinkle the miniature marshmallows evenly over the hot base. The residual heat from the baked layer will begin to melt the marshmallows.
- Return the pan to the oven and bake for an additional 3 minutes. This short time is enough to soften the marshmallows and create a gooey layer.
- Remove the pan from the oven and let it cool completely. This step is vital. Attempting to add the top layer while the marshmallow is still hot and melty will cause it to slide off and mix with the chocolate, ruining the distinct layers. Patience here is key.
Create the Top Layer:
- While the base is cooling, prepare the topping. In a small saucepan, combine the semi-sweet chocolate chips and the peanut butter.
- Cook over low heat, stirring constantly, until the chocolate and peanut butter are completely melted and smooth. Low heat is essential to prevent scorching the chocolate.
- Once smooth, stir in the Rice Krispies cereal until it’s evenly coated in the chocolate-peanut butter mixture.
- Spread this cereal mixture evenly on top of the COOLED marshmallow layer. Work relatively quickly, as the mixture can start to set as it cools. Use your spatula to gently press it down to create a neat, even top.
Chill and Serve:
- Refrigerate the bars for at least 2 hours, or until firm. This allows the chocolate to set and the layers to meld together.
- Once firm, cut into bars of your desired size. A 2×1 inch bar is a classic proportion for these delightful treats.
Expert Tips & Tricks
- Butter vs. Margarine: While margarine works perfectly fine, using real butter will impart a richer, more nuanced flavor to the base. Ensure it’s softened to room temperature for easy creaming.
- Nutty Crunch: If you’re a fan of nuts, don’t skip them in the bottom layer! Walnuts and pecans offer a wonderful textural contrast and earthy flavor that complements the sweetness. Toasting them lightly beforehand can enhance their flavor even further.
- Marshmallow Magic: For an extra gooey marshmallow layer, you can reserve a small handful of marshmallows and press them into the topping mixture just before refrigerating. They’ll provide little pockets of melted goodness.
- Peanut Butter Precision: If your peanut butter is very stiff, you might need to warm it very slightly in the microwave for a few seconds before combining it with the chocolate chips. Be cautious not to overheat.
- Cutting for Clarity: For the cleanest cuts, especially through the chewy marshmallow layer, use a sharp knife that has been warmed by running it under hot water and then wiped dry. Wipe the knife clean between cuts for pristine edges.
Serving & Storage Suggestions
These Rice Krispies Chocolate Dream Bars are best served chilled, as this maintains their structure and the distinctiveness of the layers. They make a fantastic addition to any dessert spread, cookie platter, or as an after-school treat.
For storage, these bars fare exceptionally well. Store them in an airtight container in the refrigerator. They will remain delicious for up to 5 days. Due to the peanut butter and chocolate, they are best kept chilled. If you need to freeze them, wrap individual bars tightly in plastic wrap and then place them in a freezer-safe bag or container. They can be frozen for up to 2 months. Thaw them in the refrigerator overnight before enjoying.
Nutritional Information
Here’s an approximate nutritional breakdown per bar, assuming 48 bars are yielded:
| Nutrient | Amount per Serving | % Daily Value |
|---|---|---|
| Calories | 107.4 kcal | (Not specified) |
| Calories from Fat | (Not specified) | 56% |
| Total Fat | 6.7 g | 10% |
| Saturated Fat | 2.6 g | 12% |
| Cholesterol | 12.8 mg | 4% |
| Sodium | 61.2 mg | 2% |
| Total Carbohydrate | 10.9 g | 3% |
| Dietary Fiber | 0.8 g | 3% |
| Sugars | 6.9 g | 27% |
| Protein | 2.3 g | 4% |
Note: Nutritional values are estimates and can vary based on specific ingredients used.
Variations & Substitutions
While the classic combination is perfection, feel free to experiment!
- Chocolate Lover’s Dream: Swap the semi-sweet chocolate chips for a mix of dark chocolate and milk chocolate for a more complex flavor profile.
- Nut-Free: Omit the walnuts or pecans from the bottom layer and use a nut-free butter alternative in the topping if needed, though peanut butter is central to the flavor.
- White Chocolate Swirl: Melt 1/4 cup of white chocolate chips and drizzle them over the top layer before refrigerating for a decorative touch.
- Flavored Chips: As mentioned in the original inspiration, try using butterscotch or peanut butter chips instead of or in addition to the semi-sweet chocolate chips in the topping for a different flavor dimension.
FAQs
Q: Can I make the bottom layer ahead of time?
A: Yes, you can bake the bottom layer and let it cool completely, then cover and refrigerate it. Add the marshmallow and top layers the next day.
Q: Why are my bars not firm after refrigerating?
A: Ensure you’ve refrigerated them for the full 2 hours. If your kitchen is particularly warm, they may need a little longer. Make sure the chocolate-peanut butter mixture was spread while still somewhat warm and fluid.
Q: Can I use crunchy peanut butter instead of creamy?
A: Absolutely! Crunchy peanut butter will add an extra layer of texture to the topping, which many people enjoy.
Q: How do I prevent the marshmallows from burning?
A: The key is the very short baking time (3 minutes) after sprinkling them on the hot base. The oven’s residual heat does most of the work.
Q: Can I freeze these bars?
A: Yes, these bars freeze very well. Wrap them individually and store in a freezer-safe container for up to two months.
Final Thoughts
There’s a certain magic in simple, honest baking, and these Rice Krispies Chocolate Dream Bars are a testament to that. They evoke a sense of childhood delight, a comforting sweetness that appeals to all ages. I encourage you to recreate them in your own kitchen, perhaps for a family gathering or just as a special weekend treat. The aroma of melting chocolate and toasting cereal filling your home is a reward in itself. Share them generously, and I guarantee they’ll be as eagerly devoured as they were at those church fellowship potlucks. Enjoy every crunchy, chewy, chocolatey bite!