
Rita’s Famous Dressing Balls: A Culinary Embrace
The scent of baking bread, the savory aroma of sautéed onions and celery, and the promise of a golden-brown crust – these are the sensory harbingers of something truly special. For me, that something is Rita’s Famous Dressing Balls. I first encountered these delightful spheres at a holiday gathering hosted by my mother-in-law, Rita herself. I’d always been a hesitant participant in the dressing debate, finding traditional versions either too mushy or too dry. But one bite of these—perfectly formed, with a crisp exterior yielding to a tender, flavorful interior—completely changed my perspective. They’re not just a side dish; they’re a comforting hug on a plate, a testament to simple ingredients transformed by love and tradition.
Recipe Overview
- Prep Time: Approximately 30 minutes
- Cook Time: 45 minutes
- Total Time: 1 hour 15 minutes (plus overnight bread staling)
- Servings: 6
- Yield: Approximately 16-20 dressing balls
- Dietary Type: Adaptable (see Variations)
Ingredients
The beauty of Rita’s dressing balls lies in its humble, readily available ingredients, which come together to create something far greater than the sum of their parts.
- 2 loaves stale bread, torn into small pieces (approximately 20 cups)
- 1 cup butter or 1 cup margarine, melted
- 2 medium onions, chopped
- 2 1⁄2 stalks celery, finely chopped
- 2 cups low-fat chicken broth (canned is perfectly fine and often preferred for its consistent flavor)
- 2 large eggs, beaten
- 1 1⁄2 teaspoons celery seeds
- Salt, to taste
- Pepper, to taste
Equipment Needed
While this recipe relies on straightforward techniques, a few key tools will ensure success:
- A large mixing bowl (for combining and staling the bread)
- A large skillet or sauté pan (for softening the vegetables)
- A baking dish (e.g., a 9×13 inch baking dish or two smaller dishes)
- Your hands (essential for mixing!)
- A whisk or fork (for beating the eggs)
- Measuring cups and spoons
- An oven
Instructions
The process of making Rita’s Dressing Balls is a delightful journey, unfolding with simple steps that build upon each other to create a truly remarkable dish.
- Prepare the Bread: Begin by tearing your stale bread into small, bite-sized pieces. Place these torn pieces into a large bowl and let them sit out overnight, or for at least several hours. This process of staling is crucial, as it allows the bread to absorb the wet ingredients without becoming completely mushy.
- Preheat the Oven: When you are ready to begin cooking, preheat your oven to 350°F (175°C). This temperature is ideal for achieving that lovely golden-brown exterior while ensuring the inside is cooked through.
- Sauté the Aromatics: In a large skillet over medium heat, melt the butter or margarine. Add the chopped onions and finely chopped celery. Sauté these vegetables until they are tender and translucent, which typically takes about 5-7 minutes. This step infuses the dressing balls with a foundational layer of savory flavor.
- Combine Bread and Vegetables: Pour the softened onions and celery, along with any melted butter or margarine from the skillet, over the torn bread pieces in the large bowl.
- Toss to Mix: Using your hands, gently toss the bread and vegetable mixture to ensure the bread pieces are evenly coated with the fat and aromatics. This is where the magic begins to happen, transforming simple bread into the base of something extraordinary.
- Incorporate the Broth: Add the 2 cups of low-fat chicken broth to the bowl. Continue to mix with your hands, gently pressing and incorporating the broth into the bread mixture. You want the bread to be moistened but not completely saturated to the point of becoming a paste.
- Season to Perfection: Now, it’s time to season. Add salt and pepper to taste. Remember that you can always add more seasoning later, so start conservatively and adjust as needed.
- Add the Binder and Flavor: In a separate small bowl, beat the 2 large eggs. Add the beaten eggs and the 1 1⁄2 teaspoons of celery seeds to the main mixture. Mix thoroughly with your hands, ensuring everything is well combined. The eggs act as a binder, holding the dressing balls together, while the celery seeds offer a subtle, distinctive herbaceous note that complements the other flavors beautifully.
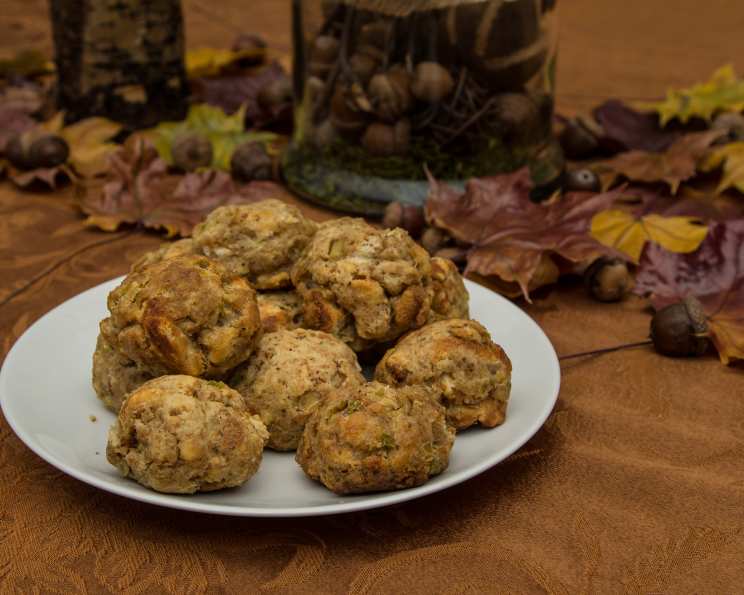
- Form the Balls: With clean hands, form the dressing mixture into 2-inch balls. Aim for a consistent size so that they bake evenly. Place these formed balls into a baking dish.
- Bake to Golden Perfection: Place the baking dish into your preheated oven. Bake for approximately 45 minutes, or until the dressing balls are golden brown on the outside and heated through. The exact time may vary slightly depending on your oven and the size of your balls.
Expert Tips & Tricks
As a chef, I’ve learned that a few subtle adjustments can elevate even the most beloved recipes. For Rita’s Dressing Balls, consider these insights:
- Bread Choice: While any stale white or challah bread will work, a slightly denser bread like a French baguette or Italian loaf will provide a more robust texture. Avoid overly soft, enriched breads that might become too gummy.
- Staling is Key: Don’t skimp on the staling process. If you’re short on time, you can lightly toast cubes of fresh bread in a 300°F (150°C) oven for about 10-15 minutes until they are dried out but not browned.
- Broth Consistency: If the mixture feels too dry after adding the broth, add a little more, a tablespoon at a time, until it holds together when squeezed. Conversely, if it feels too wet, you can add a few more pieces of torn stale bread.
- Make-Ahead Magic: The dressing mixture can be prepared a day in advance. Store it in an airtight container in the refrigerator. When ready to bake, let it sit at room temperature for about 30 minutes before forming the balls and proceeding with the baking instructions. You may need to add a splash more broth if it seems a bit dry after refrigeration.
- Crispiness Factor: For an extra crisp exterior, you can place the formed balls on a baking sheet lined with parchment paper instead of directly in a baking dish, ensuring good air circulation around each ball.
Serving & Storage Suggestions
Rita’s Dressing Balls are a star attraction on any table, and their presentation can be as simple or elaborate as you wish.
Serving: These dressing balls are a sublime accompaniment to roasted poultry, pork, or even a hearty vegetarian main. Serve them piping hot, perhaps nestled alongside a dollop of cranberry sauce or a spoonful of savory gravy. Their delightful spherical shape makes them a fun and appealing addition to a festive spread.
Storage: Leftover dressing balls can be stored in an airtight container in the refrigerator for up to 3 days. To reheat, place them on a baking sheet in a 350°F (175°C) oven for about 10-15 minutes, or until heated through and slightly crisped. Freezing is also an option; once cooled, place them on a baking sheet to freeze individually, then transfer to a freezer-safe bag or container for up to 1 month. Reheat directly from frozen in a 350°F (175°C) oven for 20-25 minutes.
Nutritional Information
While the exact nutritional values can vary based on ingredients used (especially butter vs. margarine and the type of bread), here’s an estimated breakdown per serving:
| Nutrient | Amount per Serving | % Daily Value |
|---|---|---|
| Calories | 218 kcal | 11% |
| Total Fat | 13.4 g | 17% |
| Saturated Fat | 7.8 g | 39% |
| Cholesterol | 56.9 mg | 19% |
| Sodium | 351.6 mg | 15% |
| Total Carbohydrate | 20.7 g | 8% |
| Dietary Fiber | 1.2 g | 4% |
| Sugars | 2.4 g | 3% |
| Protein | 4 g | 8% |
Note: This is an approximate nutritional calculation and may vary.
Variations & Substitutions
The charm of Rita’s dressing balls extends to their adaptability. While the original recipe is classic, here are a few ways to personalize it:
- Vegetarian/Vegan: For a vegetarian version, simply use vegetable broth instead of chicken broth. To make it vegan, you’ll need to substitute the butter with vegan butter and ensure your bread is vegan. The eggs can be omitted entirely, as the staled bread and broth mixture often holds its shape well, or you can experiment with a flax egg (1 tablespoon flaxseed meal mixed with 3 tablespoons water, let sit for 5 minutes) as a binder.
- Herbal Infusion: Feel free to add other herbs like fresh chopped parsley, sage, or thyme along with the celery and onions.
- Savory Additions: Cooked, crumbled sausage or bacon can be added to the mixture for an extra layer of richness and flavor.
- Gluten-Free: Use a good quality gluten-free stale bread to create a gluten-free variation. You may need to adjust the amount of broth slightly as gluten-free breads can absorb liquid differently.
FAQs
Q: Why does the bread need to be stale?
A: Stale bread has less moisture and a firmer texture, allowing it to absorb the wet ingredients without becoming overly mushy, resulting in better-formed and textured dressing balls.
Q: Can I make these ahead of time?
A: Yes, the dressing mixture can be prepared a day in advance and refrigerated. Form and bake when ready.
Q: How do I ensure the balls bake evenly?
A: Aim for uniform size when forming the balls and arrange them with a little space between them in the baking dish to allow for even heat circulation.
Q: What if my dressing mixture seems too dry or too wet?
A: If too dry, add a tablespoon of broth at a time. If too wet, add a few more pieces of torn stale bread.
Q: Are these the same as traditional stuffing?
A: While similar in ingredients, the “ball” format gives them a unique textural contrast – crisp on the outside, tender within – that differentiates them from typical stuffing baked in a dish.
Final Thoughts
Rita’s Famous Dressing Balls are more than just a recipe; they are an edible embodiment of comfort, tradition, and the joy of sharing a meal. They have a way of bringing people together, sparking conversations about family, holidays, and the simple pleasures of good food. I encourage you to try this recipe, to experience its unique charm, and perhaps even to create your own cherished memories around these delightful spheres. Serve them with your favorite roasted meats and gravies, or enjoy them on their own as a testament to how humble ingredients can achieve culinary greatness. I truly believe that once you try them, they will become a beloved staple in your own culinary repertoire.