
The Ultimate Roast Beef Panini with Zesty Horseradish Mayo
There’s a specific kind of magic that happens when humble ingredients are transformed into something truly spectacular. For me, that magic often manifests in a perfectly grilled sandwich, and few are as satisfying as a well-executed roast beef panini. I remember one blustery autumn afternoon, staring into my refrigerator, a bit uninspired. I had a beautiful, thinly sliced roast beef leftover from the weekend, some sturdy country bread, and a half-empty jar of horseradish. A quick mix of mayo and horseradish, a few slices of tomato and cheese, and soon, the aroma of toasting bread and savory beef filled my kitchen, creating an impromptu lunch that felt like a gourmet experience. It’s a dish that proves you don’t need a fancy occasion to treat yourself.
Recipe Overview
- Prep Time: 10 minutes
- Cook Time: 15 minutes
- Total Time: 25 minutes
- Servings: 4
- Yield: 4 paninis
- Dietary Type: Can be made dairy-free with alternative cheese
Ingredients
This recipe embraces simplicity, allowing the quality of your ingredients to shine. The beauty of a panini is its adaptability, but sticking to these core components will yield a truly delicious result.
- 8 slices of rustic country bread
- 1/2 cup mayonnaise (or more if you enjoy a generous spread)
- 1/4 cup prepared horseradish sauce
- 1/2 lb roast beef or 1/2 lb leftover steak, thinly sliced
- 1 red pepper (optional, for a touch of sweetness and crunch)
- 8 slices tomatoes
- 8 slices Havarti cheese (or your favorite melting cheese, like Provolone or Swiss)
- 2 teaspoons olive oil (for brushing the bread)
- 1 garlic clove (for rubbing on the bread)
- Herbs or salad greens (for garnish, optional)
Equipment Needed
You don’t need a professional kitchen to make a fantastic panini. Here are the tools that will help you achieve perfection:
- Small bowl (for mixing the horseradish mayo)
- Knife (for slicing ingredients and garlic)
- Cutting board
- Grill pan (a cast-iron ridged grill pan is ideal)
- Small frying pan (to use as a weight for pressing the panini)
- Spatula
- Plate (for serving)
Instructions
The process of creating this panini is straightforward, focusing on building layers of flavor and achieving that perfect toasted exterior.
-
Prepare the Horseradish Mayo: In a small bowl, combine the mayonnaise and prepared horseradish sauce. Stir until thoroughly mixed. This zesty spread is the flavorful foundation of your panini. Set it aside.
-
Prepare the Bread: Lay out your bread slices on a clean surface. Using a pastry brush or your fingers, lightly brush the underside of each bread slice with olive oil. Next, take the garlic clove and, with a firm but gentle pressure, rub its cut side over the oiled surface of the bread. This imparts a subtle but delightful garlicky aroma and flavor as the bread toasts.
-
Assemble the Paninis: Arrange the bread slices with the oiled and garlic-rubbed side facing down. Generously spread the prepared horseradish mayo on the unadorned side of each slice.
-
Layer the Fillings: On half of the bread slices (the ones that will form the bottom of your paninis), begin layering your fillings. Start with the thinly sliced roast beef (or leftover steak). If you’re using the red pepper, arrange a few thin rings over the beef. Next, place two slices of tomato on top of the beef and pepper. Finally, top each with two slices of Havarti cheese (or your chosen cheese).
-
Close the Paninis: Carefully take the remaining bread slices (with the horseradish mayo spread on them) and place them, mayo-side down, on top of the filled slices to create your sandwiches.
-
Grill the Paninis: Heat your grill pan over medium heat. Once the pan is warm, carefully place the assembled paninis onto the grill. Take the small frying pan and place it directly on top of the paninis to act as a weight, pressing them down. This will ensure even browning and a crispy exterior.
-
Cook and Flip: Let the paninis cook for about 5 to 7 minutes on the first side. You’re looking for a beautiful golden-brown crust. Carefully lift the small frying pan, and using a spatula, flip each panini. Replace the small frying pan on top to press down the other side. Cook for another 5 to 7 minutes, or until the second side is also golden brown and the cheese is wonderfully melted and gooey.
-
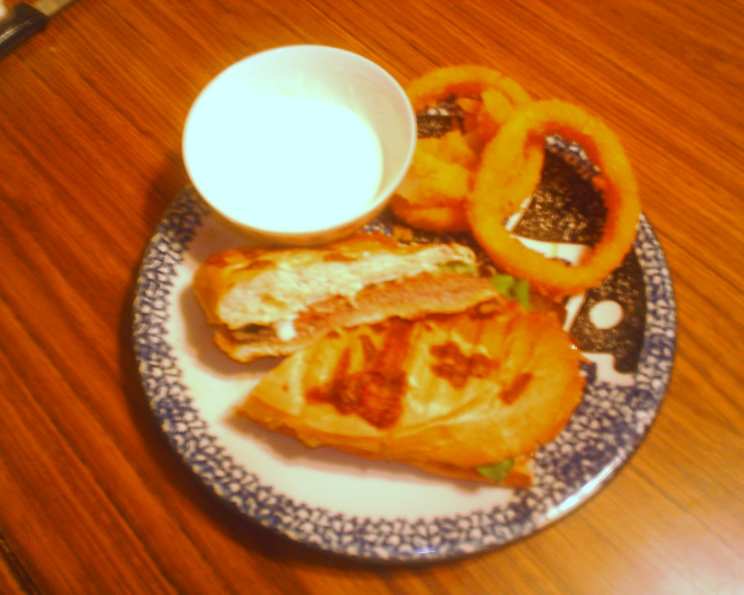
Serve: Once perfectly grilled, remove the paninis from the grill pan. Let them rest for a minute before cutting them in half, either diagonally or straight across. Garnish with fresh herbs or a few salad greens on the side, if desired.
Expert Tips & Tricks
- Bread Choice is Key: A sturdy bread like sourdough, ciabatta, or a good country loaf is essential. It needs to hold up to the fillings and the grilling process without becoming soggy. Avoid very soft sandwich breads.
- Don’t Overstuff: While it’s tempting to pile on the fillings, overstuffing can make the panini difficult to grill evenly and can lead to a messy eating experience. Aim for a balanced ratio of bread to filling.
- Garlic Rub: The garlic rub is a subtle touch but adds a fantastic layer of aroma. If you’re not a fan of raw garlic, you can skip this step, but I highly recommend giving it a try for an elevated flavor.
- Cheese Melt: For the best cheese melt, ensure your cheese slices are at room temperature before assembling. Cold cheese takes longer to melt and might not spread as evenly.
- Panini Press Alternative: If you don’t have a grill pan and a second frying pan, a standard skillet will work, but you might need to adjust your pressing method. You can use a sturdy plate with cans of food on top, or even a heavy book wrapped in foil. The goal is consistent pressure.
Serving & Storage Suggestions
This Roast Beef Panini is best enjoyed immediately off the grill when the bread is crisp and the cheese is melted to perfection. Serve it hot, perhaps with a side of crisp pickles or a simple green salad. If you find yourself with leftover paninis (which is unlikely!), allow them to cool completely before storing. Wrap them tightly in plastic wrap and then place them in an airtight container or a resealable bag. They will keep in the refrigerator for up to 2 days.
To reheat, the best method is to warm them in a dry skillet over medium-low heat, or in a toaster oven at around 350°F (175°C), until heated through and slightly crisped. Avoid the microwave, as it tends to make the bread soggy.
Nutritional Information
Here’s an estimated breakdown of the nutritional content for one serving of this delicious Roast Beef Panini. Please note that these values can vary based on specific ingredients and portion sizes used.
| Nutrient | Amount per Serving | % Daily Value |
|---|---|---|
| Calories | 816.3 kcal | |
| Calories from Fat | 306 kcal | |
| Total Fat | 34.1 g | 52% |
| Saturated Fat | 13.7 g | 68% |
| Cholesterol | 109.8 mg | 36% |
| Sodium | 1374.6 mg | 57% |
| Total Carbohydrate | 83.9 g | 27% |
| Dietary Fiber | 4.1 g | 16% |
| Sugars | 7.4 g | 29% |
| Protein | 44.9 g | 89% |
(Note: % Daily Values are based on a 2,000-calorie diet. Your daily values may be higher or lower depending on your calorie needs.)
Variations & Substitutions
The beauty of the panini lies in its versatility. Feel free to adapt this recipe to your preferences:
- Cheese: If Havarti isn’t your favorite, try a sharp Cheddar, a nutty Gruyère, or a creamy Provolone. For a dairy-free option, use your favorite vegan cheese slices.
- Bread: Experiment with different types of bread, such as rye, pumpernickel, or even a baguette. Just ensure it’s robust enough.
- Additions: Sautéed onions or mushrooms, a layer of arugula for a peppery bite, or even some pickled jalapeños for a spicy kick can all elevate this panini.
- Roast Beef Alternative: Leftover turkey, ham, or even slices of grilled chicken can be used in place of roast beef.
FAQs
Q: Can I make the horseradish mayo ahead of time?
A: Absolutely! The horseradish mayo can be made up to 2 days in advance and stored in an airtight container in the refrigerator. This saves time when you’re ready to assemble your paninis.
Q: What if I don’t have a grill pan?
A: A regular non-stick skillet works perfectly well. You’ll still want something to press the panini down, so a heavy pot lid or another smaller skillet can be used as a weight.
Q: How do I prevent the bread from burning before the cheese melts?
A: Ensure your heat is set to medium-low. If the bread is browning too quickly, reduce the heat further and cover the pan loosely for a minute or two to help the cheese melt.
Q: Can I use homemade roast beef?
A: Yes, leftover homemade roast beef is ideal! The quality of your roast beef will directly impact the flavor of the panini, so using good quality meat is key.
Q: Is it necessary to rub the bread with garlic?
A: While not strictly necessary, rubbing the bread with garlic adds a wonderful subtle flavor and aroma. If you’re sensitive to raw garlic, you can omit this step or lightly sauté the garlic in olive oil before rubbing it on.
Final Thoughts
This Roast Beef Panini with Horseradish Mayo is more than just a sandwich; it’s a testament to how simple ingredients, treated with a little care and culinary thought, can create something truly memorable. It’s the perfect answer to a quick lunch, a satisfying dinner, or even a sophisticated picnic fare. Don’t hesitate to experiment with your favorite cheeses and additions. I often find myself pairing this hearty panini with a crisp, cold lager or a bold, peppery red wine. Give it a try, and I’m confident it will become a beloved staple in your recipe repertoire. Enjoy every delicious, cheesy, beefy bite!