
Roasted Pepper, Walnut, and Garlic Spread: A Symphony of Mediterranean Flavors
There are certain dishes that just transport you. For me, this Roasted Pepper, Walnut, and Garlic Spread is one of them. I first encountered its magic years ago, tucked away in the pages of Mark Bittman’s seminal cookbook, “The Best Recipes in the World.” It wasn’t just the promise of a vibrant, flavorful spread that caught my eye, but the sheer simplicity and adaptability. I remember the first time I made it, the aroma of roasted peppers, toasted walnuts, and pungent garlic filling my kitchen. It was an instant love affair. This spread has since become a staple, a reliable friend for impromptu gatherings and a cherished ingredient for elevating everyday meals. It’s the kind of dish that proves humble ingredients, treated with care, can create something truly extraordinary.
Recipe Overview
- Prep Time: 15 minutes
- Cook Time: 30 minutes (This assumes you are roasting your own peppers; if using jarred, this time is significantly reduced.)
- Total Time: 45 minutes (With homemade roasted peppers)
- Servings: 8
- Yield: 2 cups
- Dietary Type: Vegan, Dairy-Free
Ingredients
This recipe is a testament to the power of a few well-chosen components. The sweetness of the roasted peppers, the earthy crunch of walnuts, and the sharp bite of garlic come together in perfect harmony.
- 3-4 large red peppers, roasted (or about 1 ½ cups of canned or jarred roasted red peppers)
- 1 cup walnuts
- 1 tablespoon roughly chopped garlic
- 2 tablespoons extra virgin olive oil
- 1 lemon (you will be using the grated zest and the juice)
- 1 teaspoon ground cumin
- Hot paprika or any small dried chili, to taste
- Salt, to taste
Equipment Needed
While this spread is wonderfully unfussy, a few tools will make the process smoother:
- Food processor (or a mortar and pestle for the more traditional approach)
- Measuring cups and spoons
- Cutting board
- Knife
- Grater or microplane for zesting the lemon
- Bowl for mixing and serving
Instructions
The beauty of this spread lies in its straightforward preparation. The key is to achieve a pleasing texture – not a completely smooth puree, but a paste with a little character.
-
Prepare Your Peppers: If you’re starting with fresh peppers, you’ll want to roast them first. The simplest method is to place them on a baking sheet lined with parchment paper or foil. Roast them in a preheated oven at 400°F (200°C) for about 30 minutes, turning them occasionally, until the skins are blackened and blistered. Once roasted, transfer the peppers to a bowl, cover it tightly with plastic wrap, and let them steam for about 15-20 minutes. This will make the skins incredibly easy to peel. Once cooled slightly, remove the skins, seeds, and membranes. If you’re using pre-roasted peppers from a jar or can, simply drain them well. Make sure they are as seedless as possible.
-
Combine Core Ingredients: In the bowl of a food processor, combine the roasted red peppers, walnuts, roughly chopped garlic, extra virgin olive oil, the grated zest of the lemon, and the ground cumin.
-
Process to Desired Texture: Pulse the ingredients in the food processor. You want to process until the ingredients are pulverized but not completely pureed. The aim is to create a paste, but one that still retains a little bit of texture from the nuts and peppers. Avoid over-processing, which can make the spread gummy. If you are feeling particularly energetic and possess a mortar and pestle, this is an excellent opportunity to use it for a truly authentic and textural experience.
-
Transfer and Season: Transfer the paste from the food processor to a bowl.
-
Add Finishing Touches: To the bowl, add the juice of the lemon, hot paprika (or your chosen dried chili), and salt.
-
Taste and Adjust: Stir everything together well. Now comes the crucial step: taste and adjust the seasoning. This is where you can really make the spread your own. Add more salt if needed, a touch more lemon juice for brightness, or more hot paprika for a spicier kick.
-
Serve or Refrigerate: You can serve the spread immediately, or for the flavors to meld and deepen, cover it and refrigerate for a day or two. It is essential to always let it come back to room temperature before serving for the best flavor and texture.
Expert Tips & Tricks
As a chef, I always look for ways to elevate a dish, even a simple one. Here are a few thoughts to get the most out of your Roasted Pepper, Walnut, and Garlic Spread:
- Roasting Peppers: Don’t shy away from roasting your own peppers. The smoky, concentrated flavor is incomparable to jarred. If you have a gas stove, you can char them directly over a low flame, turning them with tongs until blackened. For an even deeper flavor, consider roasting them under the broiler in your oven, watching them closely to prevent burning.
- Toasting Walnuts: For an extra layer of nutty depth, lightly toast your walnuts before adding them to the food processor. Spread them on a baking sheet and toast in a 350°F (175°C) oven for about 8-10 minutes, until fragrant. Let them cool completely before proceeding.
- Garlic Intensity: The amount of garlic is a matter of personal preference. If you love a strong garlic punch, feel free to add an extra clove. If you prefer a milder flavor, you can lightly sauté the garlic in a little olive oil before adding it to the food processor, which mellows its raw bite.
- Texture Control: The “pulse” instruction is key. If you want a smoother spread, process for a few seconds longer. If you prefer a chunkier, more rustic spread, pulse fewer times.
- Lemon Zest vs. Juice: The zest provides aromatic oils and a bright, floral note without adding extra liquid, while the juice adds acidity and balances the richness. Using both is a classic technique for maximum citrus impact.
Serving & Storage Suggestions
This versatile spread is a true chameleon in the kitchen. It shines as a dip, a condiment, and even an ingredient.
Serving:
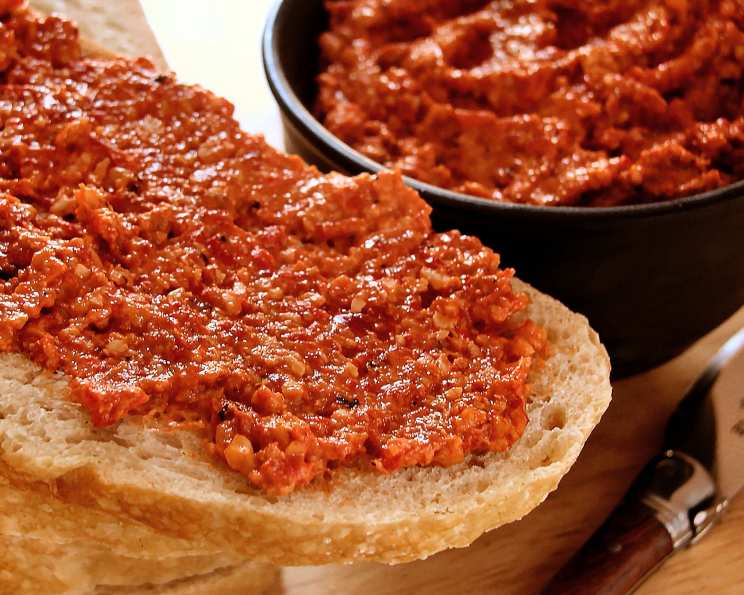
Serve this vibrant spread at room temperature for the optimal flavor experience. It’s absolutely delightful when presented with warm, crusty bread – think a good baguette, ciabatta, or a seeded artisan loaf. For a healthier option, serve it with an assortment of crisp vegetable sticks like carrots, celery, bell peppers, cucumbers, and radishes. It’s also a phenomenal addition to sandwiches, transforming a simple turkey or grilled cheese into something extraordinary. You can also dollop it onto grilled fish, chicken, or vegetables for an instant flavor boost. Garnish with a drizzle of extra virgin olive oil and a few reserved toasted walnuts or a sprinkle of fresh parsley for an elegant touch.
Storage:
This spread keeps remarkably well. Cover it tightly and refrigerate for up to two days. As mentioned, it’s crucial to bring it back to room temperature before serving to allow the flavors to reawaken and the texture to soften. Due to its olive oil content, it will firm up significantly in the refrigerator. If it becomes too firm, a gentle stir at room temperature should suffice. Freezing is generally not recommended as the texture can change upon thawing.
Nutritional Information
Here’s an approximate nutritional breakdown for this flavorful spread, per serving (assuming 8 servings). Please note that these are estimates and can vary based on the exact ingredients and quantities used.
| Nutrient | Amount per Serving | % Daily Value |
|---|---|---|
| Calories | 142 kcal | 7% |
| Total Fat | 13.2 g | 17% |
| Saturated Fat | 1.4 g | 7% |
| Cholesterol | 0 mg | 0% |
| Sodium | 2.3 mg | 0% |
| Total Carbohydrate | 6.6 g | 2% |
| Dietary Fiber | 2.6 g | 9% |
| Sugars | 2.3 g | 5% |
| Protein | 2.9 g | 6% |
Note: Percent Daily Values are based on a 2,000-calorie diet.
Variations & Substitutions
While this recipe is superb as is, the culinary world is all about creative exploration. Here are a few ideas to play with:
- Nut Variations: If walnuts aren’t your preference, or if you have allergies, almonds or hazelnuts would make excellent substitutes. Toasting them will enhance their flavor.
- Pepper Palette: While red peppers provide sweetness and body, you could experiment with a small addition of charred bell peppers of other colors (yellow, orange) for subtle nuances in flavor and hue.
- Spice Level: Adjust the hot paprika or chili flakes to your heat tolerance. For a smoky depth without much heat, use smoked paprika.
- Herbal Infusion: A small handful of fresh parsley or cilantro can be added to the food processor for a fresh, herbaceous note.
- Creaminess Boost: For an even richer, creamier spread, you could add a tablespoon or two of tahini or a few oil-cured black olives.
FAQs
Q: Can I use jarred roasted red peppers instead of fresh ones?
A: Absolutely! Jarred roasted red peppers are a convenient shortcut and will work beautifully in this recipe, just be sure to drain them well.
Q: How can I make the spread less spicy?
A: Simply reduce or omit the hot paprika or chili flakes. If you’ve added too much and it’s too spicy, a little more lemon juice or olive oil can help to temper the heat.
Q: My spread is too thick. How can I loosen it?
A: Drizzle in a little more extra virgin olive oil, a tablespoon at a time, and pulse the food processor until you reach your desired consistency.
Q: Can I make this spread ahead of time?
A: Yes, this spread is actually better when made a day in advance as the flavors have more time to meld. Just remember to bring it to room temperature before serving.
Q: What’s the best way to store leftovers?
A: Store any leftover spread in an airtight container in the refrigerator for up to two days.
Final Thoughts
This Roasted Pepper, Walnut, and Garlic Spread is more than just a recipe; it’s an invitation to savor the simple pleasures of good food. It’s a vibrant splash of color on your table and a burst of Mediterranean sunshine in every bite. I encourage you to make it, share it, and discover its versatility. Pair it with a crisp white wine or a light rosé, and let the conversation flow as freely as the flavors. I’d love to hear about your culinary adventures with this spread – how you served it, what you paired it with, and any creative twists you might have introduced. Happy cooking!