
The Humble Chickpea, Transformed: My Journey to Perfectly Roasted Delights
My introduction to the sheer magic of roasted chickpeas wasn’t in a bustling marketplace or a cherished family kitchen. It was on a breezy evening in Istanbul, a city that always feels like a culinary embrace. I was exploring a small, tucked-away shop, the air thick with the alluring scent of spices, when I encountered these little golden nuggets. They were presented in a simple burlap sack, their aroma a complex symphony of smoky paprika and a hint of something earthy and warm. I purchased a small bag, and that first crunchy, flavorful bite was a revelation – a far cry from the often-mushy texture I’d associated with canned legumes. This experience ignited a spark, a culinary quest to recreate that perfect crispness and robust flavor back home, proving that healthy snacking could indeed be utterly sensational.
Recipe Overview
- Prep Time: 10 minutes
- Cook Time: 22 minutes
- Total Time: 32 minutes
- Servings: 2-3
- Yield: Approximately 2 cups
- Dietary Type: Vegan, Gluten-Free, Dairy-Free
Ingredients
For these delightful bites, the ingredients are beautifully simple, allowing the natural flavor of the chickpeas to shine, enhanced by a whisper of spice.
- 2 tablespoons olive oil
- 2 cups canned chick-peas, drained and rinsed
- Paprika (amount to your preference)
- Salt (to taste)
- Black pepper, freshly ground (to taste)
- Chili powder (amount to your preference)
Equipment Needed
You won’t need a professional brigade for this recipe; just a few essential kitchen tools will do.
- Large mixing bowl
- Baking sheet
- Aluminum foil
- Oven
Instructions
The beauty of roasted chickpeas lies in their effortless preparation. The process is straightforward, rewarding you with a satisfying crunch and a burst of flavor in under an hour.
- Begin by preheating your oven to 400 degrees Fahrenheit (200 degrees Celsius). This initial high heat is crucial for achieving that desirable crisp texture.
- Next, drain and rinse your canned chick-peas thoroughly. This step is essential to remove any canning liquid, which can inhibit crisping. Pat them as dry as possible with a clean kitchen towel or paper towels; excess moisture is the enemy of crispiness.
- Transfer the drained and dried chick-peas into a large mixing bowl.
- Drizzle the 2 tablespoons of olive oil over the chick-peas.
- Stir well, ensuring that every single chick-pea is evenly coated with the olive oil. This oil acts as the vehicle for the spices and helps them adhere beautifully, while also contributing to their delightful crisp.
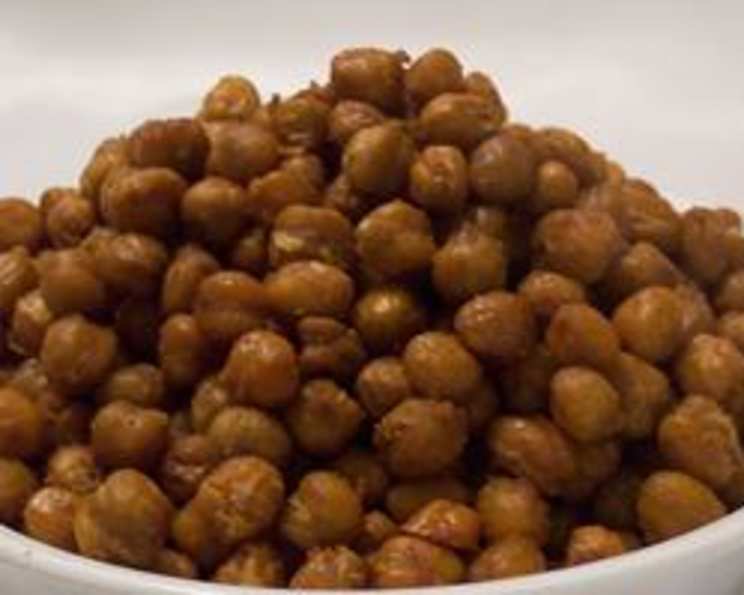
- Now comes the fun part: sprinkle your chosen spices over the oiled chick-peas. Add your desired amount of paprika, black pepper, salt, and chili powder. Mix everything together again, ensuring the spices are distributed uniformly across all the chick-peas. I personally tend to be more liberal with the paprika, as its smoky sweetness is irresistible, and I use chili powder more sparingly to provide a gentle warmth rather than an overpowering heat. Feel free to adjust these to your personal preference – this is where you can truly make these your own!
- Lay a sheet of aluminum foil onto a large baking pan. This makes for easier cleanup.
- Evenly spread the spiced chick-peas in a single layer on the prepared baking pan. Avoid overcrowding the pan, as this can lead to steaming rather than roasting, compromising the crispness. If necessary, use two pans.
- Bake in the preheated oven for 22 minutes. *Note: Cooking times can vary significantly from oven to oven. It’s important to keep a close eye on your chick-peas during the last few minutes of baking. They are ready when they are golden brown and have a satisfyingly crisp exterior.
- Once they’ve reached their perfect crispness, serve right away. Roasted chickpeas are best enjoyed immediately after baking. They possess a magical quality of being wonderfully crisp straight from the oven, but they tend to soften as they cool and sit.
Expert Tips & Tricks
To elevate your roasted chickpea game from simply good to truly exceptional, consider these insider tips:
- The Drying Imperative: I cannot stress enough how vital it is to dry the chickpeas thoroughly after rinsing. Moisture is the sworn enemy of crispiness. Spread them on paper towels and gently pat them dry. You can even let them air dry for a few minutes while your oven preheats.
- Uniformity is Key: Ensure your chickpeas are roughly the same size. This helps them roast evenly, preventing some from burning while others remain undercooked.
- The Single Layer Rule: Overcrowding the baking sheet is a common mistake that leads to steamed chickpeas. If you have too many, use a second baking sheet. They need space to breathe and crisp up.
- Spice it Up (or Down): Don’t be afraid to experiment with your spice blends. Smoked paprika is a personal favorite for its depth, but cumin, garlic powder, onion powder, or even a touch of curry powder can offer exciting flavor profiles. For a sweeter note, a tiny pinch of cinnamon can be surprisingly delightful.
- Beyond the Foil: While aluminum foil makes cleanup a breeze, for an even crispier exterior, you can roast them directly on a parchment-lined baking sheet. Some chefs even swear by a lightly oiled baking sheet for maximum crisp.
Serving & Storage Suggestions
Roasted chickpeas are incredibly versatile, making them a fantastic snack on their own or a delightful addition to various dishes.
Serve them warm, straight from the oven, as a crunchy, healthy snack. They are also a wonderful topping for salads, transforming a simple green salad into a more substantial and texturally interesting meal. Scatter them over your favorite soup for an unexpected crunch, or even add them to grain bowls for an extra layer of flavor and protein.
Due to their propensity to lose crispness, it is highly recommended to consume them immediately after baking. If you do have any leftovers, store them in an airtight container at room temperature for up to 2 days. While they will retain some of their flavor, they will undoubtedly become softer. Reheating them in a low oven (around 300°F/150°C) for a few minutes can help revive some of their crispness, but they will never quite recapture that just-baked magic. They do not store well in the refrigerator, as the moisture there will further soften them. Freezing is not recommended.
Nutritional Information
| Nutrient | Amount per Serving (approx.) | % Daily Value (approx.) |
|---|---|---|
| Calories | 404.9 kcal | 18% |
| Calories from Fat | N/A | N/A |
| Total Fat | 16.2 g | 24% |
| Saturated Fat | 2.1 g | 10% |
| Cholesterol | 0 mg | 0% |
| Sodium | 717.9 mg | 29% |
| Total Carbohydrate | 54.3 g | 18% |
| Dietary Fiber | 10.6 g | 42% |
| Sugars | 0 g | 0% |
| Protein | 11.9 g | 23% |
Nutritional values are estimates and can vary based on specific ingredients and portion sizes.
Variations & Substitutions
While this recipe is wonderfully classic, its simplicity lends itself beautifully to creative interpretations.
- Spicy Kick: For those who crave a bit more heat, increase the chili powder and perhaps add a pinch of cayenne pepper or red pepper flakes. A dash of hot sauce tossed with the chickpeas before roasting can also be a thrilling addition.
- Smoky Southwest: Introduce cumin and a touch of smoked paprika for a Tex-Mex inspired flavor. A pinch of garlic powder and onion powder will round out this profile beautifully.
- Herbaceous Delight: After roasting, toss the warm chickpeas with finely chopped fresh herbs like rosemary, thyme, or parsley. This adds a vibrant, fresh counterpoint to the roasted flavor.
- Sweet and Savory: A small amount of maple syrup or honey (if not strictly vegan) tossed with the chickpeas and spices before roasting can create a delightful sweet and savory contrast. Think of a barbecue flavor profile.
- Lemon Zest Zing: For a brighter, fresher taste, toss the chickpeas with the juice and zest of half a lemon just before serving.
FAQs
Q: Can I use dried chickpeas instead of canned?
A: Yes, but it requires significantly more preparation. You’ll need to soak and cook the dried chickpeas until tender but still firm before proceeding with the roasting steps. Canned chickpeas offer unparalleled convenience for this recipe.
Q: My chickpeas aren’t crispy. What did I do wrong?
A: The most common culprits are insufficient drying of the chickpeas before oiling and the spices, or overcrowding the baking sheet. Ensure they are as dry as possible and spread in a single layer.
Q: How can I make them less salty?
A: Reduce the amount of salt added during the spicing step. You can always add a pinch of salt at the end if needed, but it’s harder to remove excess salt.
Q: Can I prepare the spiced chickpeas ahead of time?
A: You can toss the chickpeas with oil and spices a few hours in advance and store them at room temperature. However, roasting is best done just before serving to ensure optimal crispness.
Q: What if I don’t have olive oil?
A: Other neutral oils like canola oil, vegetable oil, or avocado oil can be used. For a richer flavor, a small amount of melted butter (if not vegan) could also work, though it might affect the crisping slightly differently.
Final Thoughts
The humble chickpea, often overlooked in its canned form, holds within it the potential for something truly extraordinary. These roasted gems are a testament to the power of simple ingredients and mindful preparation. They are proof that healthy eating doesn’t require sacrifice; it can be a delicious adventure. I encourage you to try this recipe, to experiment with your favorite spices, and to discover your own perfect rendition of this satisfyingly crunchy snack. May your kitchens be filled with the warm, inviting aroma of spices, and your snack bowls overflow with these delightful, golden treasures.