
Mastering the Flame: How to Roast a Pepper on a Gas Range
There’s a certain magic that happens when fire meets vegetable. I remember as a child, watching my grandmother, a woman whose hands moved with the practiced grace of a lifelong cook, transform humble bell peppers into something extraordinary right on the stovetop. The scent of charring skin, a little smoky, a little sweet, would fill her tiny kitchen, a prelude to the vibrant, tender flesh that would soon grace our plates. It was a primal cooking method, yet utterly sophisticated in its simplicity, a testament to how a little heat and a lot of attention can unlock incredible flavor. That memory, the warmth of the stove, and the anticipation of those roasted jewels, is why I’m so passionate about sharing this technique with you.
Recipe Overview
- Prep Time: 15 minutes
- Cook Time: 30 minutes
- Total Time: 45 minutes
- Servings: 6
- Yield: 1 batch
- Dietary Type: Vegan, Gluten-Free, Dairy-Free
Ingredients
- 1 bell pepper (you can use any color, or even a hot pepper if you’re feeling adventurous!)
- 1 skewer (a metal one is ideal, or a long-handled fork will work in a pinch)
Equipment Needed
- Gas range with an open flame
- Metal skewer or long-handled fork
- Plate or bowl for steaming
- Ziploc bag
- Butter knife (optional, for scraping)
- Cutting board
- Sharp knife
Instructions
Roasting peppers directly over the open flame of a gas range is an incredibly effective and rewarding method. It’s a technique that imbues the pepper with a deep, smoky flavor and a tender texture that’s unparalleled. Here’s how to achieve it:
-
Prepare the Pepper: Begin by thoroughly rinsing your chosen bell pepper under cool running water. Pat it dry with a clean kitchen towel. This is a crucial first step to ensure an even char and to remove any surface dirt.
-
Secure the Pepper: Next, stick the pepper onto your metal skewer or your long-handled fork. Make sure it’s firmly secured so you can easily maneuver it over the flame without it falling. The skewer or fork acts as your handle, allowing you to rotate the pepper safely and evenly.
-
The Dance with the Flame: Now, the exciting part. Hold the pepper close to the gas range flame. You want the pepper to be directly exposed to the heat. While a small kitchen torch, like those used for crème brûlée, can also be used, utilizing the range is often safer and provides a more consistent char, especially when learning. Keep the pepper positioned over the flame, but be mindful of intense flare-ups.
-
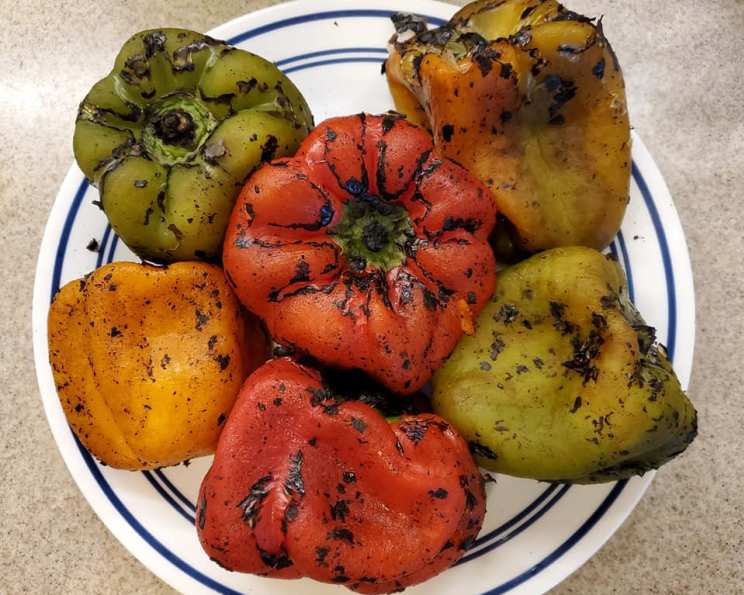
Achieving the Char: As you hold the pepper over the flame, you’ll notice the skin beginning to blister and darken. This is exactly what you want. Rotate the pepper continuously to ensure that every side is exposed to the heat. Continue this process, rotating until the entire pepper is blistered and charred. The degree of charring is a matter of personal preference. Some prefer a pepper that is evenly darkened but not completely blackened, while others enjoy a more intensely charred exterior. Don’t be afraid to experiment and discover what you like best. The goal is to char the skin significantly, which helps to loosen it and impart that characteristic smoky flavor.
-
The Steam Treatment: Once the pepper is adequately charred on all sides, immediately place the roasted pepper directly into a Ziploc bag and seal it. The steam trapped inside the bag will work its magic, further loosening the skin and making it easier to peel. This step is critical for achieving that smooth, tender flesh.
-
The Waiting Game: Let the pepper steam in the sealed bag for at least 15 minutes. This resting period is essential. It allows the internal heat and steam to penetrate the pepper’s flesh, making the skin incredibly easy to remove.
-
The Reveal and Rinse: After the 15 minutes have passed, carefully remove the pepper from the bag. You’ll notice the skin is now loose and wrinkled. Rinse the pepper under a small stream of cold water. This not only helps to cool it down but also assists in washing away any loosened charred bits of skin.
-
Peeling for Perfection: Now, it’s time to rub the pepper thoroughly until all the skin has come off. The skin should slide off quite easily due to the steaming. If there are any stubborn bits of skin remaining, you can carefully scrape the skin with a butter knife to remove them. Be gentle to avoid damaging the pepper’s flesh.
-
Prepare for Use: Once all the skin is removed, you’ll be left with perfectly roasted, tender pepper flesh. You can now remove the stem and seeds, if desired, and use the pepper in your chosen recipe.
Expert Tips & Tricks
- Color Choice Matters: While any bell pepper will work, red, yellow, and orange peppers tend to be sweeter when roasted, offering a more robust flavor profile than green peppers, which can sometimes retain a slightly bitter note.
- The Power of the Bag: Don’t skip the steaming step! It’s the secret to effortlessly removing the papery skin. If you don’t have a Ziploc bag, you can place the hot pepper in a bowl and cover it tightly with plastic wrap.
- Handling the Heat: If you’re sensitive to heat, wear oven mitts when handling the skewer or fork and the hot pepper.
- Charring Control: The more charred you get the skin, the more pronounced the smoky flavor will be. If you prefer a milder smoky taste, aim for less intense charring.
- Beyond Bell Peppers: This technique works beautifully for other peppers too! Consider roasting poblano peppers for a smoky base in Mexican dishes, or even jalapeños for a spicier kick. Just adjust your handling based on their heat level.
Serving & Storage Suggestions
Roasted peppers are incredibly versatile. They can be served warm or at room temperature.
- Freshly Roasted: Serve immediately as a side dish, tossed into a salad, or as a topping for bruschetta.
- In Salads: Slice and add to green salads, grain bowls, or pasta salads for a burst of flavor and tender texture.
- Sandwich & Wrap Filling: Chop and mix into spreads, or layer them directly into sandwiches and wraps.
- Sauces & Dips: Pureed roasted peppers form the base for delicious dips, romesco sauce, or can be blended into pasta sauces for added depth.
Storage:
- Refrigerator: Store cooled, peeled roasted peppers in an airtight container in the refrigerator for 3 to 4 days.
- Freezer: For longer storage, you can freeze roasted peppers. Pack them in freezer-safe containers or bags, leaving a little headspace for expansion. They will last for up to 6 months in the freezer. Thaw them in the refrigerator before using.
Nutritional Information
While specific nutritional values will vary based on the size and type of pepper, a single roasted bell pepper is remarkably low in calories and fat.
| Nutrient | Amount per Serving | % Daily Value |
|---|---|---|
| Calories | 30 kcal | 1% |
| Total Fat | 0.3 g | 0% |
| Saturated Fat | 0 g | 0% |
| Cholesterol | 0 mg | 0% |
| Sodium | 6 mg | 0% |
| Total Carbohydrate | 7 g | 2% |
| Dietary Fiber | 2.5 g | 9% |
| Sugars | 4.5 g | N/A |
| Protein | 1.3 g | 2% |
| Vitamin C | 130 mg | 144% |
| Vitamin A | 1500 IU | 30% |
| Potassium | 280 mg | 6% |
(Nutritional information is an estimate and can vary based on pepper size and variety.)
Variations & Substitutions
- Sweet & Smoky Red Pepper Paste: Roast several red peppers until well charred, then blend them with a clove of garlic, a tablespoon of olive oil, and a pinch of salt. This makes a fantastic base for dips and spreads.
- Spicy Roasted Peppers: For a bit of heat, use a mix of bell peppers and jalapeños or serranos. Adjust the number of hot peppers to your desired spice level.
- Marinated Roasted Peppers: Once peeled and seeded, toss the roasted peppers with good quality olive oil, balsamic vinegar, fresh herbs like oregano and thyme, and a pinch of red pepper flakes. Let them marinate in the refrigerator for at least an hour before serving.
FAQs
Q: Do I need to peel the pepper after roasting?
A: Yes, peeling the pepper after roasting is essential. The steaming process makes the skin easy to remove, revealing the tender flesh underneath.
Q: How do I know if the pepper is roasted enough?
A: The skin should be significantly blistered and charred all over. It will look blackened in many spots, but the flesh inside should remain intact.
Q: Can I roast peppers on an electric stove?
A: Roasting peppers directly on an electric coil burner is not recommended as it doesn’t provide the same intense, direct flame needed for proper charring. A gas range is ideal for this method.
Q: How long does it take for the pepper to char?
A: Charring usually takes about 5-10 minutes, depending on the heat of your flame and how frequently you rotate the pepper.
Q: What if I don’t have a skewer or long-handled fork?
A: While a skewer or fork is recommended for safety and ease of handling, you can attempt to char the pepper by carefully placing it directly on a gas burner grate for short periods, using tongs to turn it frequently. This method requires extreme caution.
Final Thoughts
There’s a profound satisfaction in transforming a simple pepper into something so rich and flavorful with just the power of fire. This technique, passed down through generations, is a beautiful reminder of the connection between simple ingredients and profound taste. Once you’ve mastered the flame, you’ll find yourself reaching for roasted peppers time and time again to elevate your dishes. Try them tossed with pasta, blended into a vibrant soup, or simply enjoyed on their own, a testament to the magic of the gas range.