
The Golden Allure of Roasted Red Capsicum
There’s something deeply nostalgic about the intense, smoky sweetness of roasted red capsicum. It takes me back to my grandmother’s kitchen, the air thick with the scent of charring peppers as she diligently tended to a batch destined for our Sunday lunch antipasto. Even as a young apprentice chef, I was mesmerized by how simple ingredients, treated with heat and patience, could transform into something so profoundly flavourful. It’s a technique that bridges generations, a testament to the power of transformation in the culinary arts.
Recipe Overview
- Prep Time: 15 minutes
- Cook Time: 15 minutes
- Total Time: 30 minutes
- Servings: N/A (Yields 1 large jar of preserved capsicum)
- Yield: 1 large jar
- Dietary Type: Vegan, Dairy-Free, Gluten-Free
Ingredients
- 8 large red capsicums
- 100 ml olive oil
Equipment Needed
- Baking tray
- Plastic bag (large enough to hold the capsicums)
- Sharp knife
- Sterilised jars (large enough to hold the prepared capsicums)
Instructions
- Preheat the oven to 200°C (180°C fan/400°F/Gas Mark 6).
- Arrange the red capsicums on a baking tray.
- Roast them in the preheated oven for 15 minutes, or until the skin has blistered and turned slightly black. This charring is crucial for developing that signature smoky flavour.
- Once roasted, carefully remove the capsicums from the oven. Place them immediately into a plastic bag and seal it loosely. Allow them to cool completely within the bag. The steam trapped inside will further loosen the skins, making them easier to peel.
- Once the capsicums are cool enough to handle, peel the skin off. You can do this by gently pulling it away. Don’t worry if a few tiny bits of skin remain; they won’t significantly affect the flavour.
- Next, trim any pith – the white, spongy material inside the capsicum – and meticulously remove all the seeds. This ensures a smooth, palatable texture.
- Cut the capsicum flesh into manageable pieces.
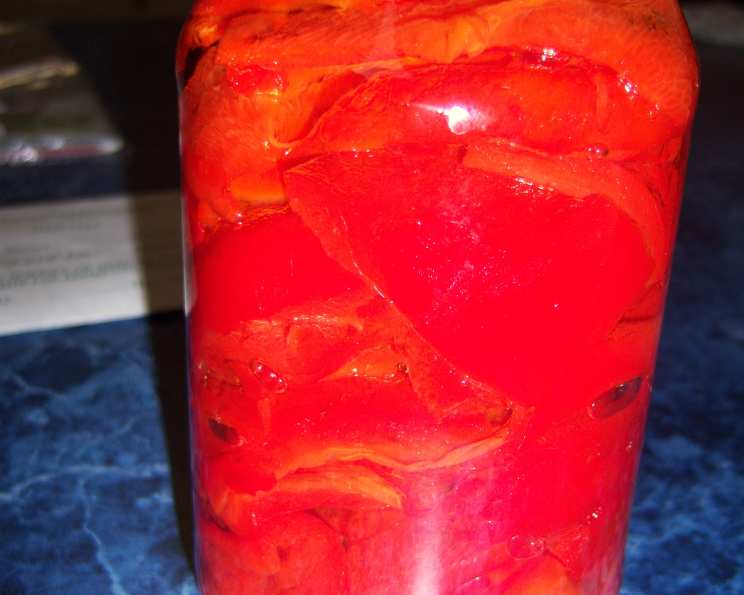
- Place the prepared capsicum flesh into your hot, sterilised jars. Pack them in snugly, but avoid crushing them.
- Pour the 100 ml of olive oil over the capsicum in the jars, ensuring it covers the flesh completely. This acts as a preservative and infuses the capsicum with a rich, fruity flavour.
- Seal the jars immediately.
- Store the jars in the refrigerator. The roasted red capsicum will keep for up to 3 weeks.
Expert Tips & Tricks
The art of roasting capsicum lies in achieving that perfect char without overcooking the flesh into mush. For an even roast, ensure the capsicums are roughly the same size. If you’re roasting a larger batch, you might find it beneficial to rotate the tray halfway through cooking. When it comes to peeling, don’t be tempted to rinse the capsicums under water; this will wash away some of that precious smoky flavour you’ve worked to develop. The steam inside the plastic bag is your best friend here. Sterilising your jars is paramount for safe storage. You can do this by washing them thoroughly in hot, soapy water, then placing them in a preheated oven at 160°C (140°C fan/320°F/Gas Mark 3) for at least 15 minutes.
Serving & Storage Suggestions
These beautifully preserved roasted red capsicums are incredibly versatile. They are a star ingredient in any antipasto platter, adding a burst of colour and flavour. Chop them finely and add them to pasta sauces, risottos, or frittatas for an instant gourmet touch. They make a fantastic base for dips and spreads, or can be layered into sandwiches and wraps. Given that they are preserved in oil and stored in the refrigerator, they will maintain their optimal quality for up to 3 weeks. Always use a clean utensil when serving to avoid introducing contaminants into the jar.
Nutritional Information
| Nutrient | Amount per Serving (estimated, based on 8 capsicums and 100ml olive oil, divided into roughly 6 servings) | % Daily Value |
|---|---|---|
| Calories | 250 kcal | 13% |
| Total Fat | 20 g | 26% |
| Saturated Fat | 3 g | 15% |
| Cholesterol | 0 mg | 0% |
| Sodium | 10 mg | <1% |
| Total Carbohydrate | 15 g | 5% |
| Dietary Fiber | 4 g | 14% |
| Sugars | 10 g | 20% |
| Protein | 3 g | 6% |
| Vitamin A | 60% | |
| Vitamin C | 250% | |
| Potassium | 500 mg | 11% |
Note: Nutritional values are estimates and can vary based on the size of the capsicums and specific olive oil used.
Variations & Substitutions
While this recipe focuses on the pure, unadulterated flavour of roasted red capsicum, there are wonderful ways to introduce subtle variations. For a hint of spice, you could add a pinch of red pepper flakes to the jar before sealing. A clove or two of garlic, thinly sliced, can also be added for an extra layer of aromatic complexity. Some prefer to add a splash of balsamic vinegar to the oil before pouring it over the capsicum; this introduces a lovely tanginess. If you find the capsicums a little too sweet, a small amount of salt added to the oil can balance the flavours beautifully.
FAQs
Q: Why do I need to place the capsicums in a plastic bag after roasting?
A: The steam trapped inside the bag helps to loosen the skins, making them significantly easier to peel off once they’ve cooled.
Q: How long will these last in the fridge?
A: Properly prepared and stored in sterilised jars, they will last for up to 3 weeks in the refrigerator.
Q: Can I use any type of olive oil?
A: While extra virgin olive oil is recommended for its superior flavour, a good quality regular olive oil will also work well.
Q: What if my capsicum skins are difficult to peel?
A: Ensure they have cooled sufficiently in the bag. If they are still stubborn, a quick, light rinse under cool water can help, but this may slightly diminish the smoky flavour.
Q: Can I roast other colours of capsicum?
A: This recipe is specifically for red capsicums as they yield the sweetest and most intense flavour when roasted. Green or yellow capsicums have different flavour profiles and may not achieve the same results.
Final Thoughts
This simple yet profoundly satisfying method of preserving roasted red capsicum is a culinary treasure. It’s a fantastic way to capture the peak flavour of the season and have a delicious ingredient on hand throughout the year. I encourage you to try this recipe; it’s a testament to how minimal effort can yield spectacular results. Once prepared, enjoy them as they are, or experiment with incorporating them into your favourite dishes. They pair beautifully with a crisp white wine or a robust red, making any meal feel a little more special.