
Rosy Radish Relish: A Vibrant Condiment to Brighten Every Bite
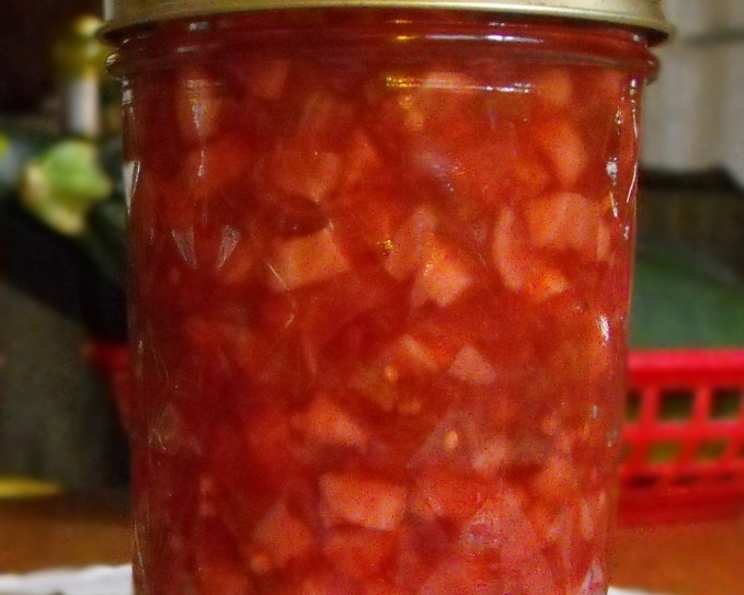
There’s a certain magic in transforming humble, everyday ingredients into something truly extraordinary. For me, that magic happens with this Rosy Radish Relish. I remember the first time I encountered it, tucked away in a jar at a bustling community picnic. Its vibrant pink hue, a testament to the radishes within, caught my eye, and the burst of tangy, slightly sweet flavor on my grilled bratwurst was nothing short of revelatory. It was the kind of condiment that stopped conversations, prompting everyone to ask, “What is that?” It’s since become a staple in my kitchen, a testament to the power of simple, fresh ingredients and a well-loved recipe.
Recipe Overview
- Prep Time: 30 minutes
- Cook Time: 10 minutes
- Total Time: 3 hours 40 minutes (includes standing time)
- Servings: 32
- Yield: 5 ½ pints
- Dietary Type: Vegetarian, Vegan (ensure vinegar is vegan)
Ingredients
This relish is a symphony of textures and flavors, relying on the peppery bite of fresh radishes balanced by sweet onions and a tangy vinegar base.
- 3 cups stemmed radishes, finely chopped or ground
- 2 large celery ribs, finely chopped or ground
- 1 large red onion, finely chopped or ground
- 2 teaspoons canning salt
- 1 cup sugar
- 1 tablespoon mustard seeds
- 1 cup vinegar
- 2 tablespoons prepared horseradish
Equipment Needed
- Food grinder or sharp knife for chopping vegetables
- Large non-reactive pan (stainless steel or enamel)
- Jars with lids for canning (½ pints or pints)
- Large pot for boiling water bath canning
- Jar lifter
- Funnel for filling jars
Instructions
Crafting this vibrant relish is a straightforward process, with the standing time allowing the flavors to meld beautifully before the quick cooking and canning.
- Begin by preparing your vegetables. Grind the stemmed radishes, celery ribs, and red onion using the coarse blade of a food grinder. Alternatively, if you don’t have a grinder, chop them very finely by hand. The goal is to have small, consistent pieces that will break down further during the cooking process.
- In a large bowl, combine the ground or finely chopped radishes, celery, and onion.
- To this mixture, add the canning salt, sugar, mustard seeds, vinegar, and prepared horseradish.
- Stir everything together thoroughly until well combined.
- Allow this mixture to stand for three hours. This crucial resting period allows the salt to draw out moisture from the vegetables and the flavors to begin infusing. Stir occasionally during this time.
- After the three-hour standing period, transfer the relish mixture to a large pan. It’s important to use a non-reactive pan, such as stainless steel or enamel, to prevent any metallic taste from leaching into the relish.
- Bring the mixture to a boil over medium-high heat, stirring frequently.
- Once boiling, reduce the heat slightly and cook for 10 minutes, stirring regularly to prevent sticking. This brief cooking time is essential for setting the flavors and preparing the relish for canning.
- While the relish is cooking, prepare your jars and lids. Ensure your jars are clean and sterilized. Heat the lids according to the manufacturer’s instructions.
- Using a funnel and a jar lifter, carefully ladle the hot relish into the hot jars, leaving a ½ inch headspace at the top of each jar. Headspace is the space between the top of the food and the rim of the jar, which is critical for proper sealing.
- Wipe the rims of the jars clean with a damp cloth to ensure a good seal.
- Adjust the lids and screw bands on the jars, tightening them just until finger-tight.
- Place the filled jars into a boiling water bath canner. Ensure the jars are covered by at least 1 inch of water.
- Process the jars in a boiling water bath for 20 minutes for both ½ pints and pints. If you are at an altitude above 1,000 feet, you will need to increase the processing time; consult reliable canning resources for specific altitude adjustments.
- After the processing time, turn off the heat, remove the canner lid, and let the jars stand in the hot water for 5 minutes. This step helps prevent siphoning (liquid loss from jars).
- Carefully remove the jars from the canner using a jar lifter and place them on a cooling rack or a towel-lined surface to cool completely. You should hear a distinctive “ping” as the lids seal.
- Once completely cool (typically 12-24 hours), check the seals by pressing the center of each lid. If a lid does not flex up and down, it is sealed. Store any unsealed jars in the refrigerator and consume within a few weeks.
Expert Tips & Tricks
- Vegetable Prep is Key: The consistency of your chopped or ground vegetables will significantly impact the final texture of the relish. Aim for uniform pieces so they cook and pickle evenly. If using a food grinder, the coarse setting is ideal for retaining a pleasant bite.
- Vinegar Choice Matters: For best results, use a good quality white vinegar (5% acidity). Avoid flavored vinegars as they can alter the delicate flavor profile of the relish.
- Don’t Skip the Standing Time: That three-hour period is not just for flavor melding; it also allows the salt to start its magic in preserving the vegetables and preparing them for cooking.
- Sterilization is Crucial: For safe canning, ensure all jars, lids, and equipment that come into contact with the relish are thoroughly cleaned and sterilized. A boiling water bath is effective, but always follow current USDA or Extension office guidelines for safe canning practices.
- Cooling and Sealing: Allow the jars to cool undisturbed for at least 12-24 hours. Resist the urge to tighten bands once they are out of the canner, as this can break the seal.
Serving & Storage Suggestions
This Rosy Radish Relish is incredibly versatile and a fantastic way to elevate simple dishes. Its bright, zesty flavor cuts through richness and adds a delightful counterpoint to grilled and roasted meats.
- On Grilled Favorites: It’s an absolute triumph atop hot dogs, bratwursts, and hamburgers. The peppery kick of the radish and the tang of the vinegar are perfect complements to grilled meats.
- With BBQ: Smear it on pulled pork, barbecued chicken, or ribs for an unexpected burst of freshness.
- As a Condiment: It’s surprisingly delicious served alongside roast chicken, pork chops, or even as a vibrant addition to a cheese board.
- In Sandwiches: Add a spoonful to deli sandwiches for an extra layer of flavor and texture.
Storage: Properly canned Rosy Radish Relish will keep in a cool, dark place for at least a year. Once opened, refrigerate the relish and it will remain fresh for several weeks. Unopened jars that did not seal properly should also be refrigerated and consumed promptly.
Nutritional Information
This information is an estimate per serving, assuming the yield is divided into 32 servings.
| Nutrient | Amount per Serving | % Daily Value |
|---|---|---|
| Calories | 31.9 kcal | |
| Calories from Fat | ||
| Total Fat | 0.1 g | 0% |
| Saturated Fat | 0 g | 0% |
| Cholesterol | 0 mg | 0% |
| Sodium | 155.8 mg | 6% |
| Total Carbohydrate | 7.4 g | 2% |
| Dietary Fiber | 0.4 g | 1% |
| Sugars | 6.8 g | 27% |
| Protein | 0.2 g | 0% |
Variations & Substitutions
While this recipe is beautifully balanced as is, here are a few ideas for customization:
- Spicy Kick: For those who enjoy a bit more heat, consider adding a finely minced jalapeño or a pinch of red pepper flakes along with the other vegetables.
- Herbal Notes: A tablespoon or two of finely chopped fresh dill or parsley added during the cooking phase can introduce a lovely herbaceous dimension.
- Different Radishes: While red radishes are classic for their color, feel free to experiment with watermelon radishes or even daikon radishes for slightly different flavor profiles and hues. You might find you need to adjust the sugar slightly depending on the natural sweetness of your chosen radish.
FAQs
Q: Why do I need to use canning salt?
A: Canning salt is pure salt, free from anti-caking agents and iodine, which can cloud the brine and affect the flavor and color of pickled products.
Q: What is headspace and why is it important?
A: Headspace is the empty space between the food and the rim of the jar. It’s crucial for creating a vacuum seal as the jars cool, ensuring proper preservation.
Q: How can I tell if my jars have sealed properly?
A: After cooling, the center of the lid should be concave (curved downward) and should not flex when pressed. A “ping” sound heard during cooling also indicates a seal.
Q: Can I use a food processor instead of a grinder or chopping?
A: Yes, a food processor can be used, but be careful not to over-process the vegetables into a paste. Pulse until finely chopped for the best texture.
Q: How long does it take for the flavors to fully develop after canning?
A: While delicious immediately, the flavors continue to meld and deepen over time. It’s best to let the relish sit for at least a week or two after canning for optimal flavor.
Final Thoughts
This Rosy Radish Relish is more than just a condiment; it’s a vibrant celebration of simple, fresh ingredients and the satisfying art of home preservation. It’s a reminder that even the most common vegetables can be transformed into something truly special with a little time and care. I encourage you to try your hand at making this relish, to experience the joy of that first tangy, sweet, and peppery bite. Share it with friends and family, and watch as it becomes a talking point at your own gatherings, just as it did at mine. Serve it proudly, knowing you’ve created a jar full of sunshine and zest.