
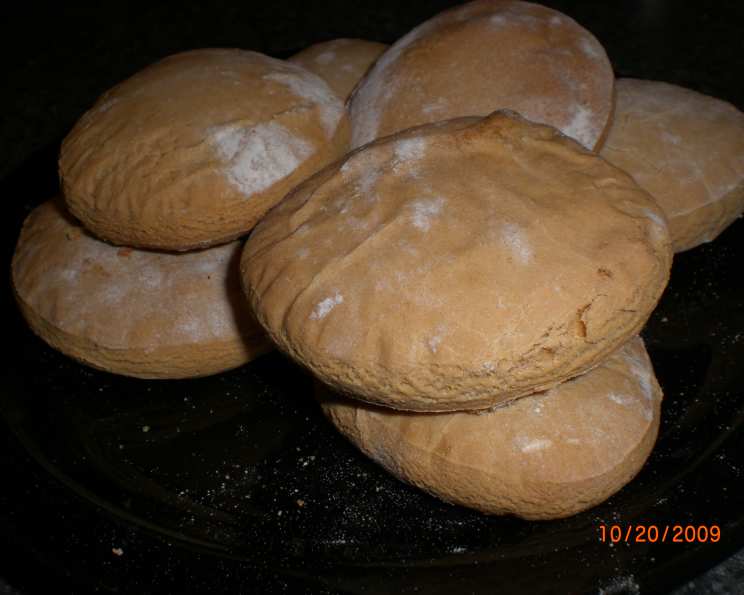
The Sweet Simplicity of Round Teething Biscuits for Baby
There’s a certain magic in those early days of parenthood, a whirlwind of tiny fingers, sleepy smiles, and, inevitably, the relentless rumble of a teething baby. I remember those moments vividly, the desperate search for anything to soothe those achy gums. While store-bought options abound, there’s an unparalleled satisfaction in creating something wholesome and nourishing yourself. These simple round teething biscuits, with their minimal ingredients and thoughtful preparation, became my go-to. They’re not just a treat for little gums; they’re a testament to the love and care we pour into nurturing our littlest ones, a small, sweet gesture in the grand adventure of raising a child.
Recipe Overview
- Prep Time: 15 minutes
- Cook Time: 30 minutes (plus 10 hours sitting time)
- Total Time: 10 hours 45 minutes
- Servings: 1 batch
- Yield: 12 cookies
- Dietary Type: Vegetarian
Ingredients
Crafted with just a handful of pantry staples, these teething biscuits are as straightforward as they are effective:
- 2 large eggs
- 1 cup sugar (white or brown, your preference)
- 2 to 2 1⁄2 cups flour (you can use all-purpose white flour, whole wheat flour, or a combination of both for a slightly different texture)
Equipment Needed
You won’t need a professional kitchen arsenal for these simple treats. Just a few everyday items will do:
- A medium-sized mixing bowl
- A whisk or fork
- Measuring cups and spoons
- A baking sheet
- Parchment paper (optional, but recommended for easy cleanup)
- A rolling pin
- A round cookie cutter or the rim of a glass
Instructions
The beauty of this recipe lies in its simplicity, but each step is designed to create a biscuit with the perfect texture for teething little ones.
-
Begin by taking your 2 large eggs and placing them into a medium-sized mixing bowl. Using a whisk or a fork, stir the eggs vigorously until they become creamy and well combined. This initial whisking helps to break down the egg proteins, creating a smoother base for your dough.
-
Next, introduce the 1 cup of sugar into the bowl with the beaten eggs. Mix well until the sugar is fully incorporated and you have a cohesive, slightly lighter-colored mixture. If you’re using brown sugar, ensure you break up any clumps for even distribution.
-
Now, it’s time to add the flour. Start by adding 2 cups of flour. Stir the flour into the wet ingredients gradually, mixing just until a dough begins to form. You want the dough to be stiff enough to handle easily. If the dough still feels too wet and sticky after adding 2 cups of flour, add an additional 1/2 cup of flour, a little at a time, until the dough is stiff and manageable. Be careful not to overmix once the flour is added; this can lead to tough biscuits. The goal is a dough that comes together without being overly sticky or dry.
-
Lightly flour a clean work surface. Transfer the dough onto the floured surface and roll it out to a 3/4 inch thickness. This thickness is crucial for creating a biscuit that is substantial enough for a baby to grip and gum on.
-
Using a round cookie cutter or the rim of a glass, cut the dough into round shapes. You can also use other fun cookie cutters if you have them, but the round shape is classic and easy for little hands to manage.
-
Carefully transfer the cut biscuit shapes onto a baking sheet. For ease of cleanup, you can line your baking sheet with parchment paper. Now comes a unique and vital step for these teething biscuits: let them sit overnight, or for at least 10 hours. This resting period allows the dough to firm up further, which is essential for achieving the desired hardness and minimal crumb when baked. This is not a typical step in most baking, but it’s what transforms these into ideal teething companions.
-
After the dough has rested for its designated time, it’s time to bake. Preheat your oven to 325°F (160°C). Place the baking sheet with the rested biscuits into the preheated oven. Bake for 30 minutes, or until the biscuits are visibly browned and feel hard to the touch. The goal is a dry, firm biscuit that won’t easily crumble. The exact baking time may vary slightly depending on your oven, so keep an eye on them, especially during the last few minutes.
-
Once baked, remove the baking sheet from the oven. Let the biscuits cool on the baking sheet for a few minutes before transferring them to a wire cooling rack to cool completely. Ensure they are thoroughly cooled before offering them to your baby.
Expert Tips & Tricks
- Flour Consistency: The amount of flour needed can vary slightly depending on the humidity and the size of your eggs. Always start with the lower amount (2 cups) and add more incrementally until you achieve that firm, easy-to-handle dough. You’re looking for a dough that’s firm but not crumbly.
- The Overnight Rest: Do not skip or shorten the overnight resting period! This is what allows the biscuits to dry out sufficiently before baking, leading to that hard, tooth-friendly texture that minimizes crumbs. This is the secret weapon of these teething biscuits.
- Even Thickness: When rolling out the dough, try to maintain an even 3/4 inch thickness. This ensures that all your biscuits bake and harden at a similar rate.
- Checking for Doneness: The biscuits should feel hard and dry. If they still have any softness, they may crumble too easily. You can test one by tapping it; it should sound hollow and feel solid.
Serving & Storage Suggestions
These round teething biscuits are best served as is, a simple, satisfying treat for your little one. Their hardness provides excellent relief for sore gums.
For storage, once the biscuits have cooled completely, they can be stored in an airtight container at room temperature for up to 3 days. Due to their low moisture content, they are quite stable. If you find you have more than you can use within that timeframe, you can freeze them. Place them in a freezer-safe bag or container, and they should keep well for up to 2-3 months. To serve from frozen, simply allow them to thaw at room temperature. They don’t typically require reheating.
Nutritional Information
Here’s an estimated nutritional breakdown for one teething biscuit. Please note that these are approximations and can vary based on the type of flour and sugar used.
| Nutrient | Amount per Serving | % Daily Value |
|---|---|---|
| Calories | 152.6 kcal | |
| Calories from Fat | 9 g | |
| Total Fat | 1 g | 1 % |
| Saturated Fat | 0.3 g | 1 % |
| Cholesterol | 35.2 mg | 11 % |
| Sodium | 12.1 mg | 0 % |
| Total Carbohydrate | 32.6 g | 10 % |
| Dietary Fiber | 0.6 g | 2 % |
| Sugars | 16.8 g | 67 % |
| Protein | 3.2 g | 6 % |
Note: Percent Daily Values are based on a 2,000 calorie diet.
Variations & Substitutions
While the original recipe is wonderfully simple and effective, here are a few ideas if you wish to experiment:
- Whole Grain Goodness: As mentioned in the ingredients, using 100% whole wheat flour can add a delightful nutty flavor and extra fiber. A mix of white and whole wheat offers a balanced texture.
- Slightly Sweeter Touch: If your baby is a bit older and you’re comfortable with it, you could explore adding a tiny pinch of cinnamon or a touch of vanilla extract to the dough for a subtle flavor variation. Ensure any additions are age-appropriate and used sparingly.
FAQs
Q: How do these biscuits help with teething pain?
A: The hardness of these baked biscuits provides a firm surface for babies to gnaw on, which can help to relieve pressure and discomfort in their gums.
Q: Why do they need to sit overnight?
A: The overnight rest allows the dough to dry out slightly before baking, which is crucial for achieving a hard texture and minimizing crumbs when the baby bites or gums them.
Q: What kind of flour is best for teething biscuits?
A: You can use white flour, whole wheat flour, or a combination. Whole wheat will offer a slightly denser texture and more fiber.
Q: How can I ensure these biscuits don’t crumble easily?
A: Ensure the dough is stiff enough before cutting and that you bake them until they are thoroughly browned and hard to the touch. The overnight rest is also key to preventing excessive crumbling.
Q: Are these biscuits safe for very young babies?
A: Always supervise your baby when they are eating any solid food, including these biscuits. Ensure they are hard enough not to break off into large, swallowable pieces. Consult with your pediatrician if you have any specific concerns about your baby’s diet or teething.
Final Thoughts
There’s a profound joy in creating something nourishing and beneficial for your little one, and these round teething biscuits embody that perfectly. They are a simple solution to a common baby challenge, made with love and wholesome ingredients. The process, from mixing to the overnight rest, becomes a small ritual, a moment of quiet dedication in the beautiful chaos of early parenthood. Bake a batch, store them safely, and have them ready for those moments when only a soothing gnaw will do. Your baby will thank you for it, and you’ll have the quiet satisfaction of knowing you’ve provided something truly special.