
Folksy Flavors of “Runsas”: A Taste of Comfort and Tradition
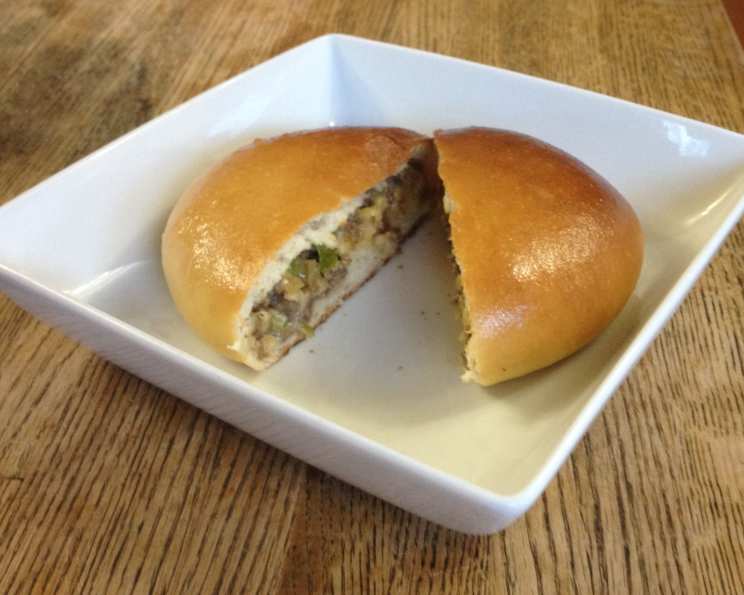
I remember the first time I encountered “Runsas.” It was on a chilly autumn evening, the kind that whispers of woodsmoke and impending holidays. My grandmother, a woman whose kitchen was a symphony of bubbling pots and fragrant spices, pulled these golden beauties from her oven. The aroma alone was enough to transport me back to childhood – warm, yeasty bread embracing a savory, deeply satisfying filling. Each bite was a revelation: the soft, yielding dough giving way to the rich, seasoned beef and the subtle sweetness of cooked cabbage and onion, all tied together by the comforting creaminess of melted American cheese. These aren’t just buns; they are edible Hugs, a testament to simple ingredients transformed by love and time-honored technique.
Recipe Overview
- Prep Time: 50 minutes (plus 1 hour resting for dough)
- Cook Time: 40 minutes
- Total Time: 1 hour 30 minutes (plus 1 hour resting for dough)
- Servings: 8
- Yield: 8 buns
- Dietary Type: Contains Gluten, Dairy, Egg
Ingredients
For the Dough:
- 3⁄4 cup warm water (ensure it’s around 110 degrees Fahrenheit)
- 1⁄2 cup sweetened condensed milk
- 1⁄4 cup vegetable oil
- 2 tablespoons sugar
- 1 large egg
- 3 1⁄2 cups all-purpose flour, plus extra for rolling out dough
- 2 (1⁄4 ounce) packages fast rise yeast
- 1 teaspoon salt
For the Filling:
- 3 tablespoons unsalted butter, divided (2 tablespoons for cooking, 1 tablespoon melted for brushing)
- 1 1⁄2 lbs ground beef (90% lean recommended for optimal flavor and texture)
- 1 large onion, chopped fine
- 1⁄2 small head cabbage, chopped (approximately 3 cups)
- Salt and pepper, to taste
- 8 slices deli American cheese
Equipment Needed
- Large bowl (for dough)
- Standing mixer with dough hook (optional, but recommended)
- Wooden spoon (if making dough by hand)
- Large measuring cup
- Large skillet
- Slotted spoon
- Paper towel-lined plate
- Plastic wrap
- 2 baking sheets
- Deep cereal bowls (for shaping)
- Pastry brush
Instructions
For the Dough:
- Begin by preparing the foundation of our “Runsas”: the dough. Lightly grease a large bowl with cooking spray. This simple step ensures your dough won’t stick as it rises.
- In a large measuring cup, combine the warm water, sweetened condensed milk, vegetable oil, sugar, and egg. Whisk these wet ingredients together until they are well incorporated.
- If you’re using a standing mixer, combine the all-purpose flour, fast rise yeast, and salt in the bowl of the mixer fitted with the dough hook.
- With the mixer running on low speed, gradually add the wet ingredient mixture to the dry ingredients. Continue mixing until the dough just starts to come together, forming a shaggy mass.
- Once the dough has come together, increase the mixer speed to medium. Let it mix for 4 to 6 minutes, or until the dough becomes shiny and smooth. This process develops the gluten, which is crucial for a tender crumb.
- If making the dough by hand: Combine the dry ingredients in a large bowl. Create a well in the center of the dry ingredients and pour in the wet ingredients. Mix with a wooden spoon until a shaggy dough forms. Turn the dough out onto a heavily floured work surface and knead until it’s shiny and smooth, which will take approximately 10 minutes of diligent work.
- Turn the dough out onto a heavily floured work surface, shape it into a ball, and gently place it back into the greased bowl.
- Cover the bowl tightly with plastic wrap. Place the bowl in a warm, draft-free spot to let the dough rest and rise until it has doubled in size. This typically takes about 1 hour.
For the Filling:
- While the dough is rising, prepare the hearty filling. Melt 1 tablespoon of unsalted butter in a large skillet over medium-high heat.
- Add the ground beef to the hot skillet. Cook until it just begins to brown, which should take around 6 minutes. Be sure to break up any large clumps of meat as it cooks.
- Using a slotted spoon, carefully transfer the browned beef to a plate lined with paper towels. This helps to drain off excess fat, ensuring a less greasy filling.
- Pour off all but 2 tablespoons of fat from the skillet. If there’s more fat than that, carefully tilt the pan and spoon out the excess.
- Add the finely chopped onion to the skillet. Cook, stirring occasionally, until the onion has softened, which takes about 3 minutes.
- Next, add the chopped cabbage to the skillet. Toss it with the onions and cook until it just begins to wilt, which will take 2 to 4 minutes. You want it tender but not mushy.
- Return the browned ground beef to the skillet with the softened onions and wilted cabbage. Season generously with salt and pepper to your liking. Stir everything together to combine.
To Assemble and Bake:
- Adjust your oven racks to the upper-middle and lower-middle positions. Preheat your oven to 350 degrees Fahrenheit (175 degrees Celsius).
- Coat two baking sheets with cooking spray. This will prevent the buns from sticking during baking.
- Once the dough has doubled in size, gently punch it down. Divide the dough into 8 equal pieces.
- Working on a lightly floured work surface, roll each piece of dough into a 7-inch circle. Aim for an even thickness across each circle.
- To shape each bun, place one dough round into a deep cereal bowl. Top the dough with one slice of deli American cheese.
- Spoon approximately 3/4 cup of the prepared filling over the cheese.
- Carefully pinch the edges of the dough together to form a sealed bun, ensuring the filling is enclosed.
- Transfer each assembled bun, seam side down, to one of the prepared baking sheets.
- Repeat this process with the remaining dough, cheese, and filling, placing 4 buns on each baking sheet.
- Cover the buns loosely with plastic wrap. Let them rest and puff up for about 20 minutes. This second rise gives them a lighter texture.
- Bake the buns in the preheated oven for approximately 20 minutes, or until they are golden brown all over. To ensure even cooking, switch and rotate the position of the baking sheets halfway through the baking time.
- As soon as the buns come out of the oven, brush them all over with the remaining 1 tablespoon of melted unsalted butter. This adds a beautiful sheen and extra layer of flavor.
- Serve the “Runsas” warm and enjoy!
Expert Tips & Tricks
- Dough Consistency is Key: If your dough feels too sticky after mixing, don’t be tempted to add too much extra flour. A little bit of stickiness is okay, especially in humid conditions. Add flour sparingly, just enough to make it manageable. Conversely, if it feels too dry, a tiny splash more warm water can help.
- The Magic of Fast-Rise Yeast: Fast-rise (or instant) yeast doesn’t require proofing in water beforehand, making the process quicker. Ensure your yeast is fresh for the best rise.
- Perfectly Cooked Beef: Browning the beef in batches if necessary can prevent it from steaming rather than searing, leading to better flavor development.
- Shaping for Success: When pinching the dough shut, a good seal is crucial to prevent the filling from escaping during baking. You can also gently press the seam together with the tines of a fork for extra security.
- The Cereal Bowl Trick: Using a deep cereal bowl is a clever way to get a consistent, rounded shape for each bun. Make sure the bowl is large enough to accommodate the dough round.
- Butter Glaze for Shine: The final brush of melted butter is a simple but effective way to enhance the visual appeal and the aroma of the finished buns. Don’t skip this step!
Serving & Storage Suggestions
These “Runsas” are best served warm, straight from the oven, when the cheese is delightfully melty and the dough is at its most tender. They make a fantastic light lunch, a hearty appetizer, or a comforting side dish. They pair wonderfully with a simple green salad or a cup of hearty soup.
Leftover “Runsas” can be stored in an airtight container at room temperature for up to 2 days. For longer storage, refrigerate them for up to 4 days. To reheat, place them on a baking sheet in a 350°F (175°C) oven for 8-10 minutes, or until warmed through. You can also gently reheat them in a microwave, though they may lose a bit of their crispness.
Nutritional Information
| Nutrient | Amount per Serving | % Daily Value |
|---|---|---|
| Calories | 634.3 kcal | |
| Calories from Fat | 273 | |
| Total Fat | 30.4 g | 46% |
| Saturated Fat | 12.2 g | 60% |
| Cholesterol | 108.1 mg | 36% |
| Sodium | 529.2 mg | 22% |
| Total Carbohydrate | 61.6 g | 20% |
| Dietary Fiber | 3.4 g | 13% |
| Sugars | 15.9 g | 63% |
| Protein | 28.1 g | 56% |
Nutritional information is an estimate and may vary based on specific ingredients and preparation methods.
Variations & Substitutions
While the classic “Runsas” recipe is wonderfully satisfying, here are a few ideas for creative twists:
- Spicy Kick: Add a pinch of red pepper flakes or a finely minced jalapeño to the beef filling for a touch of heat.
- Vegetarian Delight: Substitute the ground beef with cooked lentils, finely chopped mushrooms, or a plant-based ground meat alternative. Ensure the vegetarian filling is well-seasoned.
- Herbaceous Notes: Incorporate fresh herbs like parsley or chives into the filling for added freshness.
- Cheese Swap: While American cheese melts beautifully and provides that signature creamy texture, you could experiment with a mild cheddar or a Monterey Jack for a slightly different flavor profile.
FAQs (Frequently Asked Questions)
Q: Can I make the dough ahead of time?
A: Yes, you can prepare the dough up to a day in advance. After the first rise, punch it down, cover it tightly, and refrigerate it. Allow it to come to room temperature for about 30 minutes before shaping.
Q: What kind of water temperature is best for the yeast?
A: The ideal temperature for fast-rise yeast is around 110°F (43°C). Water that is too hot can kill the yeast, while water that is too cool won’t activate it properly.
Q: Why is the dough doubled in size before baking?
A: The rising process allows the yeast to produce carbon dioxide, which creates air pockets in the dough, resulting in a lighter and fluffier texture.
Q: Can I use a different type of cheese?
A: While American cheese provides a classic creamy melt, you can experiment with other good melting cheeses like cheddar or Monterey Jack, but be aware that the flavor profile will change.
Q: How can I ensure the buns bake evenly?
A: Placing the buns with enough space between them on the baking sheets and rotating the sheets halfway through baking are key to ensuring they all achieve a beautiful golden-brown color.
A Taste of Home
There’s a certain magic that happens when simple, honest ingredients are brought together with care and tradition. “Runsas” embodies this perfectly. They are more than just a recipe; they are a connection to heritage, a warm embrace on a plate, and a guaranteed crowd-pleaser. I encourage you to gather your ingredients, put on your favorite apron, and experience the comforting deliciousness of these remarkable buns. May they bring as much joy to your table as they have to mine.