
Russian Wedding Cookies: Delicate Delights for Every Celebration
There’s a certain magic that happens in the kitchen when the scent of butter and toasted nuts fills the air, a fragrance that instantly transports me back to childhood gatherings. My grandmother, a woman whose hands always seemed dusted with flour, would meticulously prepare these delicate, powdery cookies for every family occasion. They weren’t grand, tiered confections, but rather small, snow-kissed jewels that disappeared from the platters with astonishing speed. Each bite was a tender crumbly whisper, a sweet, nutty embrace that always left us reaching for just one more. This recipe, passed down through generations, captures that simple, pure joy of a homemade treat, perfect for sharing and savoring.
Recipe Overview
- Prep Time: 15 minutes
- Cook Time: 8 minutes (per batch)
- Total Time: Approximately 45 minutes (including cooling and re-rolling)
- Servings: 48 cookies
- Yield: 48 cookies
- Dietary Type: Contains Gluten, Dairy, and Nuts
Ingredients
This recipe is beautifully simple, relying on just a few key ingredients to create its signature texture and flavor.
- 1 cup softened butter
- 1/2 cup confectioners’ sugar (plus more for coating)
- 1 teaspoon vanilla extract
- 2 1/4 cups all-purpose flour
- 1/2 teaspoon salt
- 3/4 cup walnuts, minced very fine
Equipment Needed
You won’t need any fancy gadgets for these cookies, just the basics:
- Mixing bowls
- Electric mixer (handheld or stand mixer) is helpful but not strictly necessary
- Measuring cups and spoons
- Baking sheets
- Spatula or wooden spoon
- Wire cooling rack
- Small bowl or shallow dish for confectioners’ sugar
Instructions
The beauty of these Russian Wedding Cookies lies in their simplicity. The dough comes together quickly, and the baking process is swift. The key is to watch them closely to ensure they achieve that perfect, delicate set without browning.
- In a large mixing bowl, combine the softened butter, confectioners’ sugar, and vanilla extract.
- Cream these ingredients together until they are well combined and form a smooth, light mixture. You can do this with an electric mixer on medium speed or vigorously by hand with a spatula or wooden spoon. While it’s not strictly necessary to cream the sugar and butter first, it can contribute to a lighter texture.
- In a separate, smaller bowl, whisk together the flour and salt.
- Gradually add the dry ingredients to the butter mixture, mixing on low speed (or by hand) until just combined. Be careful not to overmix the dough at this stage, as it can develop gluten and make the cookies tough.
- Gently fold in the finely minced walnuts. Ensure they are evenly distributed throughout the dough.
- Preheat your oven to 400 degrees Fahrenheit (200 degrees Celsius).
- Line your baking sheets with parchment paper or a silicone baking mat, or leave them ungreased as indicated.
- Roll the dough into 1-inch balls. You can use a small cookie scoop or a tablespoon to measure out uniform portions.
- Place the dough balls onto the prepared baking sheets, leaving a little space between them as they will spread slightly.
- Bake for around 8 minutes. Keep a very close eye on these cookies, as they burn easily. They are done when they are set but not browned. You are looking for a pale, slightly firm cookie.
- Once removed from the oven, let the cookies cool on the baking sheet for a minute or two.
- While the cookies are still warm, gently roll them in confectioners’ sugar. The warmth of the cookie will help the sugar adhere.
- Transfer the sugar-coated cookies to a wire cooling rack to cool completely.
- Once the cookies have cooled entirely, roll them in confectioners’ sugar a second time. This creates that signature snowy, powdery finish.
Expert Tips & Tricks
- Walnut Fineness: The instruction to mince the walnuts “fine” is crucial. This ensures that you get a delightful nutty flavor and texture in every bite without any large, crunchy pieces. If you have a food processor, a quick pulse or two can achieve this quickly and efficiently.
- Butter Softness: Ensure your butter is truly softened, not melted. This means it should yield to gentle pressure but not be greasy or liquid. This helps create a cohesive dough that’s easy to handle.
- Oven Variations: Ovens can vary in their heating. The 8-minute baking time is a guideline. If you notice your cookies are browning too quickly, reduce the time slightly or move the baking sheet to a slightly higher rack. Conversely, if they seem pale and underbaked after 8 minutes, give them another minute or two, but always prioritize avoiding browning.
- Uniformity is Key: Rolling the dough into consistent 1-inch balls ensures that all cookies bake evenly. This leads to a more uniform texture and appearance across the entire batch.
Serving & Storage Suggestions
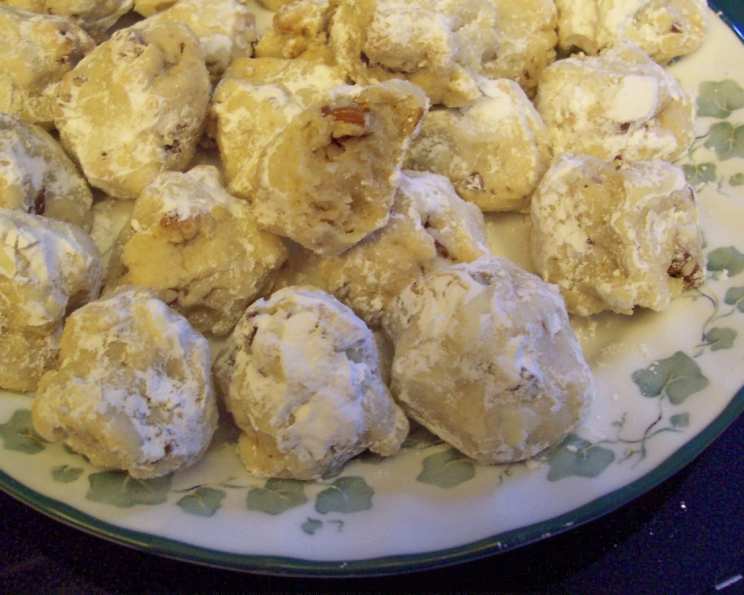
These delicate Russian Wedding Cookies are best served at room temperature. Their powdery coating makes them look like little snowballs, perfect for a festive occasion or a simple afternoon tea. They pair wonderfully with a cup of strong black tea or a glass of milk.
To store, keep them in an airtight container at room temperature. The generous coating of confectioners’ sugar helps to keep them fresh. They will maintain their delightful texture for up to a week. Avoid refrigerating them, as this can cause the cookies to become hard and the coating to become clumpy.
Nutritional Information
Please note that nutritional information can vary based on specific ingredient brands and exact measurements used. This is an estimated breakdown.
| Nutrient | Amount per Serving | % Daily Value |
|---|---|---|
| Calories | 72.3 kcal | |
| Calories from Fat | ||
| Total Fat | 5.1 g | 7% |
| Saturated Fat | 2.5 g | 12% |
| Cholesterol | 10.2 mg | 3% |
| Sodium | 58.2 mg | 2% |
| Total Carbohydrate | 6 g | 1% |
| Dietary Fiber | 0.3 g | 1% |
| Sugars | 1.3 g | 5% |
| Protein | 0.9 g | 1% |
Variations & Substitutions
While the classic Russian Wedding Cookie is a triumph as is, there are delightful ways to put your own spin on it:
- Nut Alternatives: If you have a nut allergy or simply want to try something different, finely ground almonds or pecans can be substituted for the walnuts. For a nut-free version, you could try finely ground sunflower seeds or simply omit the nuts altogether. The texture will be slightly different, but still delicious.
- Citrus Zest: For a subtle hint of brightness, add the zest of half a lemon or orange to the dough along with the vanilla extract.
- Spice It Up: A pinch of ground cardamom or cinnamon can add a warm, cozy dimension to the cookies, especially during the cooler months.
FAQs
Q: Why are these called “Russian Wedding Cookies”?
A: While their exact origins are debated, these delicate, powdered cookies are a traditional treat served at celebrations, including weddings, in many Eastern European countries, including Russia.
Q: Can I make these cookies ahead of time?
A: Yes! They store beautifully in an airtight container at room temperature for up to a week, making them perfect for preparing in advance for parties or holidays.
Q: My cookies are burning easily. What can I do?
A: Ensure you are baking at the correct temperature and keeping a close watch. Ovens vary, so the 8-minute mark is a guideline. If your oven runs hot, you may need to reduce the baking time slightly or lower the oven temperature by 25 degrees Fahrenheit.
Q: Can I use margarine instead of butter?
A: While you can, butter provides the best flavor and texture for these cookies. Margarine may result in a slightly different consistency.
Q: How should I store these cookies to keep them fresh?
A: Store them in an airtight container at room temperature. The generous coating of confectioners’ sugar helps to protect them and keep them from drying out.
Final Thoughts
There’s a profound satisfaction in creating something so simple, yet so utterly delightful. These Russian Wedding Cookies are a testament to that. They require no complex techniques, no exotic ingredients, just a bit of care and attention. As they melt in your mouth, leaving behind a whisper of butter and toasted walnut, you’ll understand why they’ve remained a beloved classic. Bake a batch for your next gathering, or simply as a treat for yourself, and let their delicate charm brighten your day. Share them with loved ones, and watch them disappear as quickly as memories made over a warm cup of tea.