
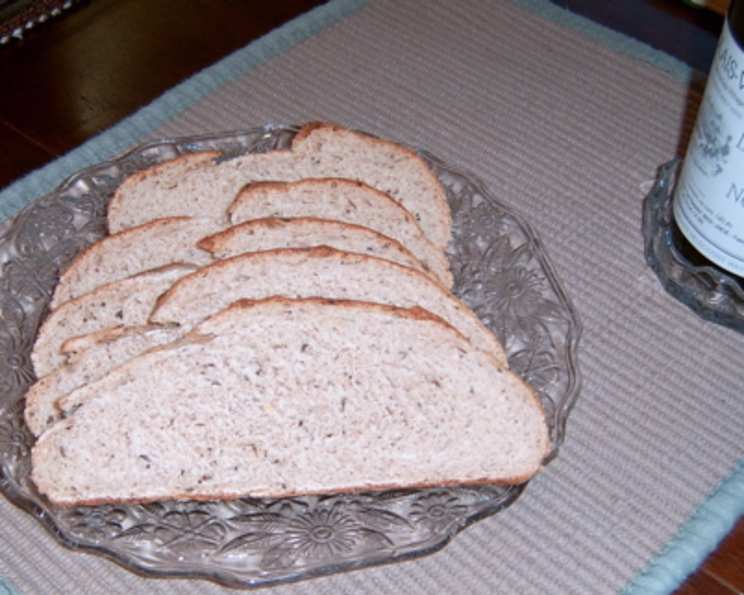
The Rustic Charm of Rye Onion Bread
There’s a certain aroma that instantly transports me back to my grandmother’s kitchen, a place where the air was always thick with the comforting scent of baking. It was never the sweet, sugary perfumes of cakes or cookies, but the deep, earthy, and slightly tangy fragrance of good bread. Among her repertoire, the Rye Onion Bread held a special place. The subtle sweetness of the rye flour, married with the savory depth of dried onion, created a loaf that was both hearty and uniquely satisfying. It wasn’t just bread; it was a warm hug on a plate, a testament to simple ingredients transformed by time and patience into something truly magnificent.
Recipe Overview
- Prep Time: 25 minutes
- Cook Time: 20 minutes
- Total Time: 1 hour 5 minutes (plus dough rising time)
- Servings: 2
- Yield: 2 loaves
- Dietary Type: Vegetarian
Ingredients
Here’s what you’ll need to bring this rustic loaf to life:
- 1 ¼ cups buttermilk, room temperature
- 2 tablespoons olive oil
- 1 cup rye flour
- 3 cups bread flour
- 1 tablespoon brown sugar
- 1 teaspoon salt
- 1 teaspoon fast-rising yeast (also known as bread machine yeast)
- 2 tablespoons dried onion flakes
- 1 teaspoon caraway seed
- 1 teaspoon black caraway seed
Equipment Needed
- Bread machine
- Large baking pan
- Rolling pin
- Oiled plastic wrap
- Wire rack
Instructions
Crafting this Rye Onion Bread is a journey that begins with the magic of a bread machine and culminates in a beautifully baked, aromatic loaf. Follow these steps carefully for the best results.
-
Begin by placing the buttermilk, olive oil, rye flour, bread flour, brown sugar, and salt into your bread machine. Follow your machine’s specific instructions for the order of ingredients; typically, wet ingredients are added first. Crucially, ensure the salt and yeast are placed in separate corners of the bread machine pan, as direct contact can inhibit yeast activity.
-
Set your bread machine to the dough cycle. This cycle will expertly mix, knead, and allow the dough to rise.
-
Listen for your machine’s beep, which usually signals the end of the kneading process. At this point, it’s time to introduce the aromatics. Add the dried onion flakes, caraway seed, and black caraway seed to the dough. These will be incorporated during the final stages of kneading.
-
Once the dough cycle is complete, carefully remove the dough from the bread machine onto a lightly floured work surface. The dough should be smooth and elastic.
-
Divide the dough into two equal portions. For each portion, gently roll it out into a 1-inch thick disk.
-
To shape the loaves, take one side of the disk and fold it into the center, pressing down with your rolling pin to seal. Then, fold the other half to the center, again pressing to seal. Finally, fold the entire shape in half along the center line, pressing the seams firmly to seal them. Roll the shaped dough forward and backward to form a loaf approximately 12 inches long. Repeat this shaping process with the second half of the dough.
-
Lightly oil a large baking pan. Place both shaped loaves onto the prepared pan, ensuring there is enough space between them for them to rise.
-
Cover the loaves loosely with oiled plastic wrap. Find a warm, draft-free spot in your kitchen and allow the loaves to rise for 45 minutes. This crucial proofing period will develop their texture and lightness.
-
After 45 minutes, remove the plastic wrap. Lightly dust the tops of the loaves with a bit of flour. Using a sharp knife or lame, score the surface of each loaf. This allows the bread to expand evenly during baking. Let the loaves stand for another 10 minutes while you preheat your oven.
-
Preheat your oven to 425 degrees Fahrenheit (220 degrees Celsius).
-
Bake the Rye Onion Bread for 20 minutes.
-
To check for doneness, tap the bottom of the loaf. It should sound hollow, and the crust will be a deep, dark brown.
-
Once baked, cool the bread completely on a wire rack before slicing and serving.
Expert Tips & Tricks
To elevate your Rye Onion Bread experience, consider these professional insights:
- Buttermilk’s Role: The acidity in buttermilk reacts with the leavening agents, contributing to a tender crumb and a wonderfully soft crust. If you don’t have buttermilk, you can create a substitute by adding 1 tablespoon of lemon juice or white vinegar to 1 ¼ cups of milk and letting it sit for 5-10 minutes.
- Flour Power: Using bread flour provides the necessary gluten structure for a good rise and chew, while the rye flour adds its distinctive earthy flavor and a slightly denser texture.
- Yeast Freshness: Always ensure your fast-rising yeast is fresh. If it’s old, it may not activate properly, leading to a flat loaf. A simple test is to add a pinch of sugar to a small amount of warm water with the yeast; it should bubble and foam within minutes.
- Oven Temperature Check: Ovens can vary. If you find your bread is browning too quickly, you can tent it loosely with aluminum foil during the last few minutes of baking.
- Scoring Artistry: Don’t be afraid to experiment with scoring patterns. Simple diagonal slashes are classic, but you can also create more intricate designs to allow for controlled expansion.
Serving & Storage Suggestions
This Rye Onion Bread is a versatile delight. It’s absolutely superb served warm, sliced thickly and generously slathered with good quality butter. It pairs wonderfully with a hearty stew, a robust soup, or as the foundation for an elevated grilled cheese sandwich. For a simpler pleasure, it’s also delicious on its own, allowing its complex flavors to shine.
When it comes to storage, allow the bread to cool completely before storing. At room temperature, it will keep well in a paper bag or bread box for 2-3 days. If you need to store it for longer, wrap it tightly in plastic wrap or place it in an airtight container and refrigerate for up to a week. For extended storage, slice the cooled bread and freeze it in a freezer-safe bag for up to 3 months. To reheat frozen slices, simply pop them in the toaster or warm them gently in a low oven.
Nutritional Information
| Nutrient | Amount per Serving (approx.) | % Daily Value |
|---|---|---|
| Calories | 110 kcal | |
| Calories from Fat | 15 % | |
| Total Fat | 1.8 g | 2 % |
| Saturated Fat | 0.3 g | 1 % |
| Cholesterol | 0.6 mg | 0 % |
| Sodium | 133.4 mg | 5 % |
| Total Carbohydrate | 20.3 g | 6 % |
| Dietary Fiber | 1.4 g | 5 % |
| Sugars | 1.7 g | 6 % |
| Protein | 3.1 g | 6 % |
(Note: Nutritional values are estimates and can vary based on specific ingredients and brands used.)
Variations & Substitutions
While this recipe is delightful as is, feel free to explore these variations:
- Cheesy Goodness: Incorporate ½ cup of grated sharp cheddar cheese or Parmesan cheese along with the dried onion flakes for an extra layer of savory flavor.
- Seed Medley: Experiment with other seeds like poppy seeds or sesame seeds alongside the caraway for added texture and visual appeal.
- Herbaceous Notes: For a more complex herbal profile, add a teaspoon of dried dill or thyme with the onion flakes.
- Whole Grain Boost: Substitute ½ cup of the bread flour with whole wheat flour for a nuttier flavor and increased fiber.
FAQs
Q: Why do I need to place the salt and yeast in separate corners in the bread machine?
A: Salt can inhibit or kill yeast if they come into direct contact during the initial mixing stages, preventing the dough from rising properly. Separating them ensures the yeast can activate and work its magic.
Q: My bread machine has different cycles, which one should I use for this recipe?
A: The dough cycle is specifically designed to handle the mixing, kneading, and initial proofing stages. It allows you to then shape and bake the bread outside the machine for a more traditional loaf.
Q: How can I tell if the dough has risen enough before baking?
A: The dough should roughly double in size and appear puffy and airy. A gentle poke with a floured finger should leave a slight indentation that slowly springs back.
Q: My bread crust is too pale. What can I do?
A: Ensure your oven is accurately preheated to 425°F. You can also consider baking for a few minutes longer, or if the crust is browning too quickly, tenting it with foil.
Q: Can I make this bread without a bread machine?
A: Absolutely! You would mix the ingredients as per step 1, then knead the dough by hand on a floured surface for 8-10 minutes until smooth and elastic. Allow it to rise in a greased bowl, covered, in a warm place until doubled (about 1-1.5 hours), then proceed with the shaping and baking instructions.
Final Thoughts
There’s an undeniable satisfaction in pulling a loaf of freshly baked Rye Onion Bread from the oven. Its aroma alone is enough to make a house feel like a home. This recipe is a beautiful testament to the simple yet profound pleasure of baking, proving that with a few quality ingredients and a little patience, you can create something truly extraordinary. I encourage you to try this recipe, to savor its rustic charm, and perhaps to create your own cherished memories around its warm, inviting presence. Share your creations, and let the comforting embrace of this bread bring a smile to your table.