
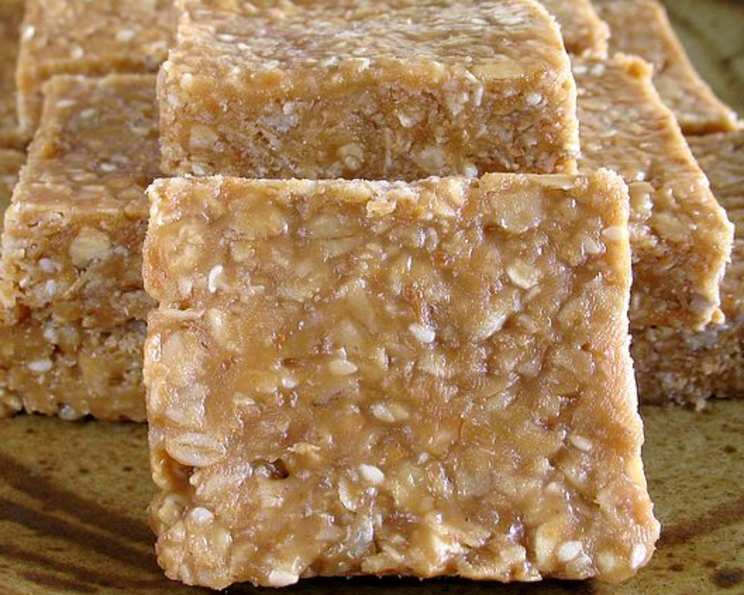
Unbaked Peanut Butter and Honey Bars: A No-Fuss Delight
There’s a certain magic that happens when simple ingredients come together to create something truly spectacular, especially when those ingredients evoke childhood memories. For me, the scent of warm peanut butter mingled with the sweet kiss of honey instantly transports me back to bustling after-school snack times. My kids, perpetually ravenous after a day of learning and playing, would greet these unbaked peanut butter and honey bars like a beacon of deliciousness, their eager faces a testament to their irresistible charm. It’s a recipe so straightforward, yet so satisfying, that it’s become a staple in my kitchen, a reliable go-to for a quick treat that never fails to bring smiles.
Recipe Overview
- Prep Time: 15 minutes
- Cook Time: 0 minutes (no-bake)
- Total Time: 15 minutes (plus chilling time)
- Servings: 12
- Yield: 1 pan of bars
- Dietary Type: Vegetarian (can be made vegan with granola substitutions)
Ingredients
This recipe champions simplicity, requiring just a handful of pantry staples to achieve a wonderfully satisfying treat.
- 3 cups granola cereal
- 1/2 cup corn syrup
- 1/4 cup honey
- 1 cup peanut butter
- 1 teaspoon vanilla extract
- 1/4 teaspoon salt
A Note on Granola: For the best texture, I recommend a hearty granola that has larger clusters. If your granola is very fine, you might find the bars a little too crumbly. You can also use a gluten-free granola if needed, just be sure it’s one you enjoy the flavor of as it will be prominent.
Equipment Needed
The beauty of this recipe lies in its minimal equipment requirements. You won’t need any fancy gadgets, just a few everyday kitchen essentials.
- A medium-sized saucepan
- A heatproof bowl (large enough to hold the granola)
- A measuring cup and spoons
- A stirring utensil (a sturdy spoon or spatula works well)
- An 8-inch square cake pan (or a similar-sized baking dish)
- Butter or non-stick cooking spray for greasing the pan
- A cooling rack (optional, but helpful for chilling)
Instructions
Creating these delightful unbaked peanut butter and honey bars is a straightforward process that even the most novice cook can master. The key is to work efficiently once the warm binder is ready.
- Begin by placing the 3 cups of granola cereal into a large, heatproof bowl. Ensure the bowl is sturdy and can withstand mixing a somewhat sticky concoction.
- In a medium-sized saucepan, combine the 1/2 cup of corn syrup and the 1/4 cup of honey. Place the saucepan over medium heat.
- Gently heat the corn syrup and honey mixture, stirring occasionally, just until it comes to a boil. Be careful not to let it boil vigorously or for too long, as this can alter its consistency. The goal is simply to heat it enough to become fluid and ready to bind.
- Once the mixture reaches a boil, remove the saucepan from the heat immediately. This is crucial to prevent overcooking the syrups, which can lead to a hard, candy-like texture in the finished bars.
- To the hot syrup mixture, add the 1 cup of peanut butter, the 1 teaspoon of vanilla extract, and the 1/4 teaspoon of salt.
- Using your stirring utensil, stir the ingredients together until they are thoroughly combined and the mixture becomes smooth and creamy. The warmth from the syrup will help the peanut butter melt and incorporate seamlessly.
- Pour this warm peanut butter mixture over the granola that you previously placed in the bowl.
- Now, stir everything together until the granola is evenly coated. This step requires a bit of elbow grease. Make sure every piece of granola is touched by the binder. The mixture will be quite thick and sticky.
- Lightly butter your 8-inch square cake pan or coat it thoroughly with non-stick cooking spray. This step is essential to prevent the bars from sticking to the pan.
- Press the granola mixture evenly into the prepared cake pan. Use the back of your spoon or a piece of parchment paper to help you press it down firmly and evenly. Getting it well-compacted will ensure the bars hold their shape when cut.
- Chill the pan in the refrigerator until set. This typically takes at least 1 to 2 hours, but allowing them to chill longer will make them even firmer and easier to cut.
- Once completely set, cut the chilled mixture into bars. You can make them into squares or rectangles, depending on your preference.
Expert Tips & Tricks
To elevate your unbaked peanut butter and honey bars from simple to sensational, consider these insider tips:
- The Power of a Good Press: Don’t underestimate the importance of pressing the mixture firmly into the pan. A well-compacted base is key to achieving bars that slice cleanly and don’t crumble apart. Use a flat-bottomed glass or a piece of parchment paper to get an even, tight surface.
- Temperature is Key: When mixing the peanut butter into the hot syrup, ensure the peanut butter is at room temperature or slightly softened. This helps it melt and incorporate smoothly without clumping.
- Granola Variety: Experiment with different granolas! A granola with nuts, seeds, or dried fruit can add wonderful texture and flavor complexity to your bars. Just ensure they are relatively uniform in size for even binding.
- Cutting for Cleanliness: For the cleanest cuts, use a sharp knife and wipe it clean between each cut. Running the knife under hot water and drying it can also help the blade glide through the chilled bars more easily.
- The “Set” Factor: If you find your bars are still a bit soft after a couple of hours, don’t hesitate to leave them in the fridge for an additional hour or even overnight. The extra chilling time will firm them up beautifully.
Serving & Storage Suggestions
These unbaked peanut butter and honey bars are incredibly versatile when it comes to serving and storage. They are perfect as an afternoon pick-me-up, a lunchbox treat, or even a simple dessert.
Serve them chilled, straight from the refrigerator for the firmest texture. They are delicious on their own, but can also be paired with a cold glass of milk or a warm cup of tea. For a more decadent touch, you could drizzle them with a little melted chocolate or serve them with a dollop of whipped cream.
To store, keep the bars in an airtight container in the refrigerator. They will maintain their best texture and flavor for up to 5 days. If you find them to be too hard after refrigeration, let them sit at room temperature for about 10-15 minutes before serving. They also freeze well; simply wrap individual bars or the whole pan tightly in plastic wrap and then aluminum foil, and store in the freezer for up to 2 months. Thaw them in the refrigerator overnight before enjoying.
Nutritional Information
Here is an estimated nutritional breakdown for these delicious bars. Please note that these values can vary based on the specific brands of ingredients used, especially the granola.
| Nutrient | Amount per Serving | % Daily Value |
|---|---|---|
| Calories | 334.3 kcal | – |
| Total Fat | 18.2 g | 27% |
| Saturated Fat | 3.5 g | 17% |
| Cholesterol | 0 mg | 0% |
| Sodium | 155.3 mg | 6% |
| Total Carbohydrate | 36.1 g | 12% |
| Dietary Fiber | 4 g | 16% |
| Sugars | 17.3 g | 69% |
| Protein | 9.9 g | 19% |
(Values are approximate and may vary based on ingredient choices.)
Variations & Substitutions
While the classic peanut butter and honey combination is undeniably superb, there’s always room for a little culinary creativity!
- Nut Butter Swap: Feel free to substitute the peanut butter with almond butter, cashew butter, or even sunflower seed butter for a nut-free option. The flavor profile will shift slightly, but the binding properties will remain similar.
- Sweetener Play: If you prefer a less sweet bar, you could slightly reduce the amount of honey and corn syrup, though be mindful that these are the binders. You might need to add a touch more peanut butter to compensate for consistency.
- Add-Ins Galore: Elevate your bars with exciting additions! Stir in chocolate chips (mini or regular), dried cranberries, shredded coconut, or chopped nuts along with the granola. These additions will not only enhance flavor but also texture.
- Savory Twist: For a more sophisticated flavor, consider adding a pinch of cinnamon or a dash of sea salt flakes on top before chilling.
FAQs
Q: Can I make these bars vegan?
A: Yes! To make these bars vegan, ensure your granola is certified vegan and use a vegan-friendly sweetener in place of honey if necessary, though many honey substitutes are not suitable for binding. A vegan syrup or agave nectar could be tested, but it may affect the final texture.
Q: Why are my bars not holding their shape?
A: This is most likely due to insufficient chilling time or the mixture not being pressed firmly enough into the pan. Ensure you chill for at least 1-2 hours until completely set, and press down very firmly in step 10.
Q: Can I use natural peanut butter?
A: Natural peanut butter, especially the kind that separates with oil, can be used, but you may need to stir it very well to reincorporate the oil before measuring. The texture of the finished bar might be slightly different.
Q: How long do these bars last?
A: Stored in an airtight container in the refrigerator, these bars will stay fresh and delicious for up to 5 days.
Q: Can I bake these bars?
A: No, this recipe is specifically designed to be an unbaked treat. Baking would change the texture significantly and is not recommended.
Final Thoughts
There’s an undeniable comfort in a recipe that requires no oven time and delivers such satisfying results. These Unbaked Peanut Butter and Honey Bars are a testament to the power of simple, wholesome ingredients coming together to create something truly delightful. They are a perfect example of how a few moments of mixing can lead to a batch of treats that will be savored by family and friends alike. I encourage you to give them a try, and if you do, I’d love to hear about your experiences – perhaps you’ve discovered a fantastic variation or a new favorite add-in! Enjoy every no-bake bite.