
Uncle Bill’s Perogie Dough: A Tender, Chewy-Free Foundation for Perfection
For years, the secret to truly transcendent perogies lay just beyond my reach. I’d sampled countless iterations, from bustling Ukrainian festivals to intimate family gatherings, each with its own charm. Yet, one elusive quality always seemed to be missing – a dough that was both tender and yielding, yet robust enough to hold its precious filling without becoming tough or chewy. Then, about two decades ago, Uncle Bill, a man of few words but immense culinary wisdom, finally entrusted me with his perogie dough recipe. The first batch I made from his meticulously crafted instructions yielded a dough so wonderfully pliant and delicate, it felt like a revelation. It was the breakthrough I had been searching for, a dough that even the most discerning palates, particularly those with deep Ukrainian roots, have lauded as simply the best they’ve ever encountered.
Recipe Overview
- Prep Time: 45 minutes
- Cook Time: 30 minutes (boiling)
- Total Time: 1 hour 15 minutes
- Servings: 36 perogies
- Yield: Approximately 3 dozen perogies
- Dietary Type: Vegetarian
Ingredients
This dough recipe is built on a foundation of simple, high-quality ingredients that work in harmony to create that perfect texture.
- 3 large eggs
- 3/4 cup whole milk, homogenized
- 1/4 cup whipping cream
- 1/4 cup sour cream (low fat is okay also)
- 3/4 teaspoon salt
- 1 1/2 teaspoons baking powder
- 4 cups all-purpose flour, plus more for dusting and kneading
Equipment Needed
While the ingredients are humble, a few key tools will make the process smoother and more successful.
- Large mixing bowl
- Whisk
- Plastic or wooden spoon
- Lightly floured surface for kneading
- Heavy rolling pin (a marble rolling pin is preferred)
- Mini Form for perogies (3 1/4″, 4″, 5″, or 6″ sizes are available)
- Large cooking pot or pasta pot
- Slotted spoon
- Frying pan (optional, for pan-frying)
- Cookie sheet (for freezing)
- Paper towels
- Freezer bags or vacuum seal bags
Instructions
Creating Uncle Bill’s perogie dough is a methodical process, but each step is crucial to achieving that signature tender texture. Read carefully, and don’t hesitate to practice if you’re new to it.
- In a large mixing bowl, begin by combining the eggs, whole milk, whipping cream, sour cream, and salt. Whisk these wet ingredients together vigorously until they are well blended.
- Next, add the baking powder to the wet mixture. Blend it in thoroughly, ensuring it’s fully incorporated.
- Now, it’s time to introduce the flour. Add the flour one cup at a time. For the first two cups, whisk them into the liquid mixture.
- With the third cup of flour, switch your mixing tool. Add the third cup and begin to mix using a large plastic spoon or a wooden spoon. This is where the dough will start to thicken considerably.
- Continue adding flour. Add the fourth cup and keep mixing with your spoon. At this stage, it might become challenging to incorporate all the loose flour with just a spoon.
- Once the dough is too stiff to mix effectively with a spoon, it’s time to get your hands involved. Roll out the contents of the bowl onto a lightly floured surface.
- Knead the dough with your hands until it transforms into a smooth and shiny mass. This process develops the gluten, giving the dough its structure.
- If you find the dough is still sticky and adhering to your hands, don’t panic. Add a bit more flour, a tablespoon at a time, and continue to knead until the dough is no longer sticky and releases cleanly from your hands.
- Once your dough is smooth and pliable, break it off into chunks. Roll these chunks between your hands to form balls, roughly the size of a golf ball.
- On a lightly floured surface, take one of these dough balls and flatten it with the palm of your hand to about a 1/2-inch thickness.
- Coat each side very lightly with some flour. This will prevent it from sticking during the rolling process.
- Now, it’s time to roll. Using a heavy rolling pin (Uncle Bill swears by a marble rolling pin for its weight and evenness), start to roll out the dough.
- You’ll notice that as you roll, the dough will begin to stick to the rolling pin. This is a good sign.
- When the dough is almost entirely wrapped around the rolling pin, peel the dough off. It should come away very easily at this point.
- Carefully place the dough back onto the rolling surface. The side that was against the rolling pin should now be facing downwards.
- Very lightly dust the top surface ONLY with a bit of flour. Avoid dusting both sides again at this stage.
- Start rolling again. Roll back and forth, then side to side, using gentle pressure to try and maintain a round shape.
- You’ll observe that the dough should now be sticking to the rolling surface and not onto the rolling pin.
- Pay attention to how the dough behaves. The dough should not “snap” back to a smaller round after you roll it. If it does, simply re-roll it again until it holds its shape.
- When you’ve finished rolling, the dough should be approximately 1/16-inch in thickness. This thinness is key to a tender perogie.
- Prepare your perogie-making tool. Open the Mini Form (refer to the photo if you have one) and rub its surface with some flour. This step is crucial for preventing the dough from sticking.
- Place the rolled dough over the Mini Form, ensuring that the dough drapes well over the edges of the form.
- To fill your perogies, place about 1 heaping tablespoon of your choice of filling into the center of the dough on the Mini Form.
- Gently pick up the Mini Form and close it slightly.
- If the filling seems too high, push it down just a bit to ensure a good seal.
- Now, fold the Mini Form completely shut and press tightly. This action cuts and seals the perogie.
- While holding the Mini Form closed, use your thumb or finger to remove the excess dough that squeezes out. This excess dough helps to create a secure seal along the edges.
- The removed excess dough can be gathered and used to form more dough balls to continue the process.
- Open the Mini Form, and your perfectly formed perogie should drop out easily.
- Set the perogies aside on a floured surface or a clean tray as you prepare more.
- Continue to make perogies with the remaining dough, repeating steps 23 through 30 until all your dough and filling are used. You can use whichever size of Mini Form you desire, whether it’s the 3 1/4″, 4″, 5″, or 6″ sizes.
Cooking Instructions
Once your perogies are formed, it’s time to cook them. You have two primary methods: boiling or pan-frying.
-
Boiling:
- In a large cooking pot or pasta pot, fill it 3/4 full with water and bring it to a rolling boil.
- Add 1 tablespoon of salt and 2 tablespoons of extra virgin olive oil or a good vegetable oil to the boiling water.
- Gently add about 8 to 10 perogies to the pot at a time. Be careful not to overcrowd the pot.
- Stir gently with a slotted spoon to prevent them from sticking to the bottom, and then bring the water back to a boil.
- Cook, uncovered, for 2 to 3 minutes, or until the perogies float to the surface. This indicates they are cooked through.
- Remove the cooked perogies with a slotted spoon and transfer them into a bowl.
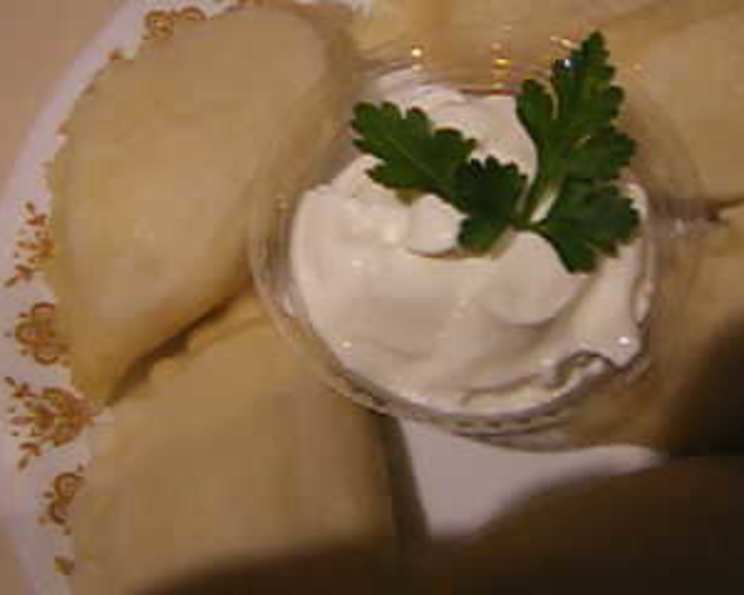
- The perogies can be eaten immediately after boiling, perhaps with a dollop of butter or margarine, a spoonful of sour cream, and a sprinkle of chopped green onions or chives.
-
Pan-Frying (Optional):
- If desired, preheat a frying pan to medium-high heat.
- Add 3 tablespoons of butter and 1 tablespoon of olive oil or vegetable oil to the hot pan.
- Add some finely chopped onions to the pan and sauté them for about 2 minutes until they are softened and fragrant.
- Now add the boiled perogies to the pan.
- Cover the pan and lightly fry them until they are lightly browned on both sides, turning once.
- Serve immediately with more butter if desired, a dollop of sour cream, chopped green onions or chives, and even some cooked chopped bacon bits for an extra savory touch.
Expert Tips & Tricks
- Dough Consistency is Key: The most common pitfall with perogie dough is making it too stiff or too sticky. Uncle Bill’s instructions are precise, but if your flour absorbs moisture differently, err on the side of a slightly softer dough that requires a bit more kneading. It’s better to add a touch more flour during kneading than to have a tough final product.
- The “Sticking to the Pin” Technique: This is the hallmark of a perfectly rolled perogie dough. When the dough adheres to the rolling pin, it indicates the ideal thinness and pliability. If it’s not sticking, you may need to roll it thinner or slightly adjust your flour-to-liquid ratio.
- Don’t Overwork the Dough: Once the dough is smooth and shiny, avoid excessive kneading, as this can lead to toughness.
- The Mini Form Flour Trick: A light dusting of flour inside the Mini Form is non-negotiable. It ensures clean release and prevents tearing.
- Freezing Perogies: For the best results, boil your perogies first, drain them well, and blot away any excess moisture with paper towels. Then, freeze them in a single layer on a cookie sheet until solid before bagging. This prevents them from sticking together in the freezer.
Serving & Storage Suggestions
Uncle Bill’s perogies are incredibly versatile. Boiled perogies are wonderful served simply with melted butter, sour cream, and fresh herbs like chives or dill. For a richer experience, pan-frying them until golden brown adds a delightful crispness. They pair beautifully with a side of sautéed onions and bacon bits.
- Room Temperature: Perogies are best served immediately after cooking. They do not keep well at room temperature.
- Refrigeration: Cooked perogies can be stored in an airtight container in the refrigerator for 2-3 days. Reheat gently by pan-frying or warming in a covered pan with a little butter.
- Freezing: These perogies freeze exceptionally well. After boiling (and drying thoroughly), place them on a cookie sheet and freeze for at least 2 hours until perogies are frozen solid. Then, transfer them to freezer bags or vacuum seal bags. Frozen perogies will last from 6 months to 1 year when properly stored. To cook from frozen, boil them directly without thawing; they will simply take a few minutes longer to cook.
Nutritional Information
(Note: Nutritional values are approximate and will vary based on filling ingredients and cooking methods.)
| Nutrient | Amount per Serving | % Daily Value |
|---|---|---|
| Calories | 69 | |
| Calories from Fat | ||
| Total Fat | 1.7 g | 2 % |
| Saturated Fat | 0.8 g | 4 % |
| Cholesterol | 21.1 mg | 7 % |
| Sodium | 73.2 mg | 3 % |
| Total Carbohydrate | 11 g | 3 % |
| Dietary Fiber | 0.4 g | 1 % |
| Sugars | 0.3 g | 1 % |
| Protein | 2.2 g | 4 % |
Variations & Substitutions
While this dough is perfect as is, you can explore some variations:
- Dairy-Free: For a dairy-free version, substitute the whole milk with unsweetened plant-based milk (like almond or soy milk) and the whipping cream and sour cream with a plant-based equivalent or a richer plant-based yogurt. You may need to slightly adjust the flour quantity.
- Whole Wheat: Incorporate some whole wheat flour (up to half) for a nuttier flavor and added fiber. You might need a touch more liquid as whole wheat flour is more absorbent.
- Herb Infused: Add finely chopped fresh herbs like dill, parsley, or chives directly into the dough for a subtle flavor boost.
FAQs (Frequently Asked Questions)
Q: Why is my perogie dough tough?
A: Toughness in perogie dough often comes from overworking the dough or using too much flour. Knead until smooth, but not excessively, and add flour sparingly only if the dough is unmanageably sticky.
Q: Can I make the dough ahead of time?
A: Yes, you can prepare the dough, wrap it tightly in plastic wrap, and refrigerate it for up to 2 days before using.
Q: What is the best type of flour to use?
A: All-purpose flour is recommended for its balance of protein and gluten. While bread flour could make it too chewy, pastry flour might make it too delicate.
Q: My perogies are sticking to my Mini Form, what can I do?
A: Ensure you are lightly dusting the inside of the Mini Form with flour before placing the rolled dough over it. This step is crucial to prevent sticking.
Q: How do I prevent my boiled perogies from breaking open?
A: Make sure your perogies are well-sealed by pressing the Mini Form firmly. Avoid overcrowding the pot when boiling and stir gently to prevent them from bumping into each other.
Final Thoughts
Mastering Uncle Bill’s perogie dough is a culinary achievement that will elevate your homemade perogies to a new level. The tender, non-chewy texture is the perfect canvas for any filling you choose, from classic potato and cheese to savory sauerkraut or sweet fruit. Gather your loved ones, share the making of these delicate dumplings, and savor the tradition. I encourage you to try this recipe, experiment with your favorite fillings, and share your creations. A simple dollop of sour cream and a sprinkle of fresh dill or chives is often all that’s needed to bring these beauties to life. Enjoy the journey!