
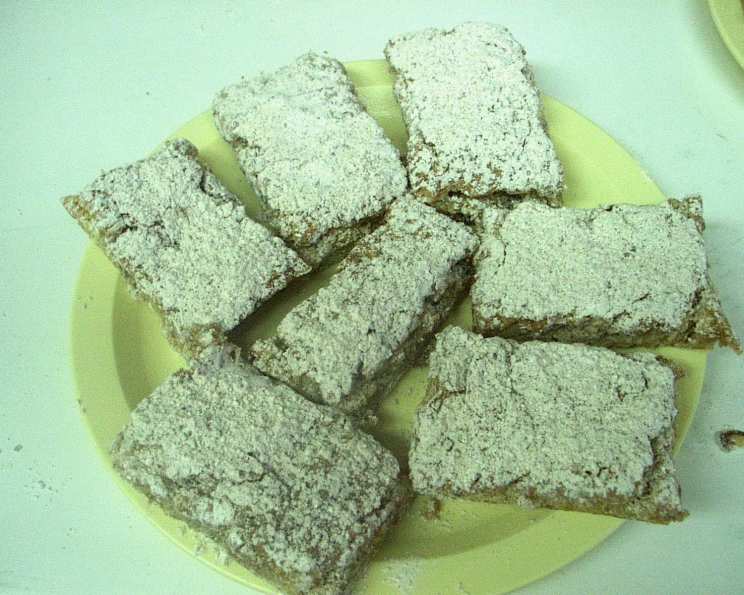
Waikiki Banana Bars: A Taste of Sunshine in Every Bite
There are certain flavors that instantly transport me. The scent of ripe bananas mingling with warm sugar, the whisper of cinnamon and a hint of lemon – it’s pure nostalgia. These Waikiki Banana Bars are more than just a recipe; they’re a portable slice of sunshine, a reminder of carefree afternoons and the simple joy of a perfectly baked treat. I remember my grandmother, whose kitchen always smelled of baking, making these for family gatherings. The way the powdered sugar and cinnamon dusted the still-warm bars, creating a delicate, fragrant coating, was pure magic. They’d disappear in minutes, leaving behind only happy crumbs and contented sighs.
Recipe Overview
- Prep Time: 20 minutes
- Cook Time: 30 to 35 minutes
- Total Time: 55 minutes (plus cooling)
- Servings: 14-16 bars
- Yield: 1 (11×7-inch) pan of bars
- Dietary Type: Vegetarian
Ingredients
For the Banana Bars:
- 1⁄4 cup shortening
- 1 cup brown sugar, firmly packed
- 1⁄2 tablespoon vanilla extract
- 1⁄2 tablespoon lemon extract
- 1 cup mashed ripe banana (This is roughly equivalent to 2 medium bananas; ensure they are very ripe for the best flavor and sweetness)
- 1 1⁄2 cups sifted all-purpose flour
- 1 1⁄2 teaspoons baking powder
- 1 1⁄2 teaspoons salt
- 1⁄2 cup of chopped nuts (your favorite variety – walnuts, pecans, or even almonds work beautifully)
For the Coating:
- 1⁄3 cup powdered sugar
- 1 teaspoon cinnamon
Equipment Needed
To bring these delightful Waikiki Banana Bars to life, you’ll need a few essential kitchen tools:
- A large mixing bowl for combining the batter.
- A hand mixer or a stand mixer fitted with a paddle attachment for creaming.
- A whisk for sifting and combining dry ingredients.
- A rubber spatula for scraping down bowls and folding in ingredients.
- A measuring cup set and spoons for accurate ingredient measurements.
- A 11 x 7-inch baking pan. Ensure it’s well-greased to prevent sticking.
- An oven for baking.
- A wire cooling rack for allowing the bars to cool and for the coating to set.
- A sieve or fine-mesh strainer for sifting the flour and for dusting the coating.
Instructions
Follow these steps carefully to achieve perfectly tender and flavorful Waikiki Banana Bars:
- Preheat Your Oven: Begin by setting your oven to 350°F (175°C). This ensures the oven is at the correct temperature from the moment the bars go in, promoting even baking.
- Cream the Base: In a large mixing bowl, combine the shortening and the brown sugar, ensuring it’s firmly packed. Cream these together until the mixture is light and fluffy. This process incorporates air, which contributes to the tender texture of the bars.
- Incorporate the Flavor: Add the vanilla extract and the lemon extract to the creamed mixture. Beat them in thoroughly. Next, gently fold in the mashed ripe banana. Continue to beat until everything is well combined and the banana is smoothly integrated into the wet ingredients.
- Combine Dry Ingredients: In a separate bowl, sift together the all-purpose flour, baking powder, and salt. Sifting is key here as it aerates the flour and removes any lumps, contributing to a lighter final product.
- Unite Wet and Dry: Gradually add the sifted dry ingredients to the wet banana mixture. Stir until just combined. Be careful not to overmix at this stage; overmixing can develop the gluten in the flour, leading to tough bars.
- Add the Nuts: Gently stir in the chopped nuts. Distribute them evenly throughout the batter for delightful pockets of crunch in every bite.
- Prepare for Baking: Pour the batter into a well-greased 11 x 7-inch baking pan. Spread the batter evenly to ensure uniform baking. A well-greased pan is crucial for easy removal later.
- Bake to Perfection: Place the pan in the preheated oven and bake for 30 to 35 minutes. You’ll know they’re done when the edges are golden brown and a toothpick inserted into the center comes out clean. Keep an eye on them towards the end of the baking time to prevent overbaking.
- Initial Cooling and Cutting: Once baked, remove the pan from the oven. While the bars are still warm, but not piping hot, cut them into bar shapes directly in the pan. This is much easier to do while they are warm. Carefully remove the bars from the pan and place them on a wire cooling rack.
- Prepare the Coating: In a small bowl, whisk together the powdered sugar and the cinnamon until thoroughly combined.
- Coat the Warm Bars: While the bars are still slightly warm, gently roll them in the powdered sugar and cinnamon mixture. Ensure they are lightly and evenly coated. This step is essential for that characteristic sweet and spicy finish.
- Final Cooling and Storage: Allow the bars to cool completely on the wire rack for the coating to set. Once cooled, store them in an airtight container.
Expert Tips & Tricks
As a chef, I always look for ways to elevate a simple recipe. For these Waikiki Banana Bars, here are a few insider tips:
- Banana Ripeness is Key: The riper your bananas, the sweeter and more intensely flavored your bars will be. Look for bananas with plenty of brown spots. If your bananas aren’t quite ripe enough, you can speed up the process by baking them in their skins at 300°F (150°C) for about 15-20 minutes until softened.
- Sifting is Non-Negotiable: Don’t skip the sifting of the dry ingredients. It truly makes a difference in the lightness and texture of the bars, preventing a dense crumb.
- Don’t Overmix the Batter: Once the dry ingredients are added to the wet, mix only until just combined. Overmixing develops gluten, resulting in tougher bars. A few streaks of flour are okay.
- The Warm Coating Technique: Coating the bars while they are still warm is crucial. The residual heat helps the powdered sugar and cinnamon mixture adhere beautifully, creating that delicate, fragrant layer. If they are too hot, the coating can become gummy; if they are too cold, it won’t stick as well.
- Nut Variety: Feel free to experiment with different nuts. Pecans offer a classic pairing, while walnuts provide a slightly more robust flavor. Even chopped almonds or macadamia nuts (for a true tropical twist!) can be delicious. Ensure they are finely chopped so they distribute evenly.
- Lemon Extract Power: The lemon extract is a subtle but vital ingredient. It brightens the banana flavor and prevents the bars from tasting one-dimensionally sweet. If you don’t have lemon extract, a tiny bit of lemon zest can be a good substitute, though the flavor might be slightly different.
Serving & Storage Suggestions
These Waikiki Banana Bars are wonderfully versatile. They are perfect on their own, making them an ideal grab-and-go treat for breakfast, a snack, or a light dessert. For a more indulgent experience, serve them slightly warmed with a dollop of whipped cream or a scoop of vanilla bean ice cream. They also pair beautifully with a cup of coffee or a tropical fruit smoothie.
Storage:
- Room Temperature: Store the cooled bars in an airtight container at room temperature for up to 3 days. The coating might become slightly less crisp over time, but the flavor will remain excellent.
- Refrigeration: For longer storage, you can refrigerate the bars in an airtight container for up to a week. They will be firmer when cold. You can gently reheat them in a low oven or toaster oven if you prefer them warm.
- Freezing: These bars freeze remarkably well. Wrap them tightly in plastic wrap, then place them in a freezer-safe bag or container. They will keep for up to 2-3 months. Thaw them at room temperature or gently reheat them.
Nutritional Information
Please note that these are estimated values and can vary based on specific ingredients and portion sizes.
| Nutrient | Amount per Serving | % Daily Value |
|---|---|---|
| Calories | 194 kcal | 9% |
| Total Fat | 6.3 g | 8% |
| Saturated Fat | 1.3 g | 7% |
| Cholesterol | 0 mg | 0% |
| Sodium | 325.7 mg | 14% |
| Total Carbohydrate | 32.5 g | 12% |
| Dietary Fiber | 1.2 g | 4% |
| Sugars | 19.7 g | 40% |
| Protein | 2.4 g | 5% |
| Calories from Fat | Not Specified | |
| Calories from Fat (%) | 30% |
Variations & Substitutions
While the classic Waikiki Banana Bar is a delight, there are always ways to put your own spin on it:
- Gluten-Free: To make these bars gluten-free, substitute the all-purpose flour with a 1:1 gluten-free baking blend. Ensure the blend contains xanthan gum for proper structure.
- Dairy-Free: If you need to make these dairy-free, you can use a plant-based shortening and a non-dairy milk for mashing bananas if needed (though typically mashed bananas are sufficient).
- Spice It Up: For an extra layer of warmth, consider adding 1/4 teaspoon of ground nutmeg or a pinch of ground cloves to the dry ingredients.
- Chocolate Lover’s Twist: Fold in 1/2 cup of mini chocolate chips along with the nuts for a delicious chocolate-banana combination.
- Toasted Nuts: For a deeper, richer nut flavor, lightly toast your chopped nuts in a dry skillet over medium heat for a few minutes until fragrant before adding them to the batter.
FAQs
Q: Why are my banana bars dry?
A: Dryness can result from overbaking or using flour that’s been packed too tightly into the measuring cup. Always bake until a toothpick comes out clean, and measure flour by spooning it into the cup and leveling off.
Q: Can I use artificial banana flavoring instead of real banana?
A: While artificial flavoring might add a banana scent, it won’t provide the moisture, sweetness, or depth of flavor that real mashed bananas do. It’s highly recommended to use ripe, fresh bananas.
Q: My bars are sticking to the pan. What went wrong?
A: The most likely culprit is insufficient greasing of the pan. Ensure you generously grease the 11×7-inch pan before pouring in the batter. Using parchment paper with an overhang can also make removal a breeze.
Q: How do I get the powdered sugar coating to stick better?
A: The key is to coat the bars when they are still warm but not scalding hot. The slight residual heat helps the sugar adhere without melting into a paste.
Q: Can I make these bars without nuts?
A: Absolutely! If you have nut allergies or simply prefer them nut-free, you can omit the nuts entirely. The bars will still be delicious.
Final Thoughts
Waikiki Banana Bars are a testament to the power of simple ingredients coming together to create something truly special. They embody warmth, comfort, and a touch of tropical bliss, all in one delightful package. Whether you’re sharing them at a potluck, enjoying them with a quiet cup of tea, or simply treating yourself, I hope they bring as much joy to your kitchen as they do to mine. Give them a try, experiment with the variations, and don’t forget to share your delightful creations!