
Wareneki: A Taste of Mennonite Tradition
There’s a particular comfort that comes from dishes rooted in heritage, and for me, Wareneki hold a special place. I first encountered these delightful parcels not in a bustling restaurant, but in the warm, flour-dusted kitchen of my grandmother, a proud descendant of German Mennonite settlers. The air would be thick with the sweet scent of simmering broth and the earthy aroma of baking bread, and amidst it all, my grandmother would be meticulously folding dough, her hands moving with a practiced grace that spoke of generations. She’d explain that the measurements were never exact, a testament to the intuitive, heart-led cooking that defined our family’s culinary legacy, and tasting them for the first time – the tender dough giving way to a savory, cheesy interior – was an instant connection to my roots.
Recipe Overview
- Prep Time: 45 minutes
- Cook Time: 10 minutes (for boiling) + additional time if frying
- Total Time: 55 minutes (boiling)
- Servings: 4-6
- Yield: Approximately 20-24 Wareneki
- Dietary Type: Vegetarian (can be adapted)
Ingredients
This recipe, like many cherished family traditions, relies on a bit of intuition, but these proportions will guide you to a beautiful result.
For the Dough:
- ½ cup milk
- ½ teaspoon salt
- 2 egg whites
- 2 to 2 ½ cups all-purpose flour
For the Filling:
- 1 lb dry curd cottage cheese
- 2 egg yolks
- ½ teaspoon salt
Equipment Needed
To craft your own Wareneki, you’ll want to have the following on hand:
- Large mixing bowl for the dough
- Another mixing bowl for the filling
- Measuring cups and spoons
- Rolling pin
- A round cutter (a mason jar lid is traditionally perfect for this!)
- A large pot for boiling
- A slotted spoon for transferring the Wareneki
- Optional: A skillet for frying
Instructions
The process of making Wareneki is a rewarding journey, bringing together simple ingredients to create something truly special. Take your time, embrace the hands-on nature of this dish, and savor the creation.
-
Prepare the Dough: In a large mixing bowl, combine the milk, salt, and egg whites. Whisk them together until well incorporated. Gradually add the all-purpose flour, starting with 2 cups, mixing until a soft dough begins to form. You may need to add the remaining ½ cup of flour, a little at a time, until the dough is no longer sticky but remains soft and pliable. Knead the dough briefly on a lightly floured surface until it’s smooth. It’s important that the dough is not too stiff, as this will make it difficult to roll thinly.
-
Roll and Cut the Dough: Lightly flour your work surface. Roll out the dough thinly, aiming for about 1/16th of an inch thickness. The thinner you roll it, the more delicate your Wareneki will be. Using your chosen round cutter (a mason jar lid is ideal, approximately 3 inches in diameter), cut out as many circles as possible from the rolled dough. Gather the scraps, re-roll, and cut more circles.
-
Prepare the Filling: In a separate bowl, combine the dry curd cottage cheese, egg yolks, and salt. Blend these ingredients thoroughly until the mixture is smooth and well combined. This filling should be savory and creamy.
-
Assemble the Wareneki: Place a small spoonful (about 1 to 1 ½ teaspoons) of the filling onto one half of each dough circle. Be sure not to overfill, as this can make sealing difficult. Leave a small border around the edge of the dough to ensure a good seal.
-
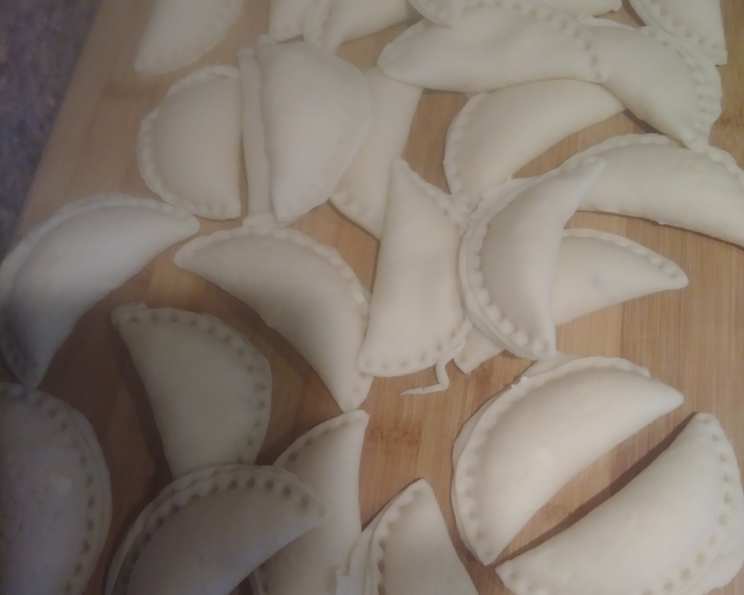
Fold and Seal: Carefully fold the other half of the dough circle over the filling to create a half-moon shape. Press the edges firmly together with your fingers to seal them completely. You can also use the tines of a fork to create a decorative edge and ensure a secure seal, preventing any filling from escaping during cooking.
-
Boil the Wareneki: Bring a large pot of lightly salted water to a rolling boil. Gently drop the assembled Wareneki into the boiling water, being careful not to overcrowd the pot. Cook the Wareneki for approximately ten minutes. You’ll know they are cooked through when they float to the surface of the water.
-
Drain and Serve (Boiled): Once they float and have cooked for their allotted time, carefully remove the Wareneki from the boiling water using a slotted spoon. Drain them well. At this stage, they are ready to be served.
-
Optional Frying: For an added layer of texture and flavor, after boiling and draining, you can fry the Wareneki. Heat a skillet over medium heat and add a knob of butter or a bit of cooking oil. Fry the boiled Wareneki until they are golden brown and slightly crispy on both sides. This step is entirely optional but highly recommended for a delicious variation.
Expert Tips & Tricks
- Dough Consistency is Key: The dough for Wareneki is meant to be soft. If it feels too dry, add a tiny splash more milk; if too sticky, a whisper more flour. The goal is a dough that is pliable and easy to work with without tearing.
- Don’t Overfill: This is a common pitfall. Too much filling makes it challenging to seal the edges, leading to leaks. Start with less and you can always add a bit more on your next batch.
- Seal Tightly: A good seal is crucial to prevent the filling from escaping into the boiling water. Press those edges with confidence!
- Work in Batches: You’ll likely need to boil and fry the Wareneki in batches to avoid overcrowding your pot or skillet. This ensures even cooking and browning.
- The “Float Test”: The floating indicator is your best friend for knowing when the Wareneki are perfectly cooked. Don’t be tempted to pull them out too early!
Serving & Storage Suggestions
Wareneki are wonderfully versatile. Traditionally, they are served with a generous dollop of sour cream, a sprinkle of fresh chives, or a drizzle of melted butter. Some enjoy them with a savory gravy, reminiscent of a hearty stew. For a richer experience, the fried Wareneki are exceptional with sautéed onions and crispy bacon. And if you’re like me and enjoy a bit of tang, a side of ketchup is always welcome!
Leftover cooked Wareneki can be stored in an airtight container in the refrigerator for up to 2 days. They can be gently reheated by pan-frying them until warmed through and slightly crisp, or by steaming them briefly. For longer storage, you can freeze the uncooked, assembled Wareneki on a baking sheet until solid, then transfer them to a freezer-safe bag. They can be boiled directly from frozen, just add a few extra minutes to the cooking time.
Nutritional Information
(Note: This is an estimate and can vary based on specific ingredients and portion sizes.)
| Nutrient | Amount per Serving | % Daily Value |
|---|---|---|
| Calories | 376.7 kcal | |
| Calories from Fat | ||
| Total Fat | 4.3 g | 6% |
| Saturated Fat | 1.8 g | 9% |
| Cholesterol | 106.6 mg | 35% |
| Sodium | 643.4 mg | 26% |
| Total Carbohydrate | 51.6 g | 17% |
| Dietary Fiber | 1.7 g | 6% |
| Sugars | 2.4 g | 9% |
| Protein | 30.1 g | 60% |
Variations & Substitutions
While the classic recipe is a masterpiece in its own right, there’s always room for delightful experimentation:
- Herbed Filling: Incorporate finely chopped fresh dill, parsley, or chives into the cottage cheese mixture for an aromatic twist.
- Spiced Filling: A pinch of nutmeg or a whisper of black pepper can add subtle warmth to the filling.
- Creamier Filling: For a richer texture, you can blend a small amount of cream cheese or a dollop of sour cream into the cottage cheese mixture.
- Sweet Wareneki: For a dessert rendition, you could try a sweet filling of farmer’s cheese mixed with a touch of sugar, cinnamon, and perhaps some finely chopped apple or berries. Serve with a fruit sauce or whipped cream.
FAQs
Q: My dough feels too stiff. What should I do?
A: If your dough is too stiff, gradually add a tiny bit more milk (about a teaspoon at a time) until it reaches a soft, pliable consistency. Avoid adding too much, as you don’t want it to become sticky.
Q: My Wareneki are falling apart when I boil them. What’s the problem?
A: This usually means the edges weren’t sealed properly, or the dough was rolled too thin without sufficient pressure to seal. Ensure you press the edges firmly, and consider using the tines of a fork for an extra secure closure.
Q: Can I make the dough ahead of time?
A: Yes, you can prepare the dough a day in advance. Wrap it tightly in plastic wrap and refrigerate. Allow it to come to room temperature slightly before rolling it out.
Q: Is it possible to freeze Wareneki before cooking?
A: Absolutely! Arrange the assembled Wareneki on a baking sheet lined with parchment paper and freeze until solid. Once frozen, transfer them to a freezer-safe bag or container. They can be cooked directly from frozen.
Q: What’s the best way to prevent sticking when rolling out the dough?
A: Use a light dusting of all-purpose flour on your work surface and on your rolling pin. If the dough starts to stick, add a little more flour, but be mindful not to add too much, which can alter the dough’s texture.
Final Thoughts
Wareneki are more than just a recipe; they are a connection to a culinary past, a testament to the simple beauty of home cooking. Each folded parcel holds a story, a memory, and a taste of comfort. I wholeheartedly encourage you to try making them yourself. Share them with loved ones, or savor them as a quiet moment of delicious reflection. Whether served with a dollop of sour cream or a hearty gravy, these humble dumplings are sure to bring warmth and satisfaction to your table. Enjoy the process, and may your Wareneki be as delightful as the memories they create.