
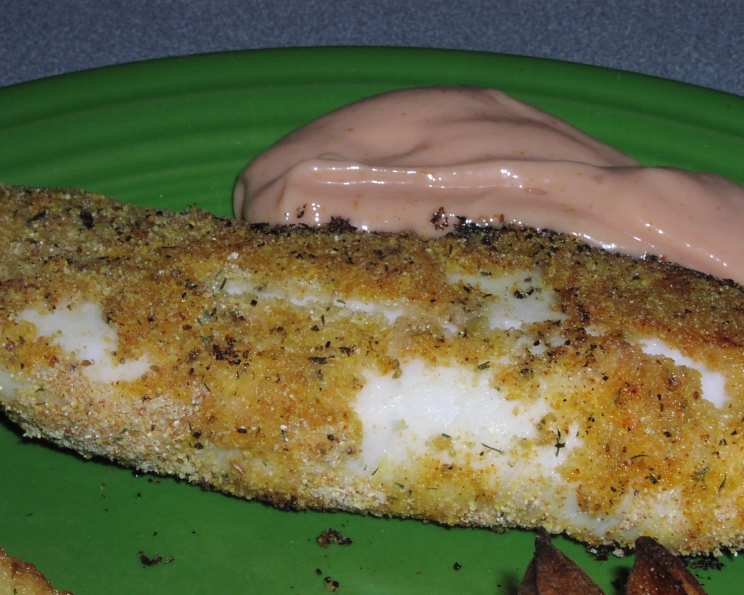
Weight Watcher Oven Fried Fish: A Crispy, Guilt-Free Delight
There are certain dishes that transport you back in time, and for me, a perfectly fried piece of fish is one of them. I can vividly recall lazy summer afternoons at my grandmother’s house, the air thick with the scent of brine and sizzling goodness. While her version was undoubtedly delicious, it came with a hefty dose of indulgence. Over the years, as I honed my culinary skills and learned more about healthier cooking, I’ve strived to recreate that comforting taste with less of the fat. This Weight Watcher Oven Fried Fish is the culmination of that journey – a recipe that delivers that satisfying crunch and flaky interior without the deep-frying drama.
Recipe Overview
- Prep Time: 10 minutes
- Cook Time: 10 minutes
- Total Time: 20 minutes
- Servings: 6
- Yield: N/A
- Dietary Type: Low-Fat
Ingredients
Here’s what you’ll need to gather for this delightful oven-fried fish:
- 1 ½ pounds tilapia fillets, or any other firm white fish
- ¼ cup white cornmeal (yellow cornmeal works beautifully too)
- ¼ cup dry breadcrumbs (I often reach for seasoned breadcrumbs for an extra flavor boost)
- ½ teaspoon dried dill
- ½ teaspoon salt
- ⅛ teaspoon pepper
- ½ teaspoon paprika
- ⅓ cup skim milk
- 3 tablespoons butter, melted
Equipment Needed
To bring this recipe to life, you’ll want to have these basic kitchen tools ready:
- Oven
- Baking sheet
- Cooking spray (for lining the baking sheet)
- Two shallow dishes (pie plates are ideal for this purpose)
- Tongs or a fork for dipping the fish
- A fork for testing doneness
Instructions
Let’s get this simple yet satisfying dish into your oven:
- Preheat Your Oven: Begin by preheating your oven to a robust 450 degrees Fahrenheit. This high heat is crucial for achieving that desirable crispy exterior.
- Prepare the Dry Coating: In one of your shallow dishes, such as a pie plate, combine the white cornmeal, dry breadcrumbs, dried dill, salt, pepper, and paprika. Whisk them together until they are well incorporated. This blend will form the flavorful, crispy coating for your fish.
- Prepare the Wet Coating: Pour the skim milk into the second shallow dish. This will serve as the binder to help the dry coating adhere to the fish.
- Coat the Fish: Working with one tilapia fillet at a time, carefully dip it into the skim milk, ensuring it’s fully coated on both sides. Then, transfer the milk-coated fillet to the cornmeal and breadcrumb mixture. Press gently to ensure a generous and even coating adheres to the fish. Repeat this process for all the fish fillets.
- Arrange on Baking Sheet: Lightly coat a baking sheet with cooking spray. This is a vital step to prevent sticking and to help achieve that golden-brown crust. Arrange the coated fish fillets in a single layer on the prepared baking sheet. Ensure they are not overcrowding the pan; give them a little breathing room for even cooking.
- Drizzle with Butter: Evenly drizzle the melted butter over the coated fish fillets. This adds a touch of richness and helps with browning, contributing to that classic “fried” texture without submersion in oil.
- Bake to Perfection: Place the baking sheet into your preheated oven. Bake for 10 minutes, or until the fish is opaque and flakes apart easily when tested with a fork. The exact time may vary slightly depending on the thickness of your fish fillets and your specific oven.
Expert Tips & Tricks
As a chef, I’m always looking for ways to elevate a dish, even a simple one like this. Here are a few tricks to make your Weight Watcher Oven Fried Fish even better:
- Fish Selection is Key: While tilapia is a fantastic lean option, don’t be afraid to experiment with other white fish like cod, haddock, or flounder. Just ensure they are relatively uniform in thickness for even cooking.
- Breadcrumb Power: For an extra flavor dimension, consider using panko breadcrumbs for a crispier texture or seasoned breadcrumbs if you like a little extra herbaceousness. You can also pulse a few sprigs of fresh parsley or chives into your breadcrumb mixture for a pop of fresh flavor.
- Don’t Skimp on the Heat: That 450°F temperature is your friend here. It mimics the intense heat of frying, creating that irresistible crunch. If your oven tends to run cool, consider giving it a few extra minutes to preheat.
- Crispiness Check: If after 10 minutes your fish isn’t quite as golden and crisp as you’d like, you can carefully switch your oven to the broiler setting for the last minute or two. Keep a very close eye on it, as broilers can scorch quickly!
- Seasoning Adjustments: Feel free to play with the dry seasoning blend. A pinch of garlic powder, onion powder, or a dash of cayenne pepper can add different flavor profiles.
Serving & Storage Suggestions
This oven-fried fish is wonderfully versatile and pairs beautifully with a variety of sides. For a light and healthy meal, serve it alongside a vibrant green salad with a lemon vinaigrette, some steamed asparagus, or a dollop of homemade tartar sauce (a lighter version can be made with Greek yogurt). It’s also delicious with roasted sweet potato wedges for a slightly more substantial meal.
Leftovers can be stored in an airtight container in the refrigerator for up to 2 days. While it won’t have the same crispness as when freshly made, it will still be delicious. To reheat, I recommend a brief stint in the oven or an air fryer at around 350°F to help revive some of its crispiness, rather than the microwave, which can make it soggy.
Nutritional Information
| Nutrient | Amount per Serving | % Daily Value |
|---|---|---|
| Calories | 195.6 kcal | – |
| Calories from Fat | – | – |
| Total Fat | 6.9 g | 10% |
| Saturated Fat | 3.9 g | 19% |
| Cholesterol | 90.3 mg | 30% |
| Sodium | 583.4 mg | 24% |
| Total Carbohydrate | 8.1 g | 2% |
| Dietary Fiber | 0.7 g | 2% |
| Sugars | 0.3 g | 1% |
| Protein | 24.3 g | 48% |
Note: Nutritional information is an estimate and can vary based on specific ingredients and portion sizes.
Variations & Substitutions
The beauty of this recipe lies in its adaptability. Here are a few ways you can make it your own:
- Gluten-Free: For a gluten-free version, simply swap out the regular breadcrumbs for gluten-free breadcrumbs or even almond flour. Ensure your cornmeal is also certified gluten-free.
- Spice it Up: If you enjoy a little heat, add a pinch of cayenne pepper or a dash of your favorite hot sauce to the dry coating mixture.
- Herbaceous Notes: Beyond dill, consider adding other dried herbs like parsley, chives, or even a touch of thyme to the breadcrumb mixture for a different aromatic profile.
- Alternative Fish: While tilapia is budget-friendly and widely available, feel free to use other flaky white fish like cod, haddock, pollock, or catfish. The cooking time might vary slightly depending on the thickness of the fillets.
FAQs
Q: Why is the oven temperature so high for this recipe?
A: The high oven temperature of 450°F is essential for mimicking the effect of deep-frying, creating a wonderfully crisp and golden-brown coating on the fish.
Q: Can I use fresh herbs instead of dried dill?
A: Absolutely! If using fresh dill, you’ll want to use a larger quantity, perhaps 1-2 tablespoons finely chopped, as fresh herbs are less concentrated than dried.
Q: My fish isn’t flaking easily after 10 minutes. What should I do?
A: This can happen if your fillets are particularly thick. Continue to bake for a few more minutes at a time, checking for doneness with a fork until it flakes easily. Ensure your oven is accurately preheated.
Q: Is this recipe suitable for meal prep?
A: While best enjoyed fresh, leftovers can be stored and reheated. For optimal crispiness upon reheating, use the oven or an air fryer rather than the microwave.
Q: Can I make the dry coating ahead of time?
A: Yes, you can mix the dry ingredients together in advance and store them in an airtight container at room temperature. This can save you a few minutes when you’re ready to prepare the fish.
Final Thoughts
This Weight Watcher Oven Fried Fish is a testament to the fact that healthy eating doesn’t mean sacrificing flavor or texture. It’s a simple recipe that delivers big on satisfaction, bringing that beloved crispy fish experience to your table with ease and a clear conscience. I encourage you to give it a try, perhaps serving it with a bright lemon wedge and a side of your favorite steamed greens. It’s the kind of dish that proves you can enjoy all your favorite flavors, smartly and deliciously. Enjoy!