
Wheat Germ Sesame Bread: A Nutty, Nourishing Loaf to Elevate Your Everyday
There’s a certain magic that happens when humble grains are transformed into a warm, fragrant loaf of bread. I remember, years ago, tinkering in my kitchen, seeking a bread that offered more than just sustenance – something with a bit of character, a pleasant chew, and a whisper of nuttiness. This Wheat Germ Sesame Bread emerged from that quest, a delightful discovery that quickly became a staple. The subtle earthiness of the wheat germ, combined with the satisfying crunch of toasted sesame seeds, creates a symphony of textures and flavors that perfectly complements everything from a dollop of butter to a rich stew. It’s a bread that feels both wholesome and sophisticated, a true testament to the simple, yet profound, art of baking.
Recipe Overview
- Prep Time: 15 minutes
- Cook Time: 30 minutes
- Total Time: 1 hour 30 minutes (includes rising time)
- Servings: 8 slices
- Yield: 1 loaf
- Dietary Type: Contains Wheat, Egg
Ingredients
This recipe calls for a straightforward list of ingredients, readily available at most grocery stores. The star players, wheat germ and sesame seeds, bring a unique nutty dimension to an otherwise classic bread dough.
- 1 cup water, lukewarm
- 3 tablespoons vegetable oil
- 3 tablespoons honey
- 1 large egg
- 1 teaspoon salt
- 3 tablespoons wheat germ
- 1 ½ tablespoons sesame seeds
- 1 cup whole wheat flour
- 2 cups bread flour
- 1 ½ teaspoons dry yeast
Equipment Needed
While a bread machine can certainly simplify the process, this recipe is designed to be adaptable. You’ll find it quite manageable with standard kitchen equipment.
- Large mixing bowl
- Measuring cups and spoons
- Whisk (optional, for initial mixing)
- Oven
- Standard 9×5 inch loaf pan
- Wire cooling rack
- Pastry brush (optional, for egg wash)
Instructions
The beauty of this recipe lies in its simplicity and the flexibility it offers. Whether you choose to embrace the convenience of a bread machine or the hands-on approach of oven baking, the result is consistently delicious.
- Prepare the Dough Base: In a large mixing bowl, combine the lukewarm water, vegetable oil, honey, and egg. Whisk gently to combine.
- Incorporate Dry Ingredients: Add the salt, wheat germ, sesame seeds, whole wheat flour, bread flour, and dry yeast to the bowl.
- Initial Mixing: If using a stand mixer with a dough hook, mix on low speed until a shaggy dough forms. If mixing by hand, stir with a sturdy spoon or your hands until just combined and no dry flour remains.
- Kneading:
- Stand Mixer Method: Increase the mixer speed to medium and knead for 5-7 minutes, or until the dough is smooth, elastic, and pulls away from the sides of the bowl.
- Hand Kneading Method: Turn the dough out onto a lightly floured surface. Knead for 8-10 minutes, pushing, folding, and turning the dough until it becomes smooth and elastic. It should spring back when gently poked.
- First Rise: Lightly grease a clean bowl with a little vegetable oil. Place the kneaded dough in the bowl, turning to coat all sides. Cover the bowl tightly with plastic wrap or a damp kitchen towel. Let the dough rise in a warm place for 1 to 1.5 hours, or until it has doubled in size.
- Shaping the Loaf: Once the dough has risen, gently punch it down to deflate it. Turn the dough out onto a lightly floured surface and shape it into a loaf that will fit your 9×5 inch bread pan. Tuck the ends under to create a smooth top.
- Second Rise: Grease your 9×5 inch loaf pan with vegetable oil. Place the shaped dough into the prepared pan. Cover loosely with plastic wrap or a damp kitchen towel and let it rise again in a warm place for 30-45 minutes, or until it has nearly doubled in size and is peeking over the rim of the pan.
- Preheat the Oven: While the dough is on its second rise, preheat your oven to 375 degrees F (190 degrees C).
- Baking: Once the oven is preheated and the dough has completed its second rise, carefully place the loaf pan into the preheated oven. Bake for 30 minutes.
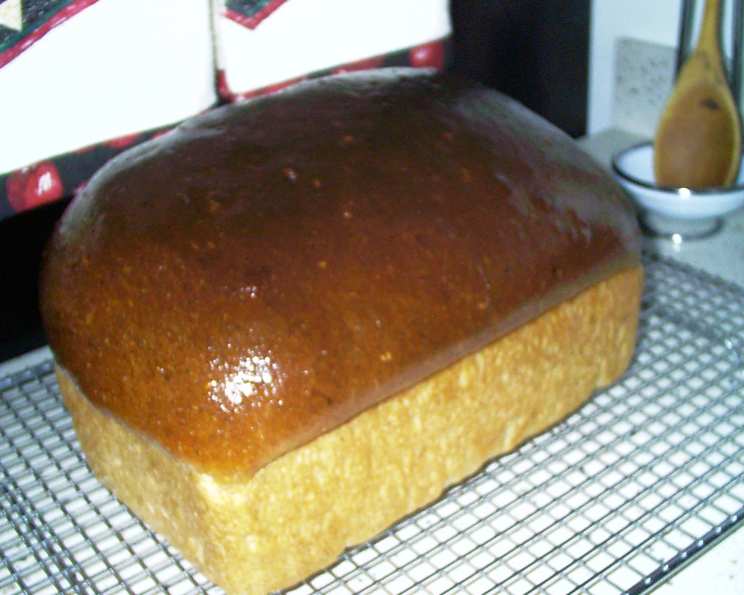
- Checking for Doneness: The bread is done when it is golden brown on top and sounds hollow when tapped on the bottom. You can also use an instant-read thermometer; the internal temperature should register around 190-200 degrees F (88-93 degrees C).
- Cooling: Immediately remove the bread from the loaf pan and place it on a wire cooling rack. Allow it to cool completely before slicing. This is crucial for the texture to set properly.
Note on Bread Machine Use: If you have a bread machine, you can follow the manufacturer’s instructions for adding ingredients. This recipe is designed to work well on the “dough” cycle. Once the dough cycle is complete, remove the dough, shape it into a loaf, place it in an oiled bread pan, let it rise as per step 7, and then bake in a 375-degree F (190-degree C) oven for 30 minutes as described in steps 8-11.
Expert Tips & Tricks
To elevate your Wheat Germ Sesame Bread from good to exceptional, consider these professional insights.
- Toasting the Sesame Seeds: For an even more intense nutty flavor, lightly toast the sesame seeds in a dry skillet over medium heat for a few minutes until fragrant and lightly golden before adding them to the dough. Watch them carefully, as they can burn quickly.
- Lukewarm Water is Key: Ensure your water is lukewarm (around 105-115°F or 40-46°C). Water that is too hot can kill the yeast, while water that is too cold will slow down its activity significantly.
- Don’t Over-Flour: When kneading, resist the urge to add too much extra flour. A slightly sticky dough will often produce a lighter, more tender crumb. Use just enough flour to prevent sticking.
- The Importance of Cooling: Patience is a virtue when it comes to bread! Letting the loaf cool completely on a wire rack is non-negotiable. Slicing too soon can result in a gummy texture and make the loaf fall apart.
Serving & Storage Suggestions
This Wheat Germ Sesame Bread is wonderfully versatile. Its slightly nutty flavor makes it a fantastic canvas for a variety of accompaniments.
- Serving: Serve slices warm, perhaps with a generous smear of creamy butter. It’s also excellent toasted and topped with your favorite jam, avocado, or a poached egg. For a savory touch, consider it as the base for an open-faced sandwich with smoked salmon and cream cheese, or alongside hearty soups and stews.
- Storage: Once completely cooled, store the bread in an airtight container or bread bag at room temperature for up to 3 days. For longer storage, wrap the cooled loaf tightly in plastic wrap, then in foil, and freeze for up to 3 months. Thaw at room temperature and reheat slices in a toaster oven or under the broiler for a delightful crisp.
Nutritional Information
The following nutritional information is an estimate per slice, assuming the loaf is divided into 8 equal servings.
| Nutrient | Amount per Serving | % Daily Value |
|---|---|---|
| Calories | 211.6 kcal | |
| Total Fat | 6.0 g | 8% |
| Saturated Fat | 0.9 g | 5% |
| Cholesterol | 18.6 mg | 6% |
| Sodium | 242.1 mg | 10% |
| Total Carbohydrate | 34.6 g | 13% |
| Dietary Fiber | 2.6 g | 9% |
| Sugars | 5.3 g | 11% |
| Protein | 5.8 g | 12% |
Note: Nutritional values can vary based on specific ingredients and portion sizes.
Variations & Substitutions
While this recipe is wonderful as is, feel free to experiment and make it your own!
- Seed Power: If you love seeds, consider adding a tablespoon of flax seeds or poppy seeds along with the sesame seeds for an extra layer of texture and nutrition.
- Herbaceous Twist: Incorporate a tablespoon of finely chopped fresh rosemary or thyme into the dough for a fragrant, savory bread perfect for accompanying Italian dishes.
- Sweetener Swap: While honey provides a lovely depth of flavor, you can substitute it with maple syrup or agave nectar for a different kind of sweetness.
FAQs
Q: Can I use all whole wheat flour?
A: While this recipe calls for a blend, you could experiment with substituting more whole wheat flour for bread flour. However, be aware that this may result in a denser loaf.
Q: My dough didn’t rise. What could be the problem?
A: The most common culprits are inactive yeast (check the expiration date and ensure it’s stored properly) or water that was too hot or too cold. Ensure you used lukewarm water and fresh yeast.
Q: How do I get a crispier crust?
A: For a crispier crust, you can try placing a small oven-safe pan filled with water on the bottom rack of your oven during the first 15-20 minutes of baking. This creates steam, which aids in crust formation.
Q: Can I make this bread dairy-free?
A: Yes, you can easily make this recipe dairy-free by substituting the egg with a flax egg (1 tablespoon ground flaxseed mixed with 3 tablespoons water, let sit for 5 minutes) or a commercial egg replacer. Ensure your vegetable oil is dairy-free.
Q: Why do I need to let the bread cool completely?
A: Cooling allows the internal structure of the bread to set. Slicing while hot can release steam, leading to a gummy texture and potentially causing the bread to collapse.
This Wheat Germ Sesame Bread is more than just a recipe; it’s an invitation to enjoy the simple pleasures of homemade bread. The wholesome ingredients come together to create a loaf that’s as nourishing as it is delicious. Imagine the aroma filling your kitchen as it bakes, a promise of the warm, satisfying bite to come. I encourage you to try this recipe, embrace the process, and savor the delightful results. It pairs beautifully with a comforting bowl of tomato soup or a slice of sharp cheddar cheese. Happy baking!